|
Final Image Preview
In this tutorial we’ll find out how to create Halloween T-shirt design. I’ll draw with you for a little bit, and then we’ll turn our sketch into a vector pumpkin. Have fun learning our new Adobe Illustrator tutorial and Happy Halloween!
Creation of a pumpkin sketch
Step 1
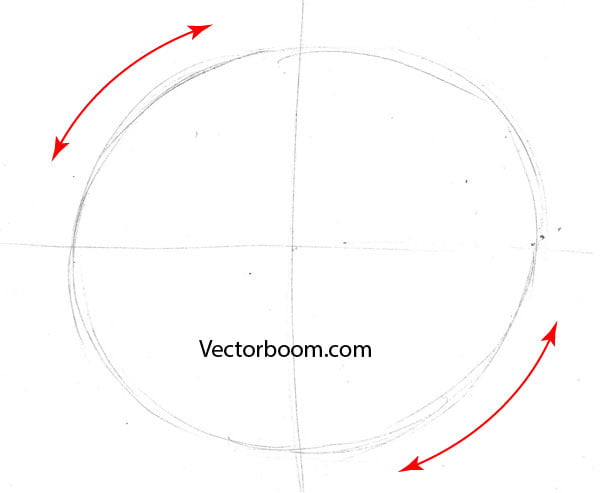
Typically, such tutorials begin with the words: "recently I’ve drawn a pumpkin sketch…” and the picture of it is attached. Today I suggest you to draw together with me. Even though at the time I wrote this tutorial the pumpkin’s sketch really exists, I can quickly reconstruct my main drawing stages. Therefore, the final sketch will be somewhat different from those shown in the stages; but the most important for you is to understand the process. So, take a piece of paper, a pencil and an eraser. A white sheet of office paper is perfect for our purposes. For sketches I usually use the HB pencil. With this pencil you can easily create thin, barely visible lines of constructions, as well as thick lines, which are the outlines of the main elements of the drawing. In addition, lines drawn by the HB pencil can be erased easily if you use a soft eraser. Create horizontal and vertical axial lines, and then draw an oval. Do not try to create forms with only one movement. Draw thin lines with 5-10 cm length movements. The lines, which you can see on the figure, are in reality very thin. I worked with the sketch after scanning it in Photoshop, so you can see them clearly.
 Step 2
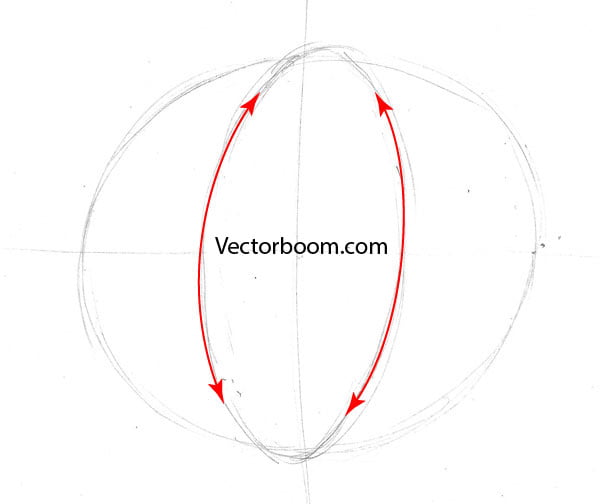
Draw an ellipse which center is located at a symbolical intersection of axial lines.
Now draw two more segments of ellipses to the right and to the left of the vertical axis.
You have certainly noticed how I bent (not on purpose of course) the axis of our ellipse. There is nothing to worry about, it is just a sketch and we can edit whatever did not worked out. We’ll talk about it a bit later.
Step 3
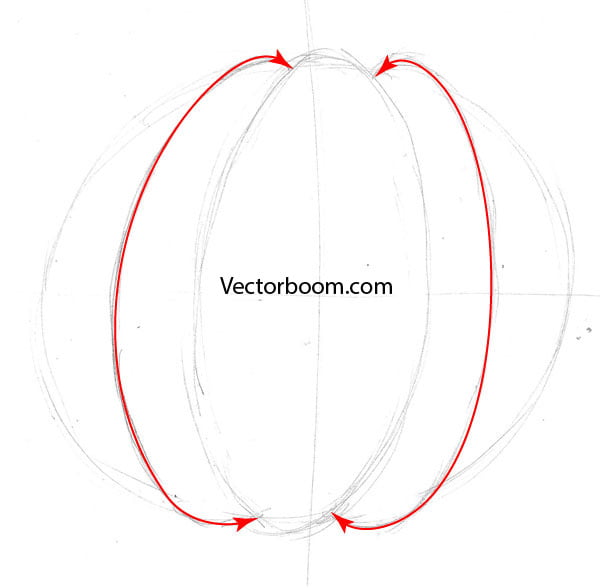
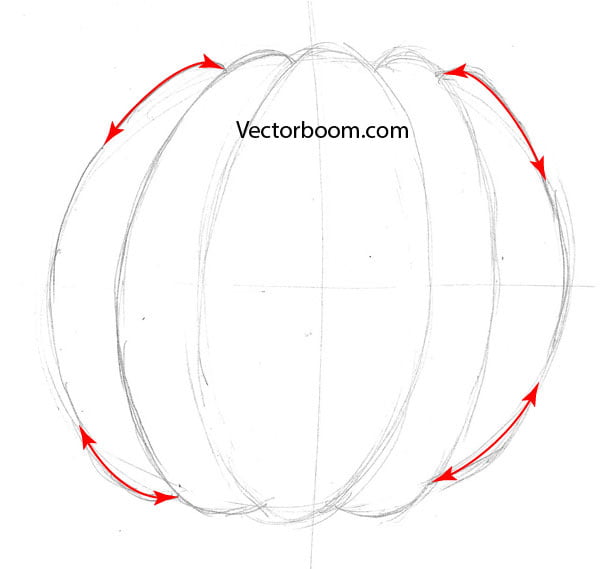
Extend exterior oval of our pumpkin by adding some curved segments above and below, and also to the right and to the left to the axes. The pumpkin’s form is ready.
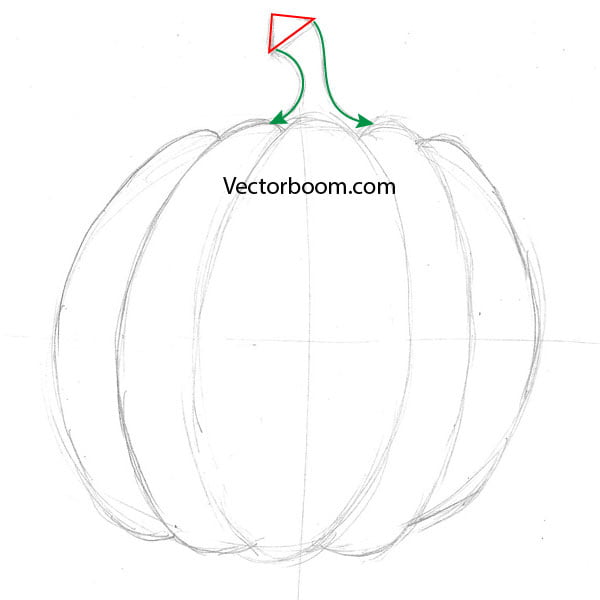
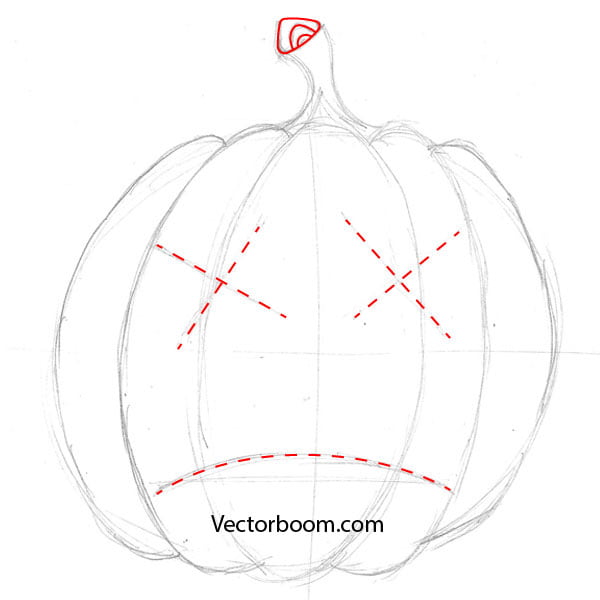
Draw a triangle and then join it with the pumpkin with the help of two curves in the shape of the letters C and S.
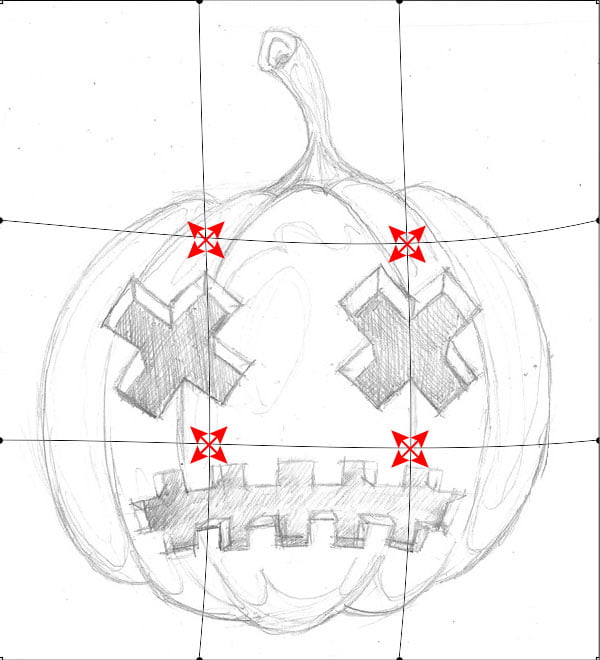
Round the corners of the triangle and add two arcs inside it. Outline the mouth with the arc and the position of the eyes with the crosses.
Step 4
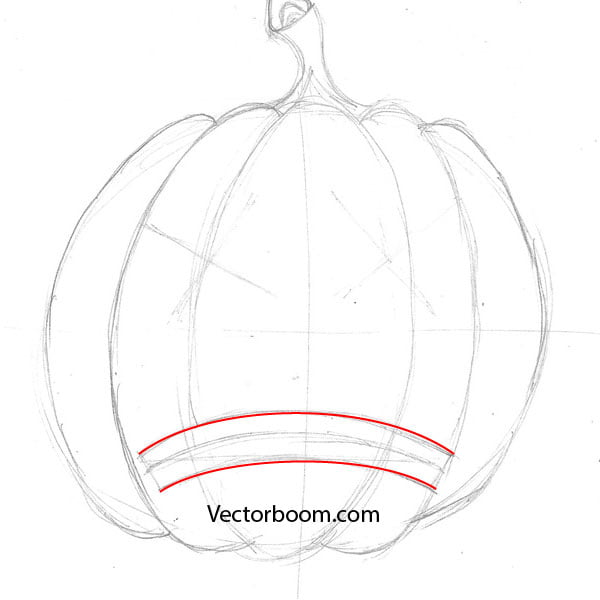
Draw two parallel arcs placed at equal distance from the original line of the mouth.
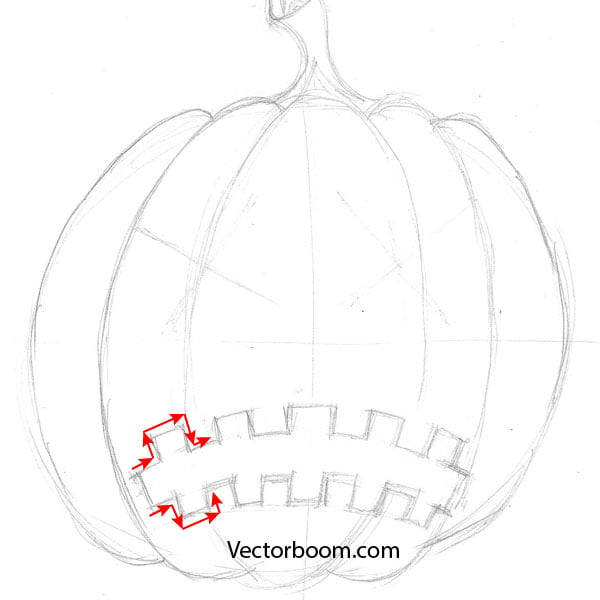
Based on these lines, draw the teeth of the pumpkin as it is indicated on the figure below.
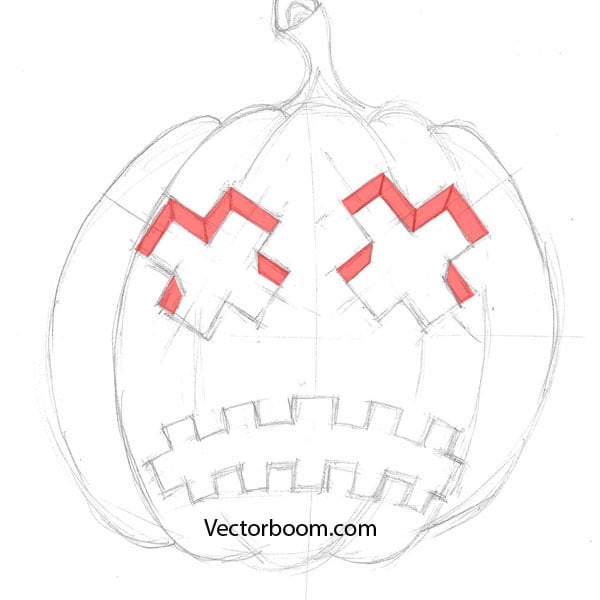
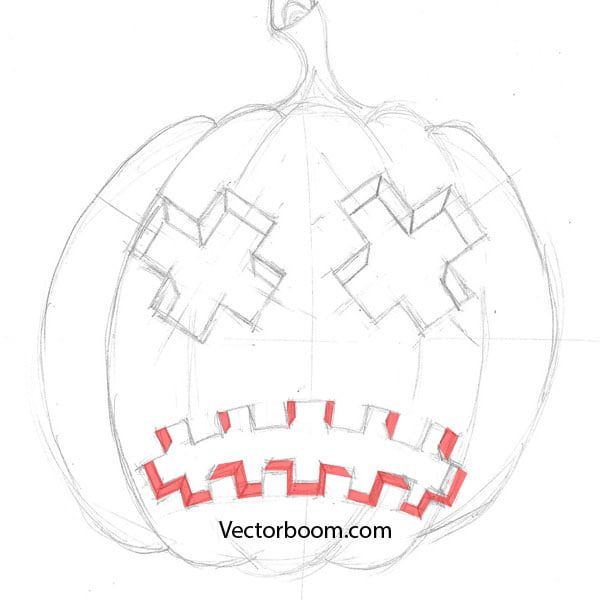
Step 5
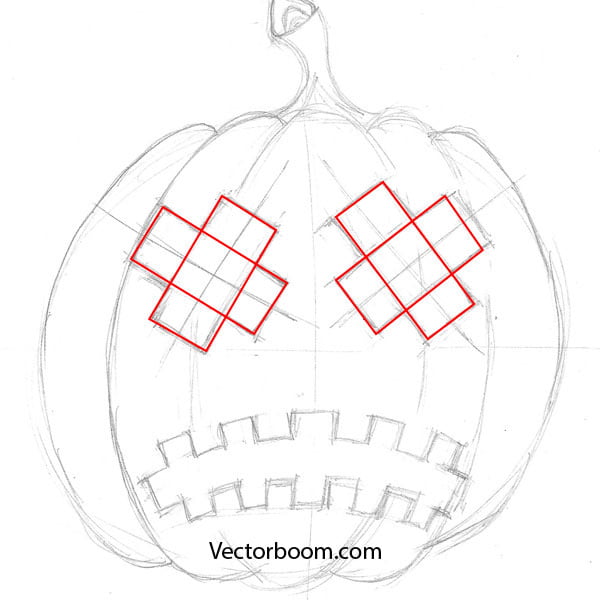
Outline the shape of the eyes with the help of four rectangles.
Draw edges of the pumpkin peel in the slots of the eyes and the mouth.
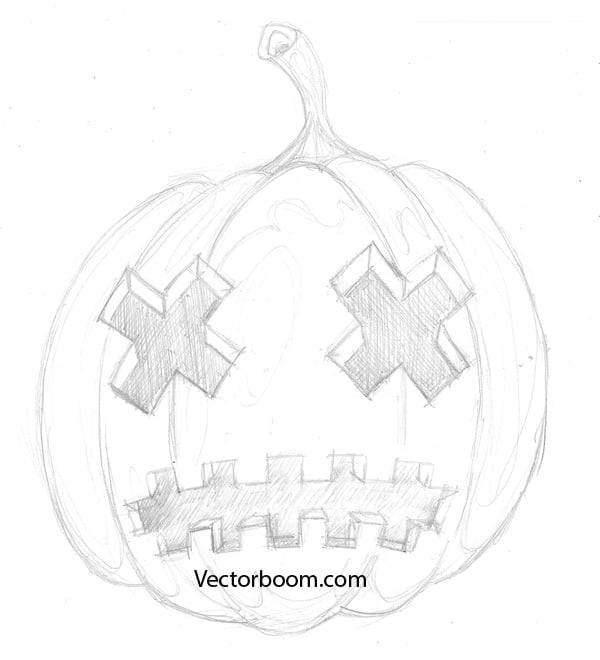
The main elements of out sketch are ready. On the figure below you can see the sketch which existed before this tutorial was written.
Sketch’s Correction in Photoshop
Step 6
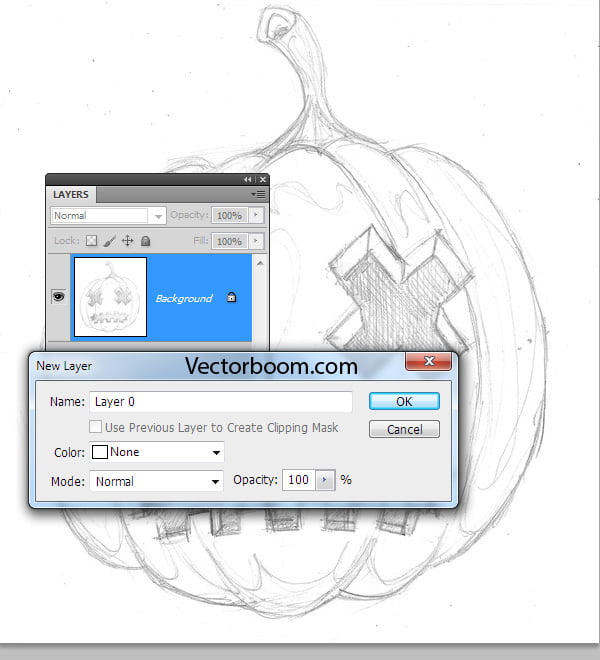
After our sketch was scanned, open it in Photoshop. To make it more contrast, go to the Image > Adjustments > Levels… and shift the midtone slider to the right, to the top of the histogram.
Click twice on the Background in the Layers panel, and then click OK in the opened dialog box, the New Layer.
To edit the shape of our pumpkin go to the Edit > Transform > Warp. By changing the position of nodes, which appeared on the mesh, we achieve desired result; then click on the Enter/Return.
You can also erase dirt from the sketch with the Eraser Tool, but it is not needed. Now our sketch is ready to be worked with in Adobe Illustrator. Finally, we’re back to our familiar habitat!
Vector Pumpkin Creation in Adobe Illustrator
Step 7
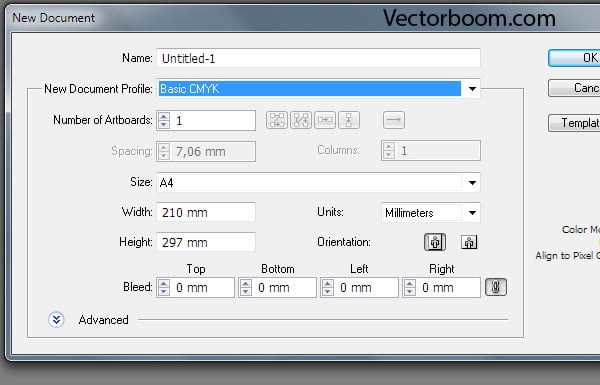
Start Adobe Illustrator and create a new document File > New…. Since we’re working on a T-shirt design, we need to use the CMYK color mode.
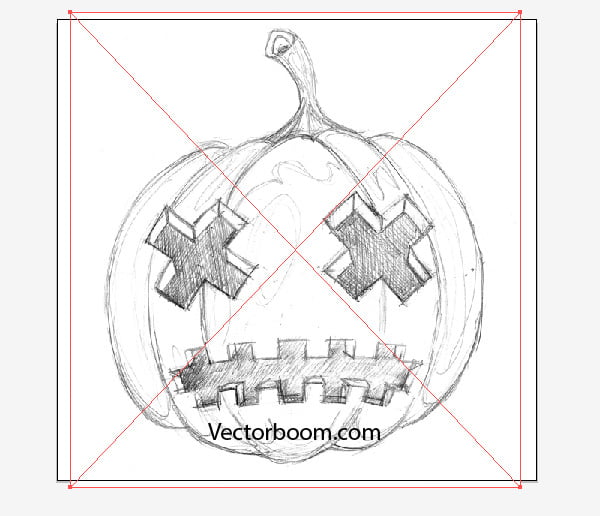
Now paste the sketch into our current document (File > Place…)
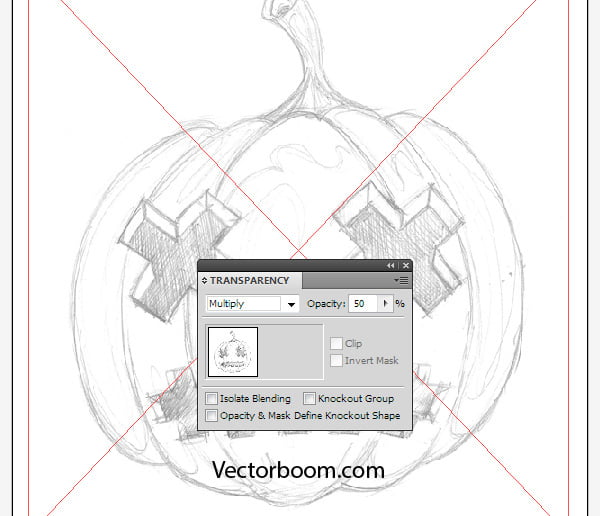
Set 50% opacity and Multiply blending mode in the Transparency panel.
Step 8
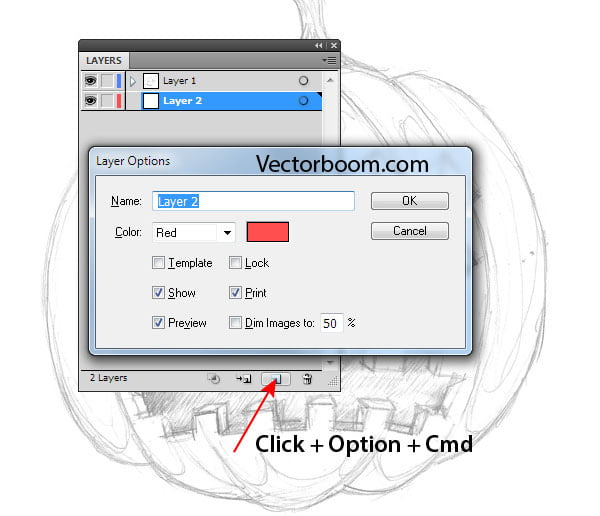
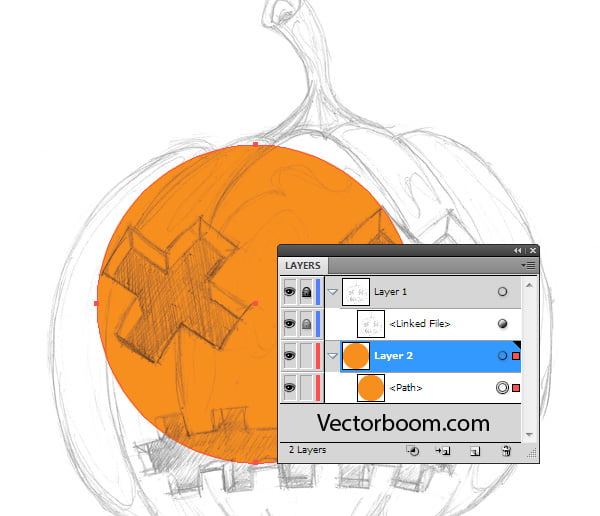
Click on Create New Layer in the Layers panel by holding down the Cmd/Ctrl + Opt/Alt keys. This action creates a new layer underneath the existing one.
Lock the layer with the sketch. We are to draw in the second layer. This type of layers organization and Multiply blending mode, which we applied to the sketch, allows us always to see the lines of the sketch.
Step 9
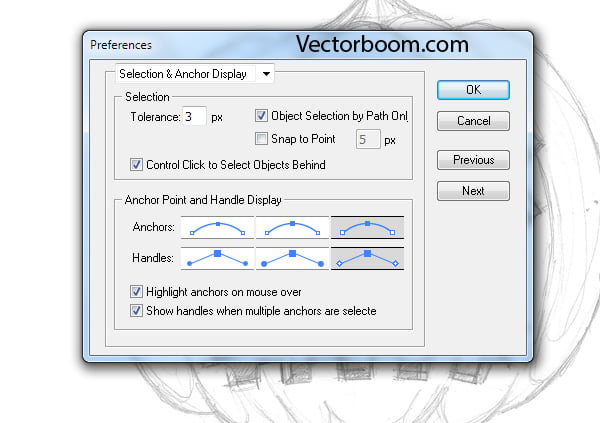
The main drawing tool for our pumpkin will be the Pen Tool. Although this tool has no settings, we can customize Illustrator’s Preferences for more convenient work with paths. Click on the Cmd/Ctrl + K, then go to the Selection & Anchor Display tab. The settings, that I use, are indicated on the figure below. Pay some attention to the Object Selection by Path Only option.
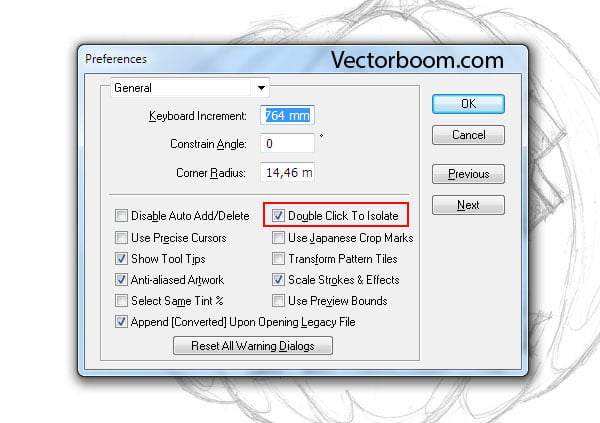
Its activation allows us to avoid accidental displacement of the objects with which we’re not working at the moment. However, at the same time, selection of the necessary object for coloring gets not really very convenient. That’s why I turn this option on when I work with the shape of objects, and I turn it off when I need to color the objects. You can also isolate the object you’re working with, by clicking twice on it, if you have the option Double Click to Isolate selected.
Step 10
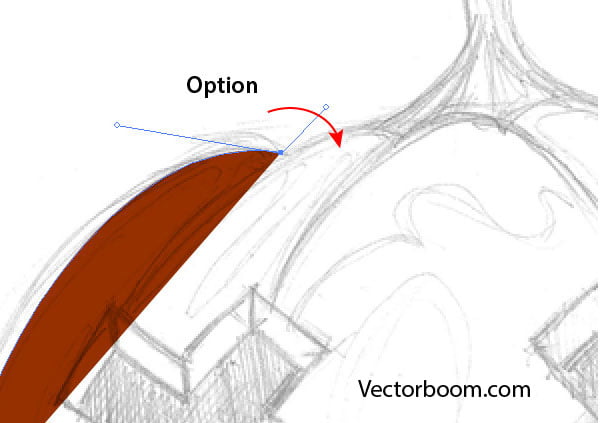
I’m sure that all of you know all the tricks while working with the Pen Tool (P). But I will still allow myself to refresh your memory. Use the Opt/Alt key to transform a smooth point into a corner one.
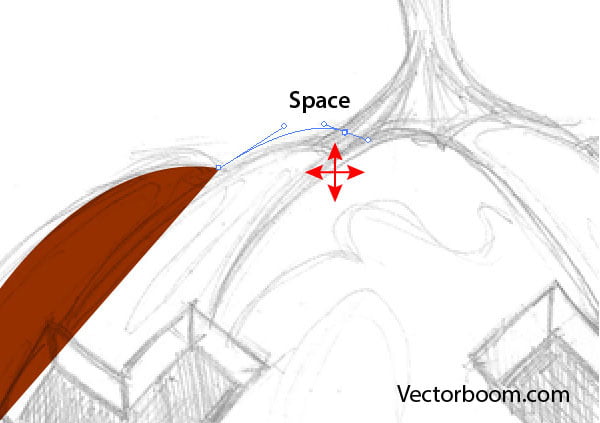
Use the Space key to move the last created point (the mouse button pressed).
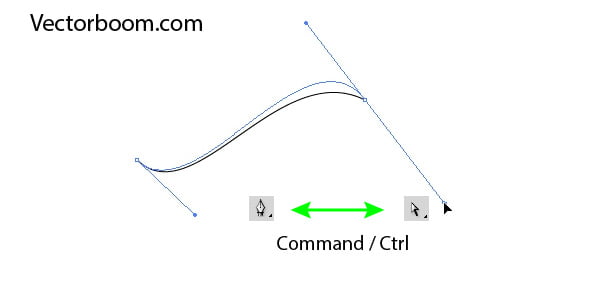
The button Cmd/Ctrl temporary activates the Direct Selection Tool (A), if this tool was selected before the Pen Tool (P).
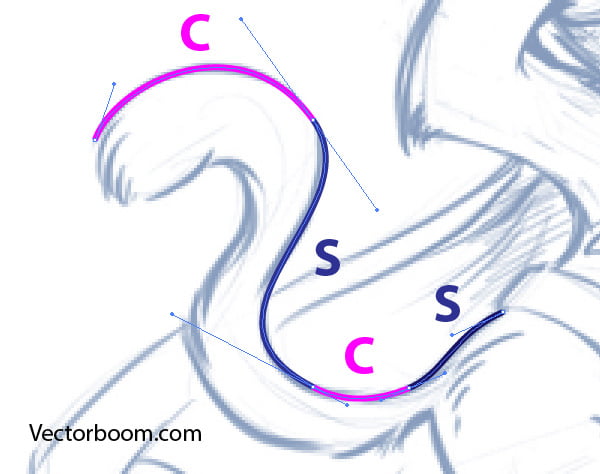
Try not to create any extra points (the line might lose its smoothness because of them), imaginary breaking the outline into C and S shaped segments.
Step 11
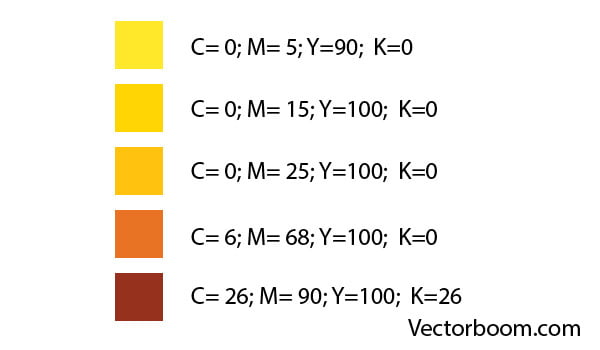
Now let’s create vector objects, but first we define the color. I’ll use five colors to color our pumpkin.
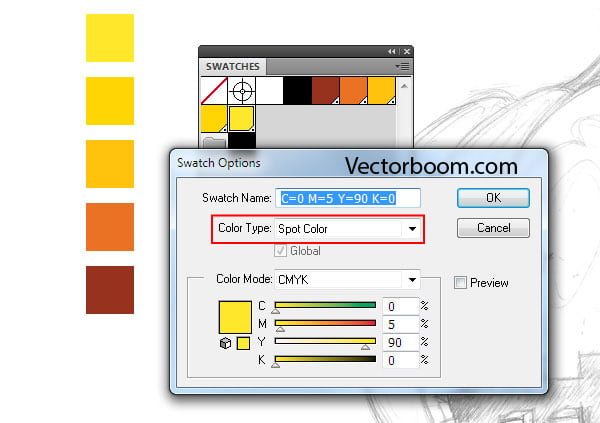
Create the same boxes and fill them with colors indicated on the figure above. Now open the fly-out menu of the Swatches panel and choose Add Used Colors. Make a double click at one of the color swatch and choose the Spot color in the opened dialog box. This action must be performed with all color swatches which will be used in the illustration.
Step 12
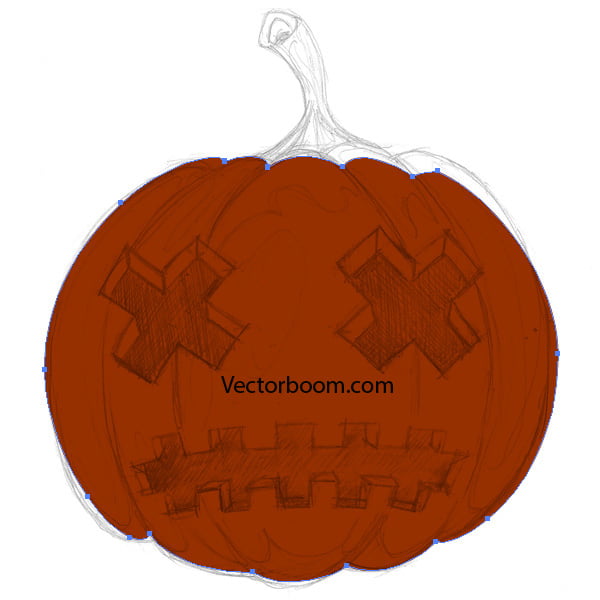
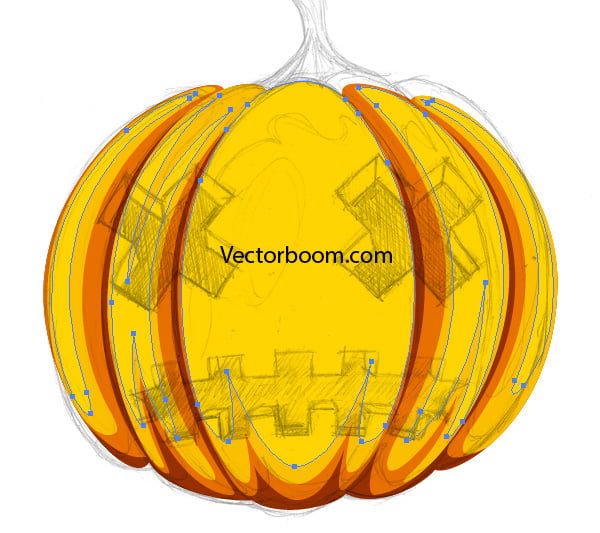
The preparation process is over; we just need to bend the Bezier curves. Let’s start with the darkest color. Surely, you can and should step aside from out rough sketch, if you see that you can improve its shape. Create a dark-brown shape of the pumpkin.
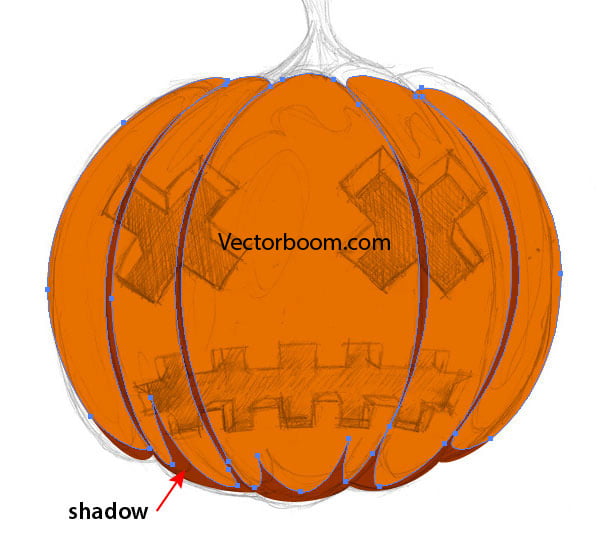
While moving from dark to light colors, create new objects.
The orange objects, in the process of creation, can extend beyond the lower shape. You can always remove some extra parts by using the Shape Builder Tool and by holding the Opt/Alt. When creating new objects, we should pay attention not only to the smoothness of their shape, but also to space that is been constituted between the objects. This type of space is called white space. In our case, white spaces are shadows on the surface of the pumpkin.
Step 13
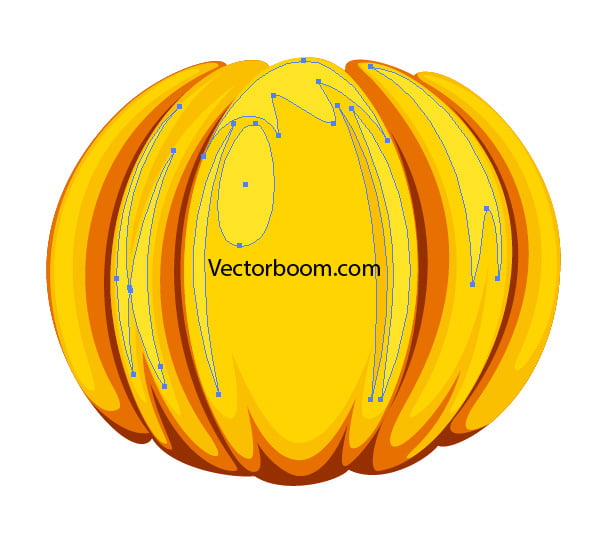
Create dark-yellow objects. Sometimes, for creation of new forms, it is easier to copy the old forms and edit them, rather than to create new forms with the help of the Pen Tool. That’s exactly what I did in this case. Double the orange forms and change the forms of new objects with the help of the Direct Selection Tool (A).
Keep in mind, that white space is a shadow in the recessed parts of our pumpkin.
Step 14
Using the technique of doubling, the Direct Selection Tool (A) and the Pen Tool (P) create shapes of two lighter shades of yellow. The lightest shade of yellow conveys the highlights on the pumpkin.
Step 15
I don’t see any problems in creation of eyes and mouth. I just want to make two comments: we should use black C =0; M =0; Y =0; K =100; and there is no need to make perfect cuts on our pumpkin. They were cut with a knife.
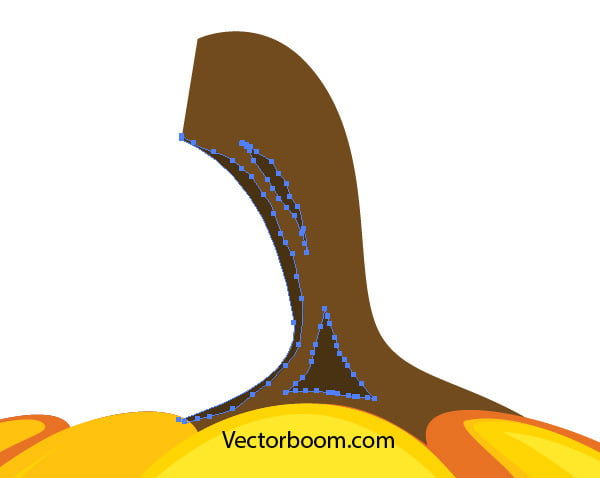
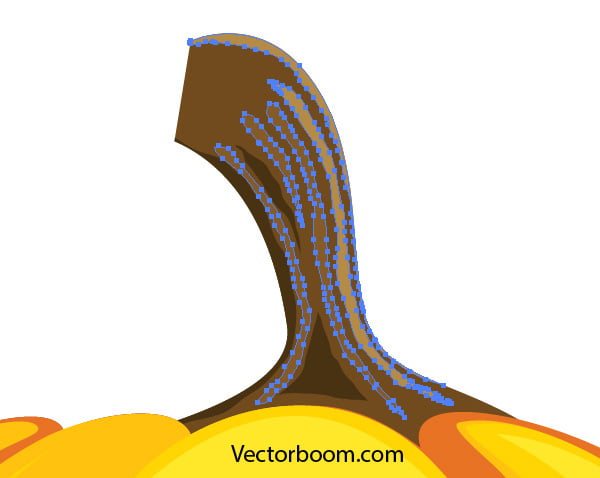
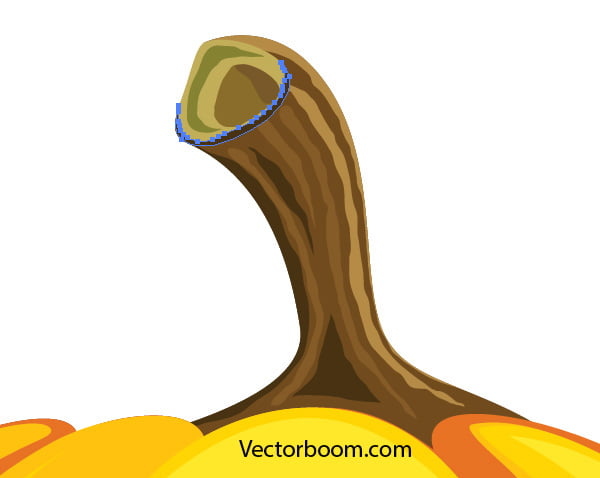
Step 16
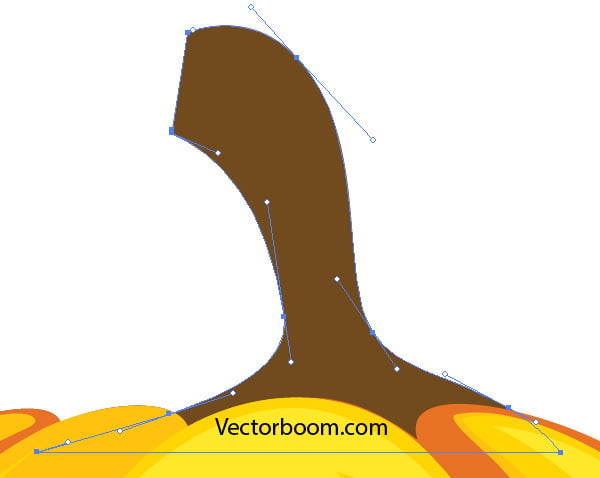
Let’s start drawing a tail of the pumpkin. This time, I won’t specify the colors that I used. You should pick out your own colors. These should also be Spot colors. The form of the tail was created with the help of the Pen Tool (P)
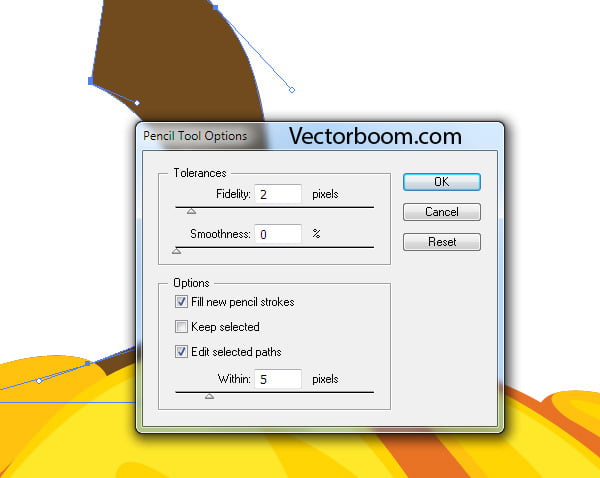
All the other objects should be created with the help of the Pencil Tool (N). The settings of this tool are indicated on the figure below.
I draw the objects with the help of the Graphic Tablet, but you shouldn’t get upset if you don’t use this tool in your work. Objects of this shape can be created with the mouse. The object creation process is illustrated on the figures below.
Well, that’s all. The pumpkin is ready!
We can, of course, continue talking on the pre-press topic. Believe me, there are many ways. I personally think that our job as illustrators is over. Let the typography’s employees do their job, we don’t ask them to draw ;) One last note- try to use as few colors as possible. This determines the cost of printing. Happy Halloween!
P.S. Any criticism and comments are welcome.
|