|
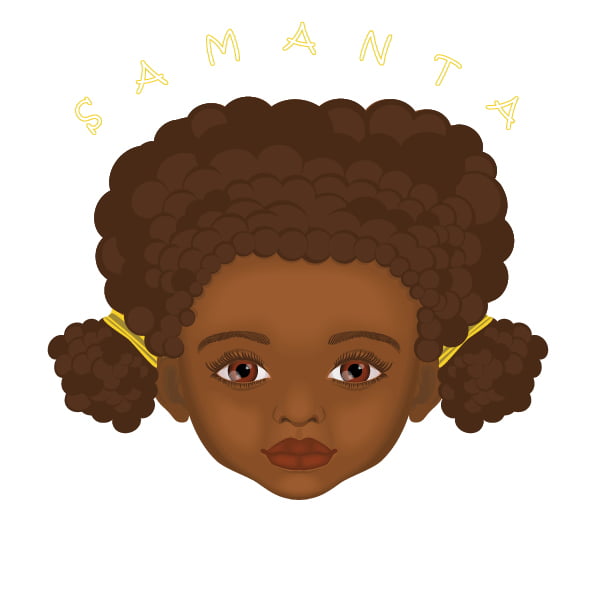
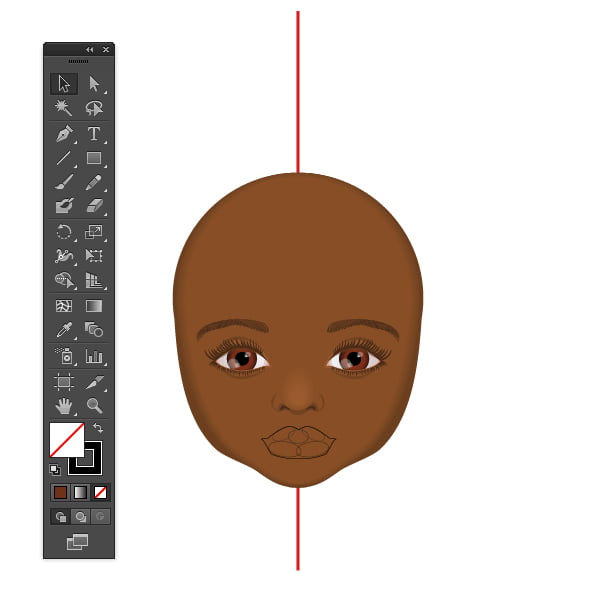
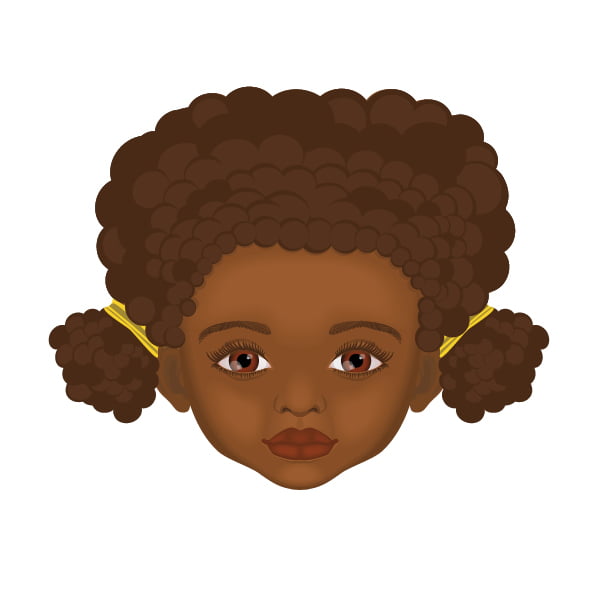
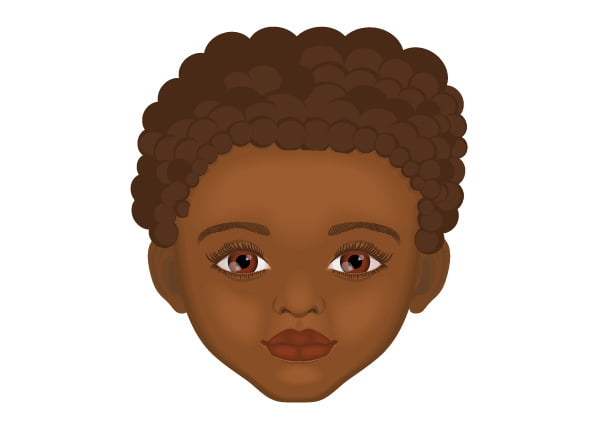
Final Image Preview
In this step-by-step tutorial, I’m going to show you how to create a Cartoon Little Girl (or Boy) Portrait in Illustrator. We will use modified Basic Shapes, Blend Tool and Art Brush (for stylized afro).
You can download the Cartoon Little Girl vector file absolutely for free by clicking on Download button at the beginning or in the end of this post. You need to register to download the EPS10 file.
Tutorial Details
-
- Program: Adobe Illustrator
- Version: CS6
- Difficulty: Intermediate
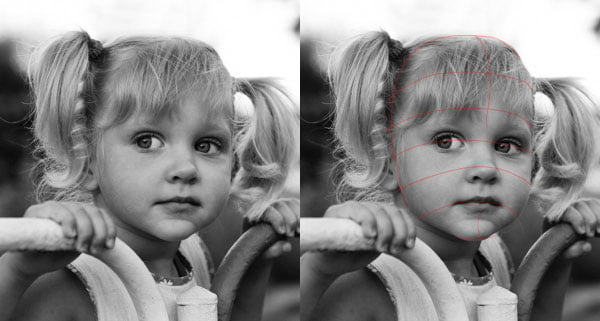
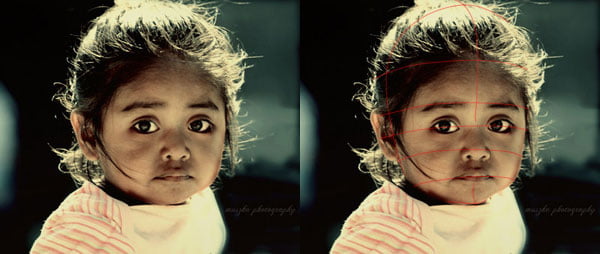
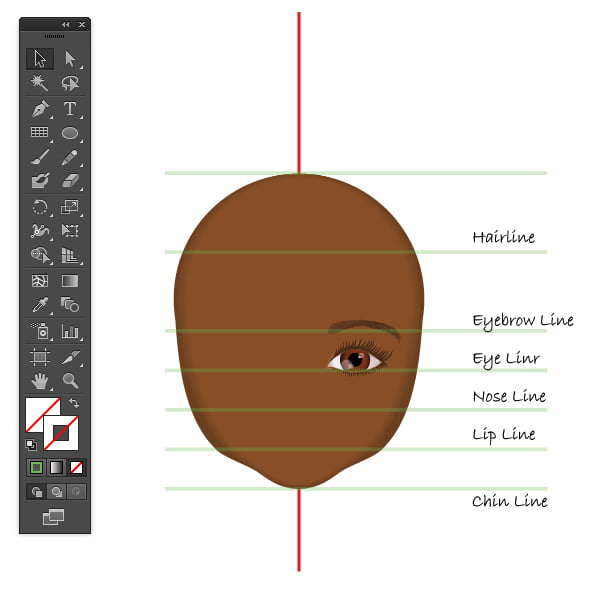
Any child's face is smooth and round. The spaces between the features are short, so the face seems quite wide. The eyes appear large and buttony. They are wider apart than the average adult's eyes. The nose is usually small and quite rounded. The bridge of the nose is low. The upper lip rises sharply and usually protrudes. The chin is small and round with little fat under it. The cheeks are usually full. Knowing this helps you design a little girl's (or boy's) face in any style. Let’s get started!
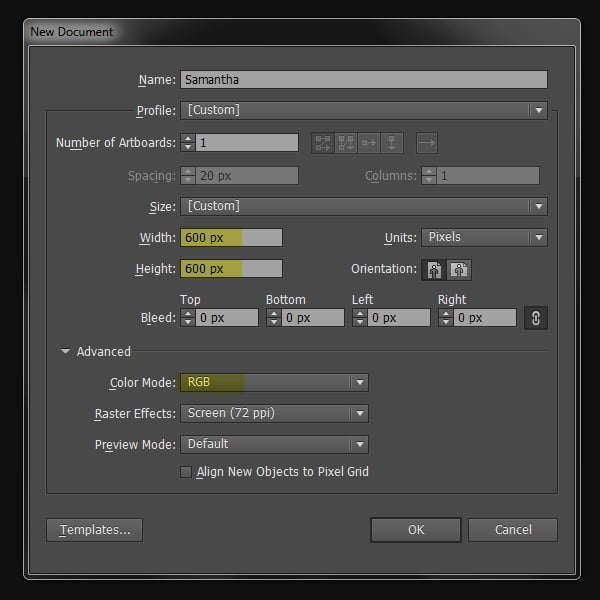
Step 1
Start by creating a new Web Document in Adobe Illustrator with artboard size of 600 x 600 px and RGB color mode (File > New).
Step 2
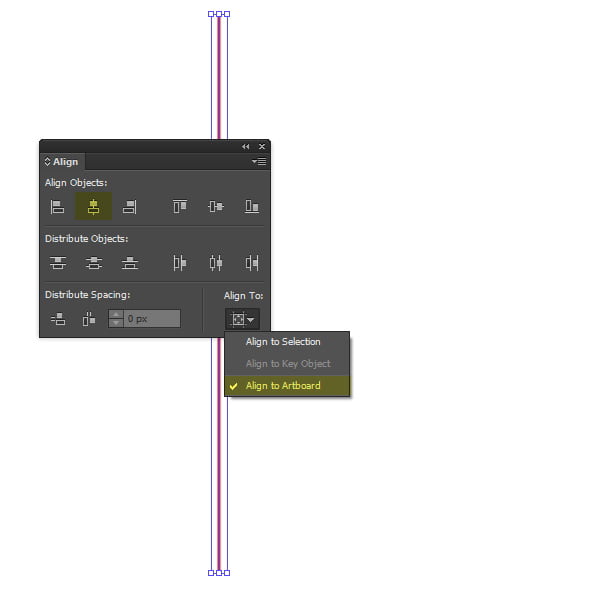
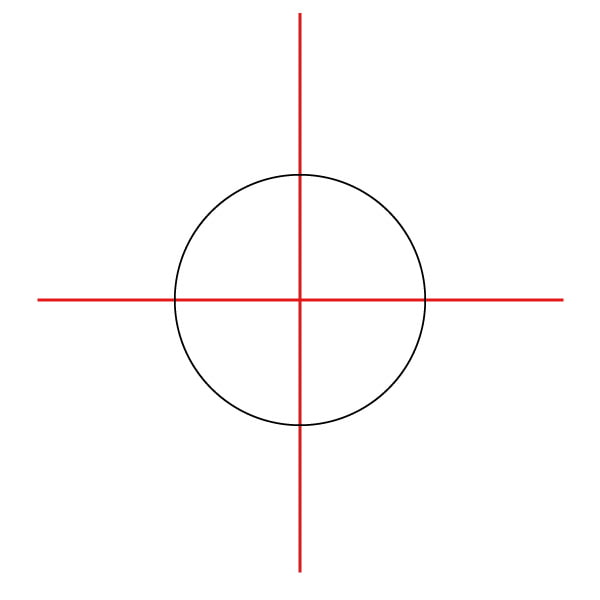
First of all build two guidelines for our construction.
Now select the Line Segment Tool (L) from the Tool Panel and create vertical guideline while holding Shift (Shift for the straight line). Click on the flyout arrow of the Align panel, and click on the Align to Artboard option. And now just click on the Horizontal Align Center on the Alignment panel.
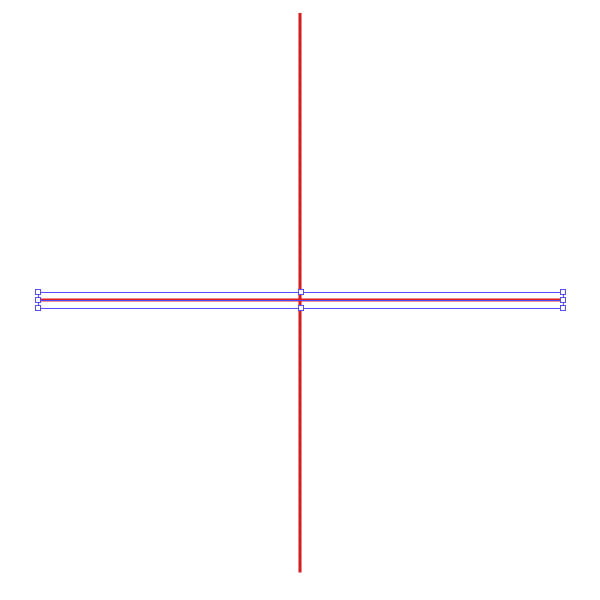
So, the vertical guideline is aligned to the center of our artboard. Create a horizontal guideline, aligned to the center of our artboard too.
Step 3
We are going to start drawing a portrait from the creation of the head shape.
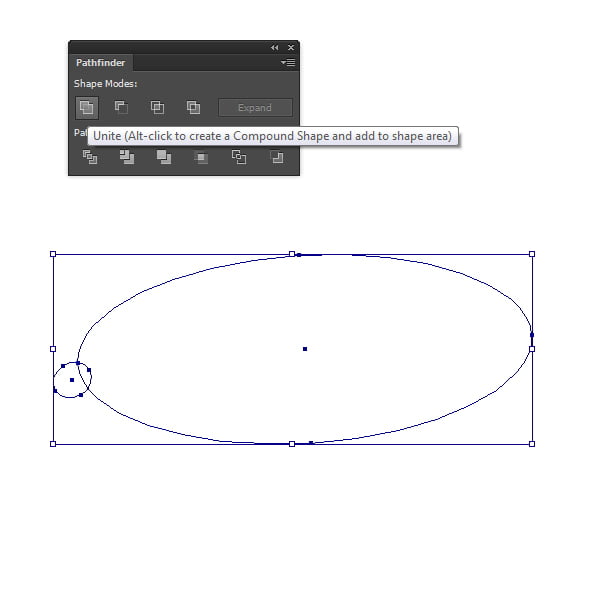
Using the Ellipse Tool (L), draw a circle and align it to the centre of the artboard. In my version, the circle is 300 pixels by 300 pixels, with a 1pt black stroke weight and no fill.
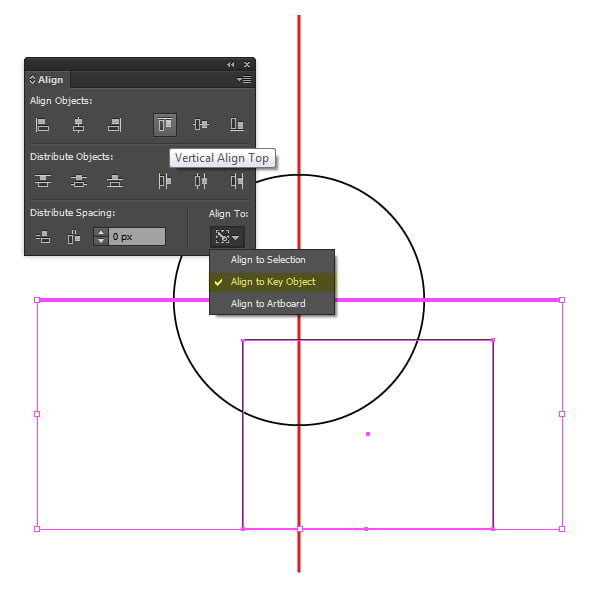
Then draw a rectangle. The width of the rectangle is 300 px and the height is about 3/4 of the circle's diameter. Align the top border of the rectangle relative to a horizontal guideline.
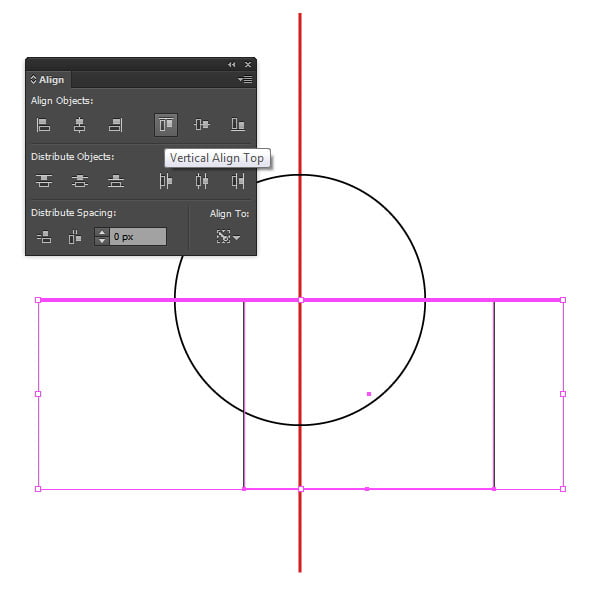
Just select the rectangle and the horizontal guideline. And click the fly-out arrow on the Align panel; select the Align to Key Object option. And then click on the horizontal guideline (this object will stay on same place) and now just click on the alignment you requested on the Alignment panel.
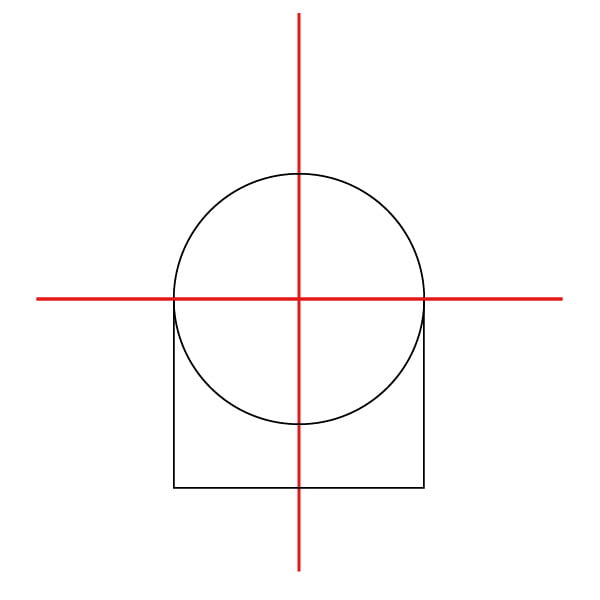
And then align the rectangle relative to the vertical guideline.
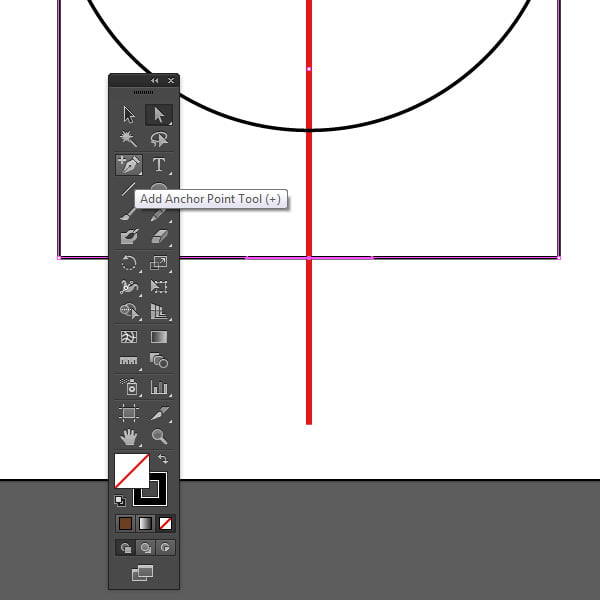
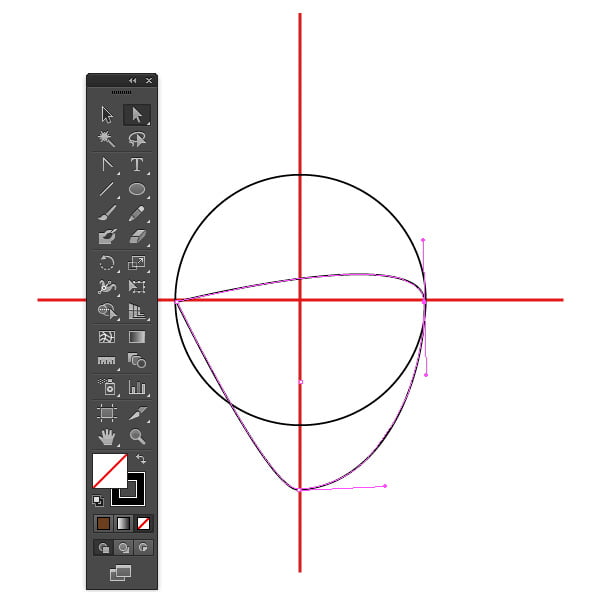
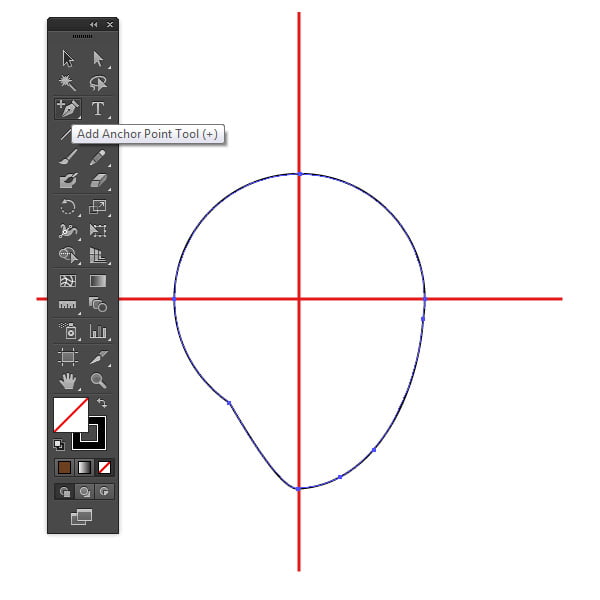
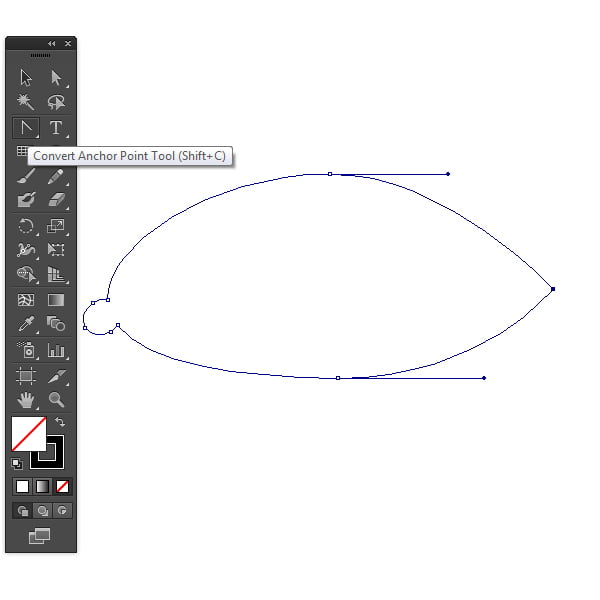
Select the rectangle and add a new anchor point exactly in the middle of the bottom border with the Add Anchor Point Tool (+).
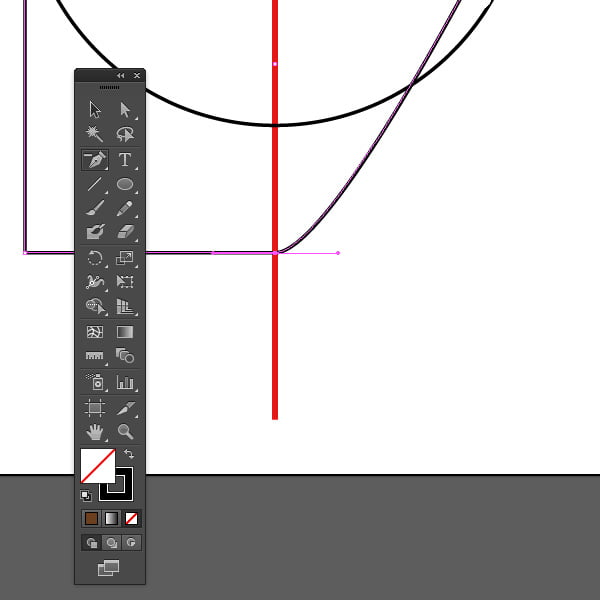
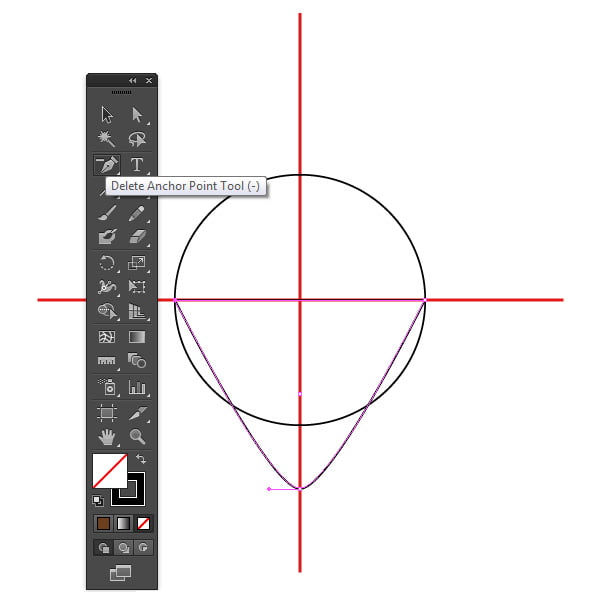
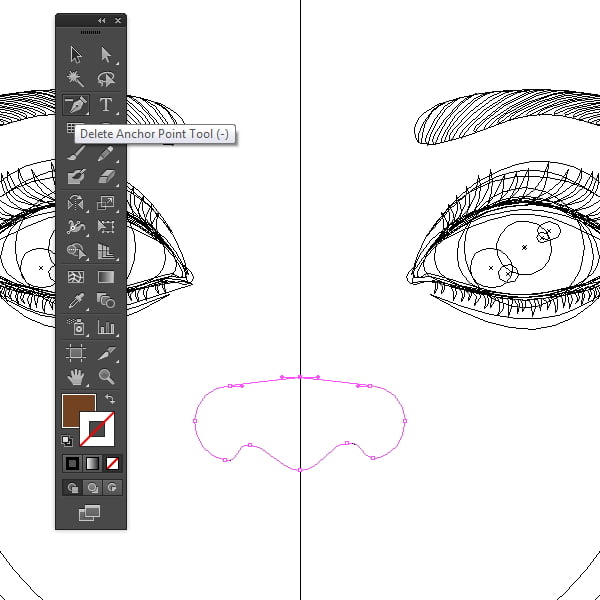
Then delete two points of intersection of the bottom border with sides using the Delete Anchor Point Tool (-).
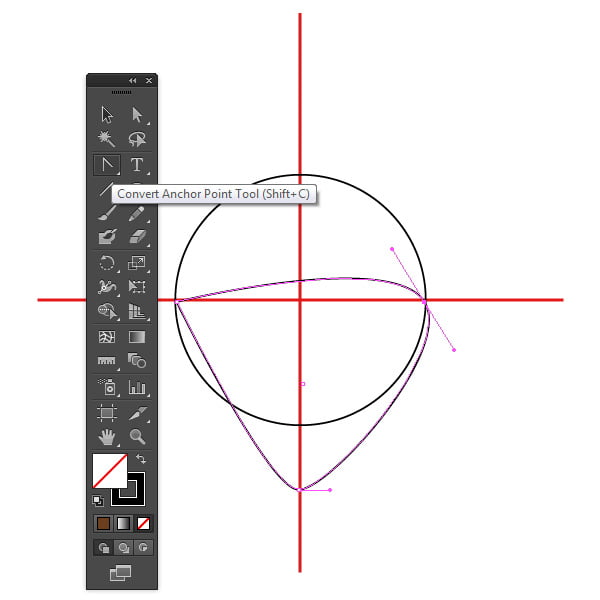
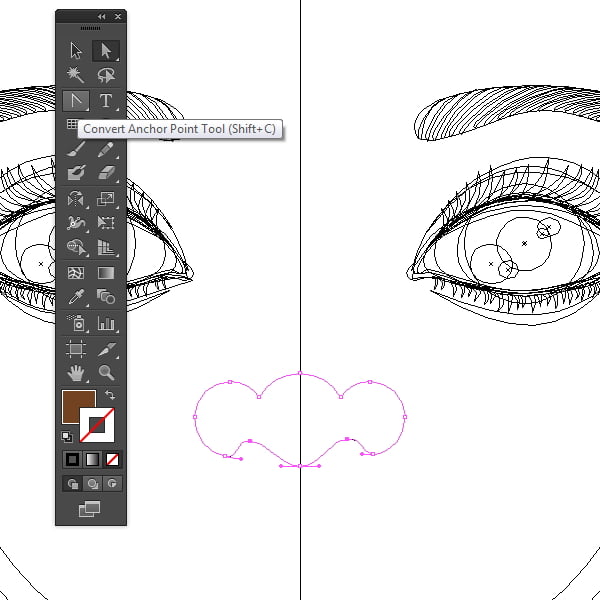
Select the Convert Anchor Point Tool (A) and modify one point of intersection of the top border with side and its handle as shown below.
Select both shapes by holding down the Shift key. Now open up the Pathfinder panel and click on the button Unite.
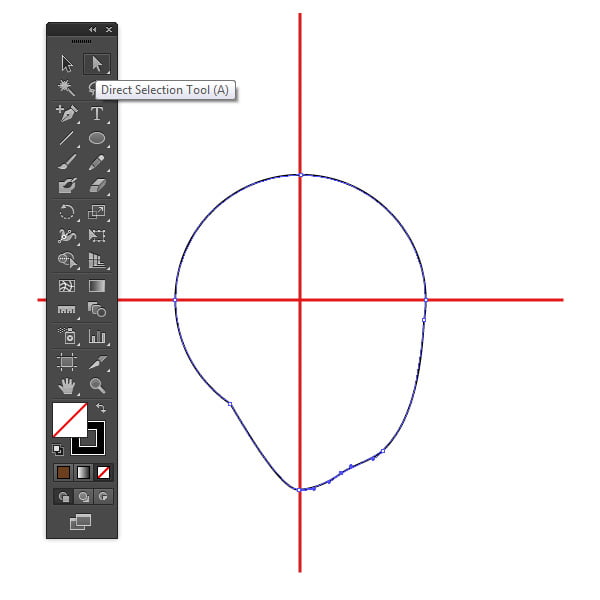
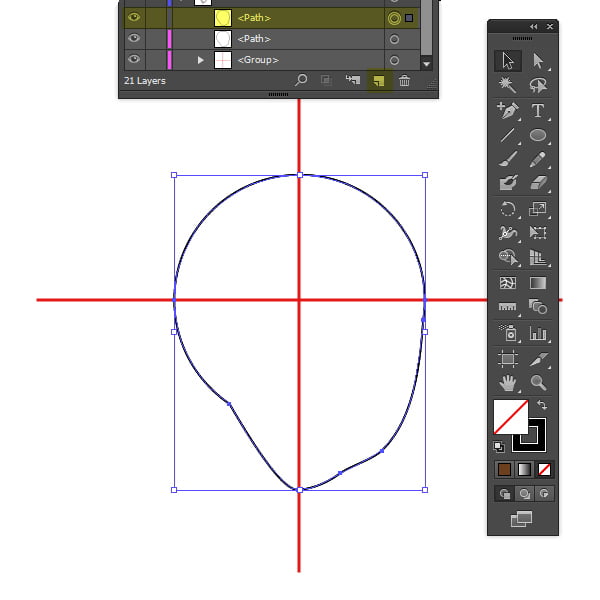
While selected, add a few anchor points to modify the shape. Aim for smoothness to preserve a cartoon look of our shape.
Select the shape and duplicate it. Drag the Path (this is our shape) to the new layer icon on the Layer panel. The copy will appear on a new sublayer.
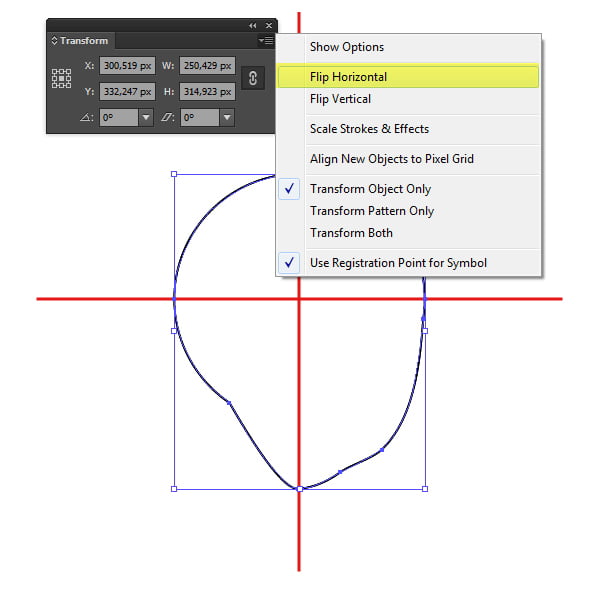
Flip the copy. While selected, go to the fly-out menu on the Transform panel and click on the Flip Horizontal.
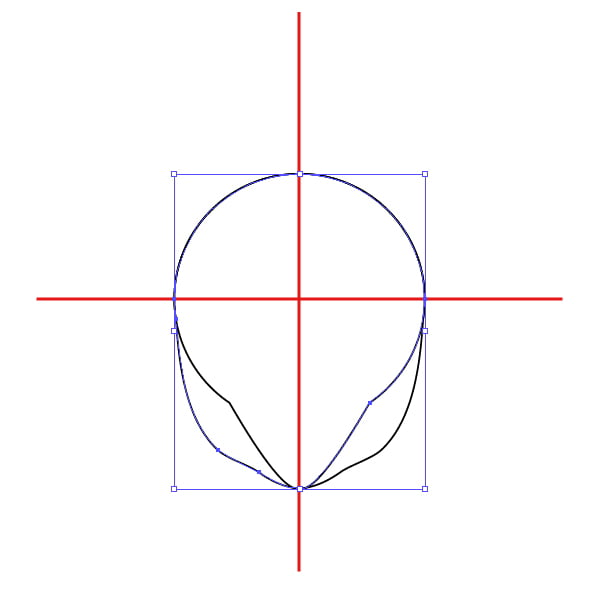
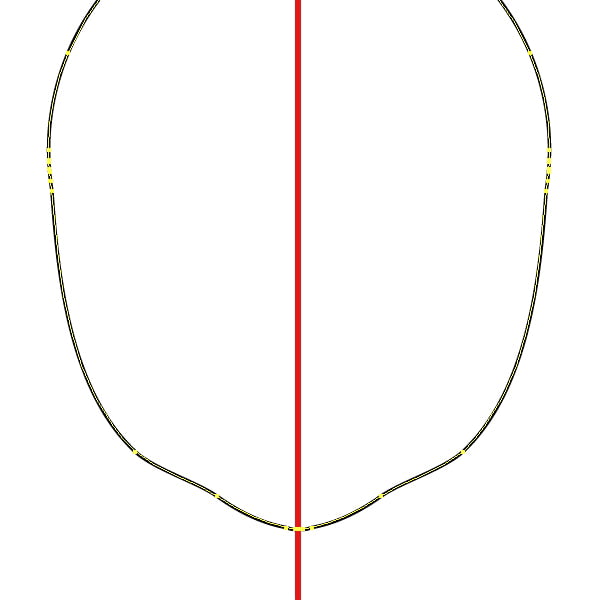
Select both shapes and hit the button Unite on the Pathfinder panel.
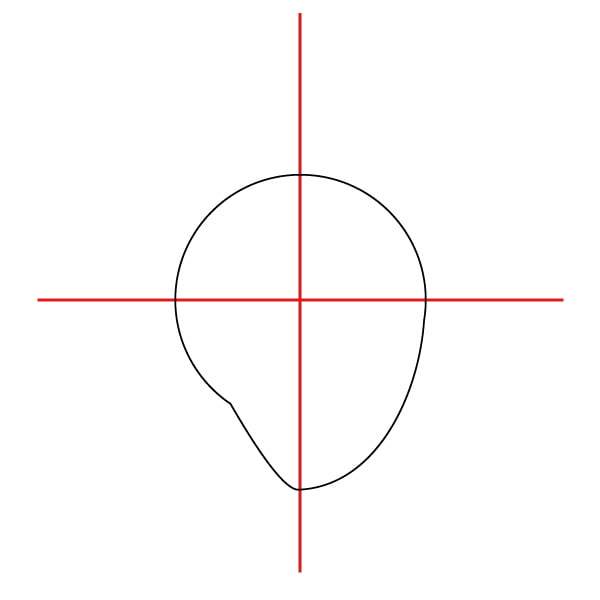
As a result of this action, we got the shape containing many unwanted anchor points.
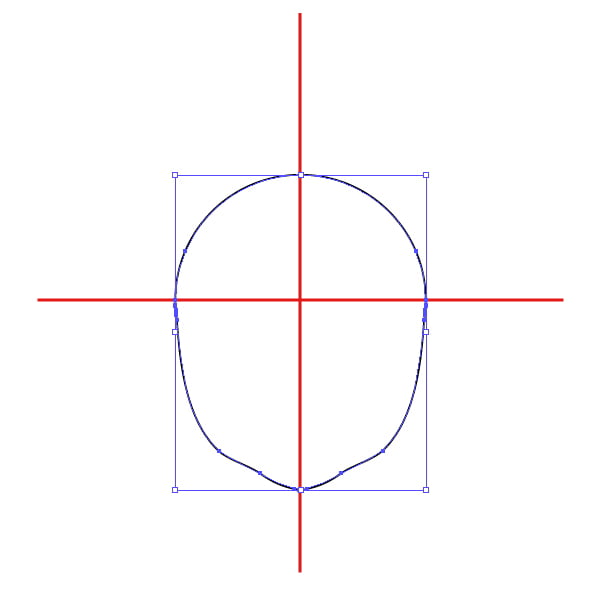
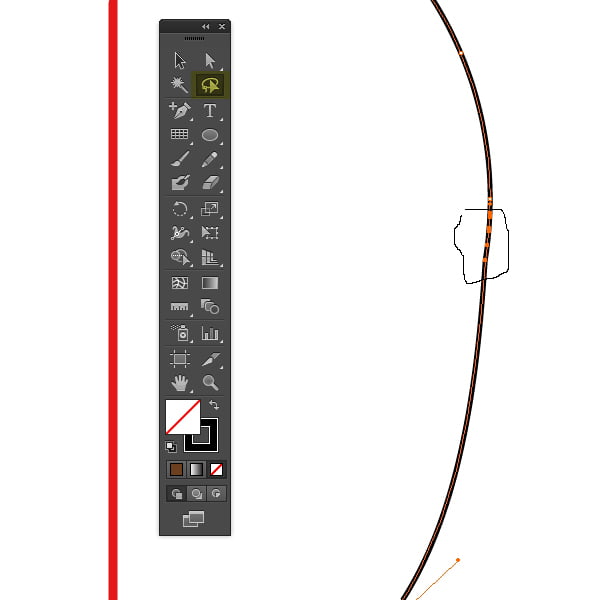
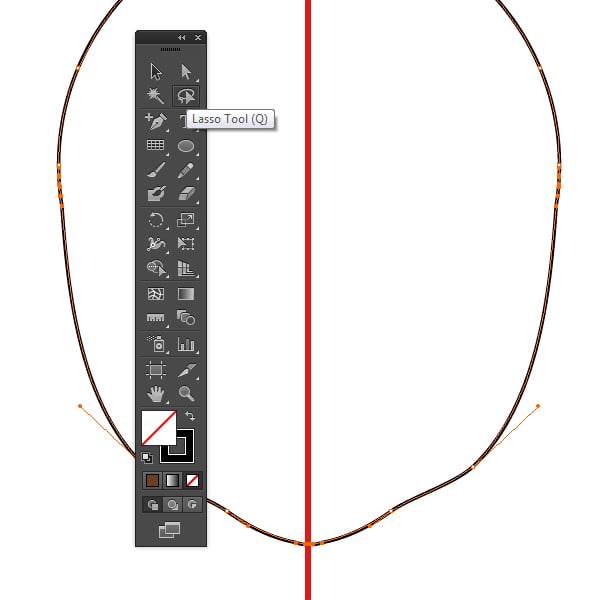
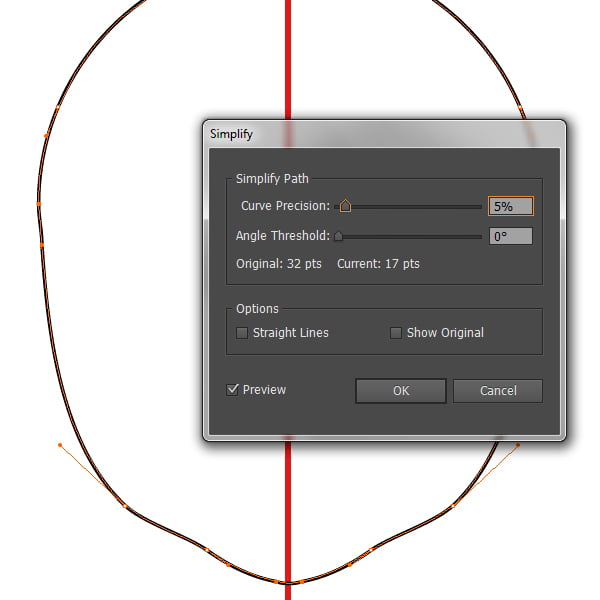
Therefore, this shape requires optimization for the unnecessary anchor points. Beforedoing that, lock the vertical guideline and delete the horizontal line. To lock a line, click on the area to the left of its name. A lock will appear(click again to unlock it). Select the Lasso Tool, and drag around the unwanted anchor points. Then go to Object > Path > Simplify… and set the value of the Curve Precision you requested. The unselected points will stay on same place.
If you are satisfied with your shape name the Layer "Head" and go to the next step.
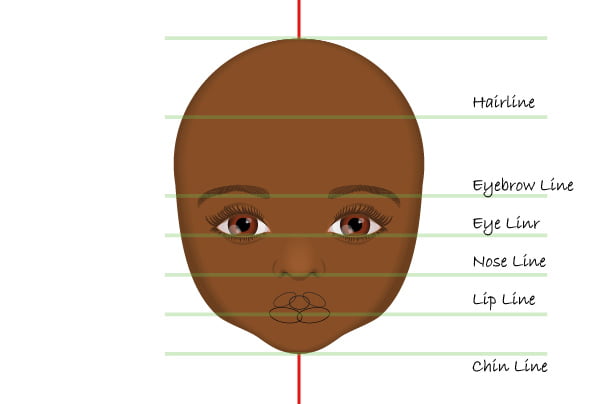
Step 4
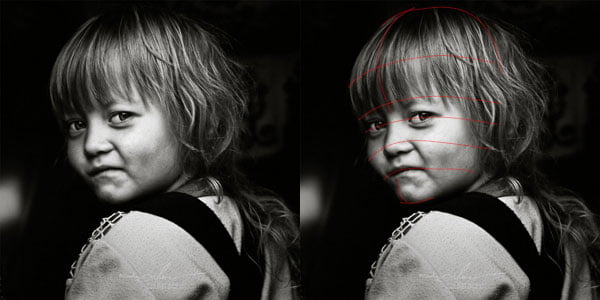
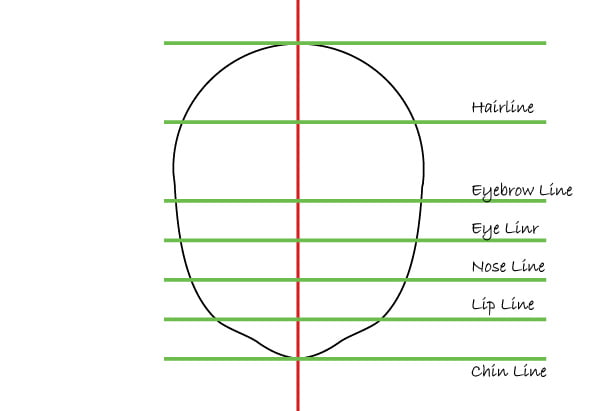
While the facial mass of the child's head, from brows and lower, (this is the face), only occupies about one-quarter of the whole area of the head, - the proportions are somewhat different from those in the adult face. Images below show the four divisions of child's face. The brows are a little above the middle line of the head (or the top line of the face), and the eyes, nose, and the corners of the mouth are on the division lines.
With this formula, you can construct the face. But varying a little in the placement of the features and its proportions you can make the Original Character.
So I would like to make eyes and lips larger and the nose relatively smaller to make the little girl look cartoon-like.
Step 5
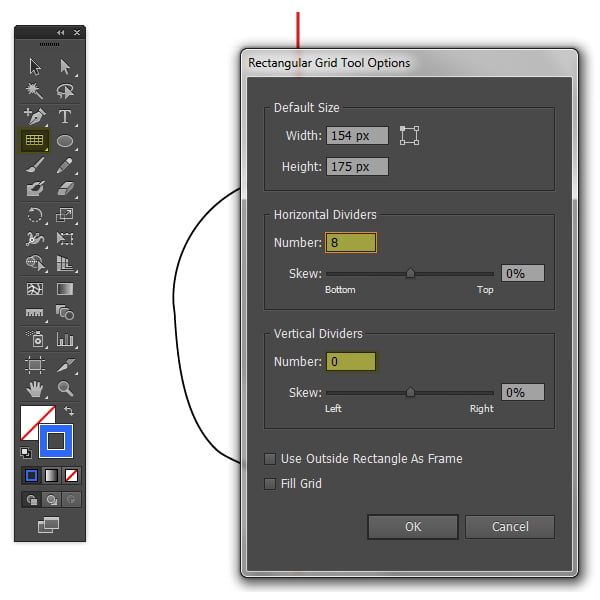
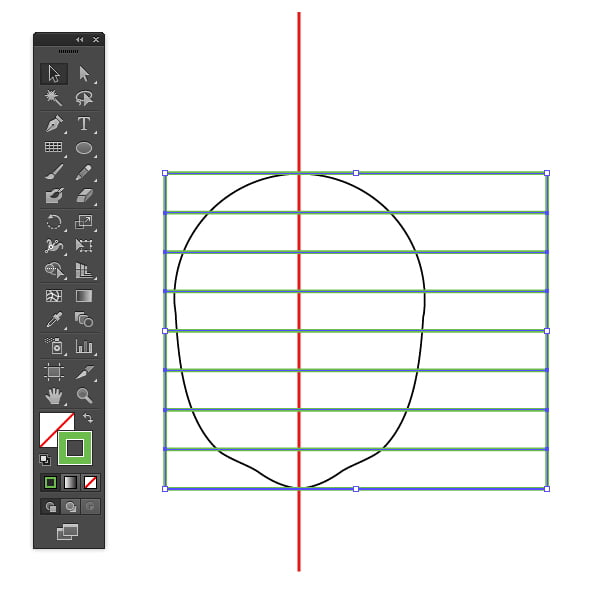
Let's build the main horizontal guides for our head. Before that, lock our layer "Head". Create a new layer and name it "Guides". Select the Rectangle Grid Tool in the Tools Panel and click on the artboard. Set the value of the Horizontal Dividers "7" and Vertical Dividers "0". Click OK. And then move the grid on the head shape as shown below.
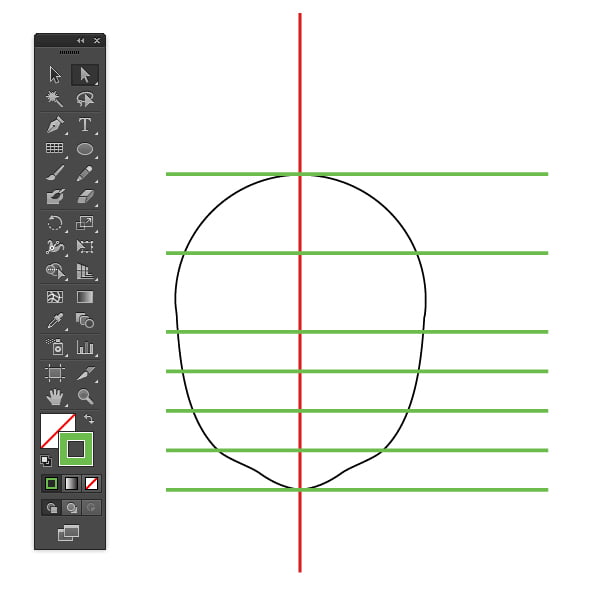
Select the unnecessary lines while holding Shift and delete them.
Lock the Layer "Guides" and keep it at the very top of the layer stack to the end of the project. You can toggle the visibility (by clicking on the eyeball icon) or reduce the Opacity in the Transparency panel for self-check. Thereby, we've got the basic contour of the head with some horizontal main guides.
Step 6
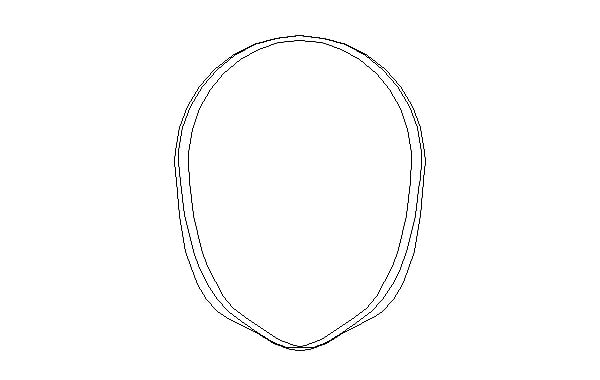
Unlock this contour. Duplicate and slightly reduce the contour size. Repeat the same process for the second shape.
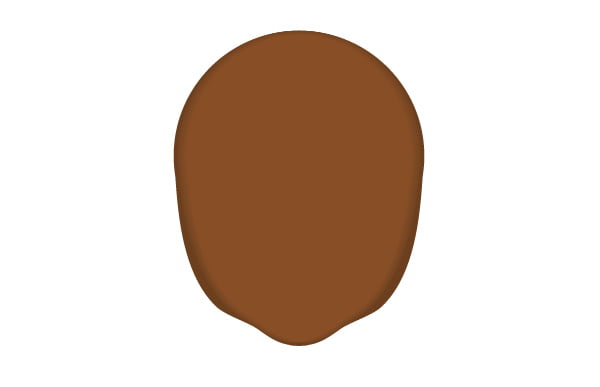
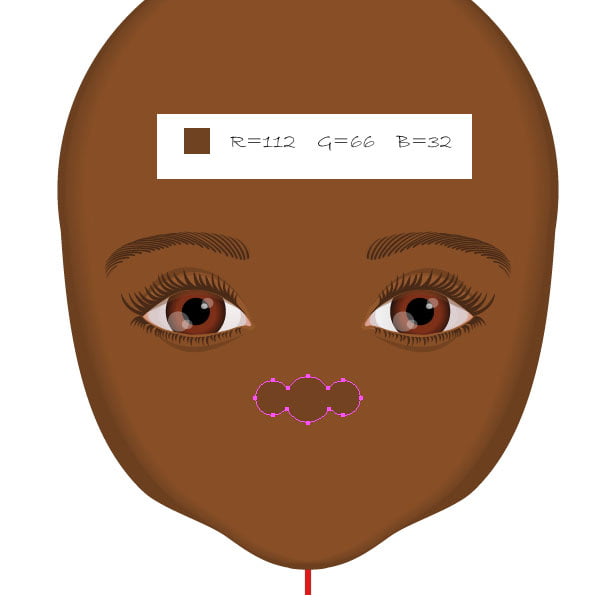
As shown above (View > Outline), we've got three similar-reducing shapes. I'm going to fill these shapes. In my case, I will use four colors for the skin: the basic color of the skin (R=132, G=78, B=37) for the upper and smaller shape, the color (R=112, G=66, B=32) for the middle shape will be a bit darker, the darkest color (R=105, G=63, B=31) for the lower and larger shape, and the color - (R=152, G=90, B=46) for highlights (bulges). In this step we will use only three of these colors.
Select the upper and smaller shape and fill it with the color - (R=32, G=78, B=37). Then fill the middle shape with the color - (R=112, G=66, B=32) and the lager shape with the color - (R=105, G=63, B=31).
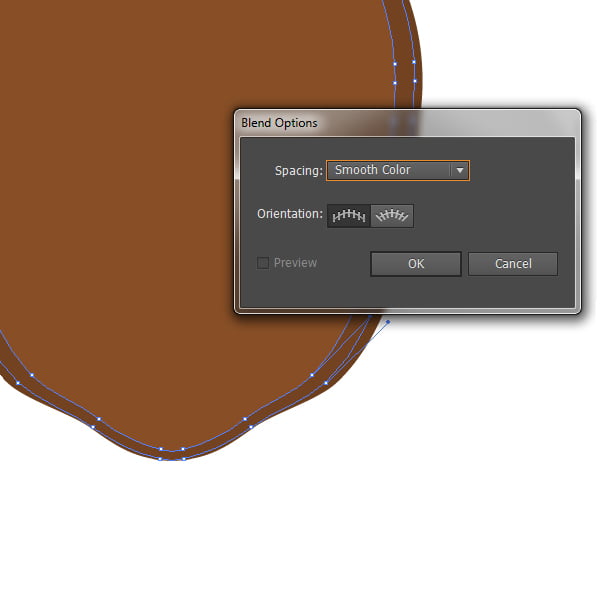
At last, use Illustrator's Blend tool to create the smoothness. Now select the smaller and middle shapes, go to Object > Blend > Blend Option… and choose the Smooth Color in Blend Options. Now make a blend between these shapes. (Object > Blend > Make).
Lock the layer "Head" to lock this object.
Step 7
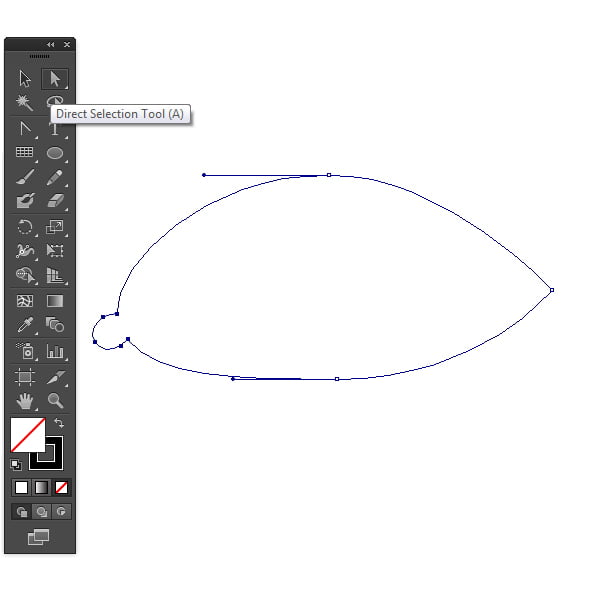
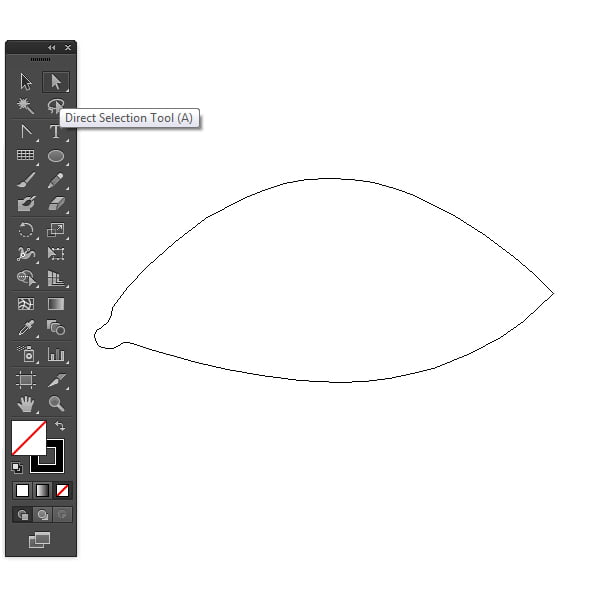
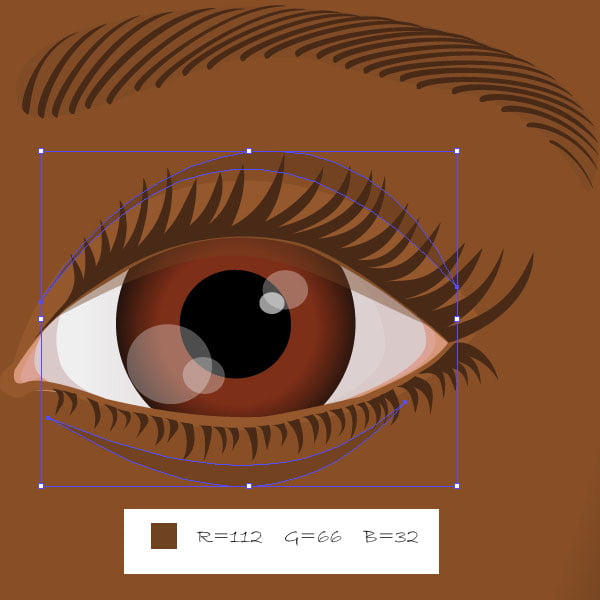
In this step we will create large and buttony eyes. Create a new layer and name it "Eyes". Choose the Outline view (View > Outline). Before that, make the basic eye shape from two elipses. With the Ellipse Tool (L) create two ellipses, unite them and modify the contour.
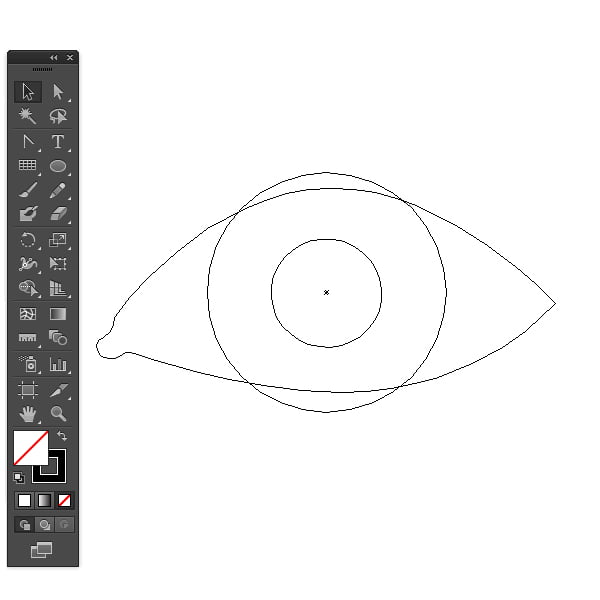
Draw the circle for the iris. Select, duplicate and reduce it for the pupil.
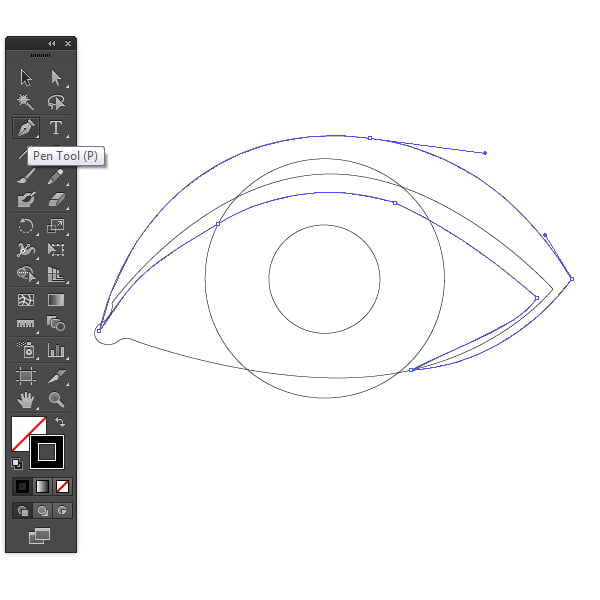
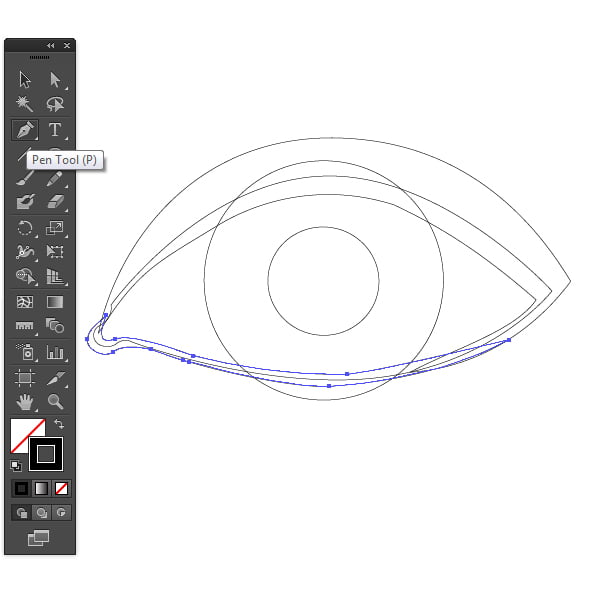
With the Pen Tool create the eye contour consisting of two shapes as shown below. Two shapes are required to quickly change the eye contour, for example for laughing.
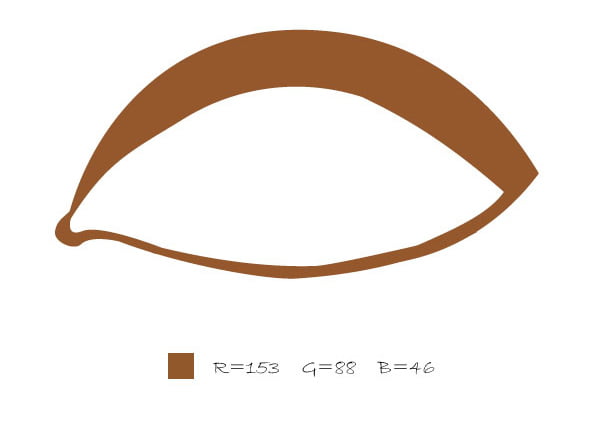
Go to the Preview mode (View > Preview) and put in the colors. Put in the color (R=153, G=88, B=46) for the eye contour.
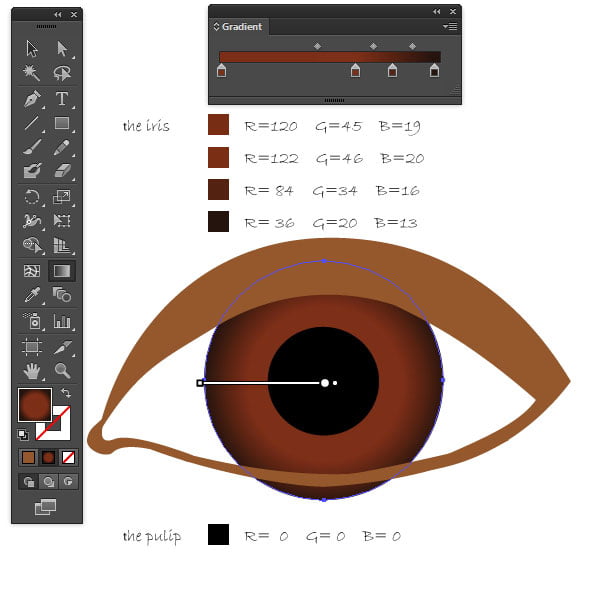
Put in the colors for the eye iris and the pupil. Usually the iris is not all the same color: there are some lighter and darker areas and the dakest outline. Use the Gradient Tool with the colors: (R=120, G=45, B=19), (R=122, G=46, B=20), (R=84, G=34, B=16), and(R=36, G=20, B=13), as shown below. And put in the darkest color (R=0, G=0, B=0) for the pupil.
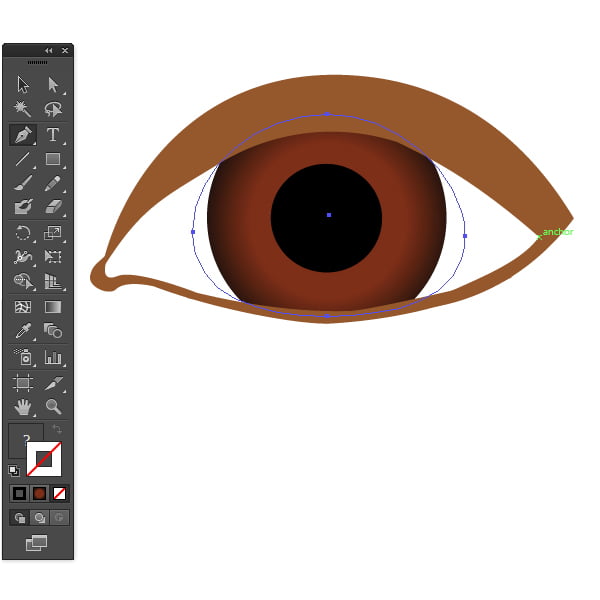
Now create a clipping mask to mask the unwanted parts of the iris. With the Pen Tool create the shape in such way, that only area within it will be visible (this is clipping shape). Move the clipping shape above the iris shape in the layer stack. Then select this shape and the iris and go to the Object > Clipping Mask > Make.
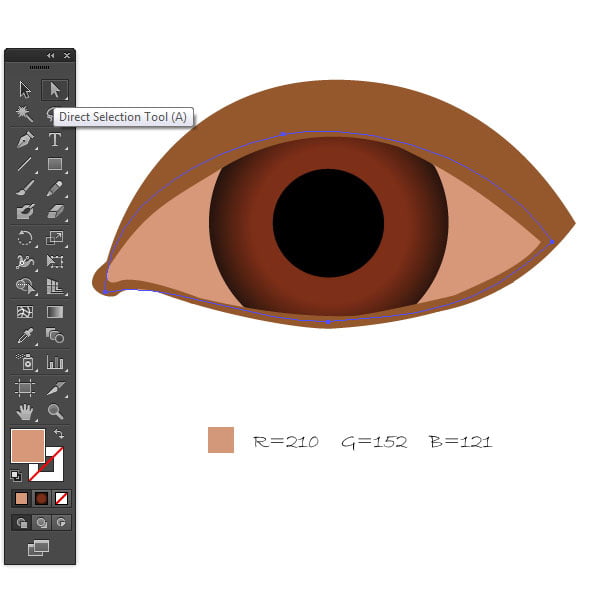
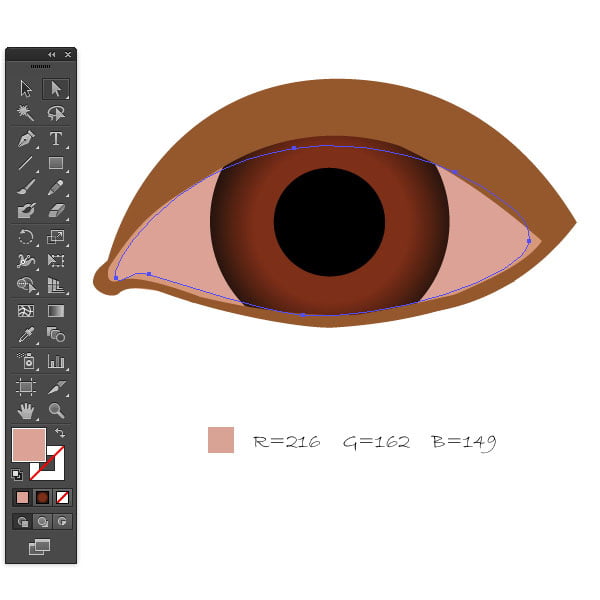
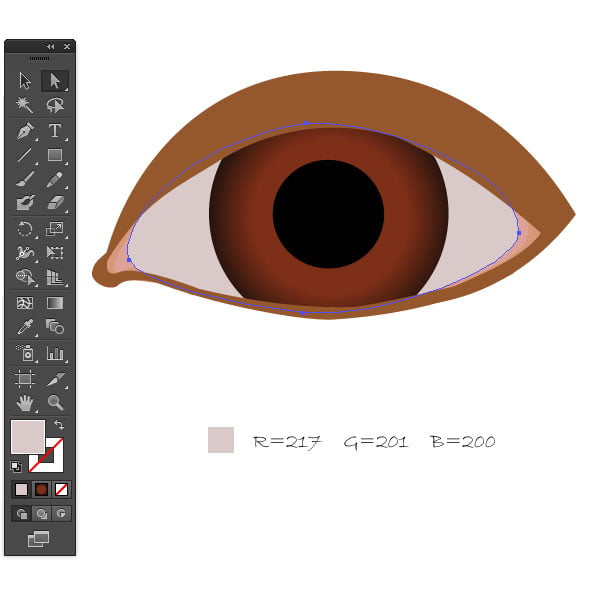
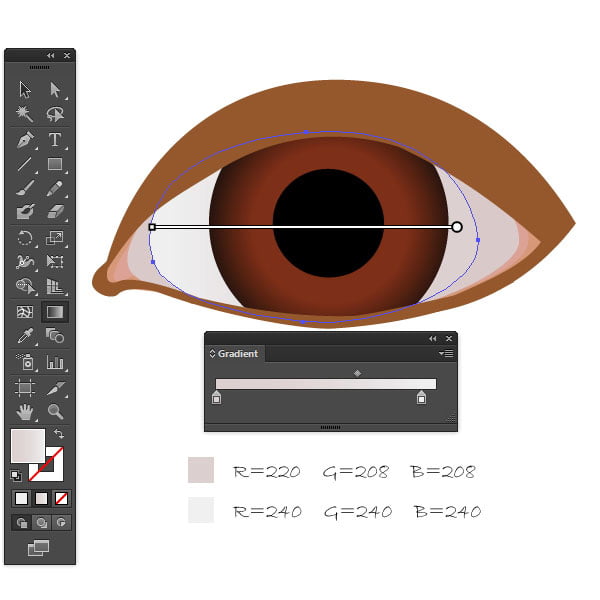
Now create the puncta (corner of the eye near tear duct) and the sclera (the white part of the eye). Though the sclera is not pure white. Modify the basic eye shape, duplicate it couple of times, modify every copy and put in the colors as shown below. I've used five colors: the darkest color (R=210, G=152, B=121), and the color (R=216, G=162, B=149) for the puncta, the middle color (R=217, G=201, B=200) for the sclera, and the gradient from (R=220, G=208, B=208) to (R=240, G=240, B=240) for the lighter sclera's area.
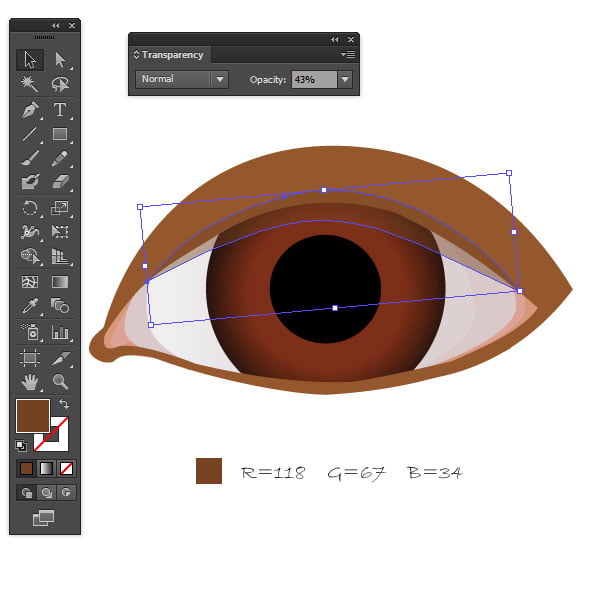
With the Pen Tool (or from modified shape) create the shadow in the sclera and the puncta. I've used the color (R=118, G=67, B=34), the Normal Blending mode and the Opacity 43%.
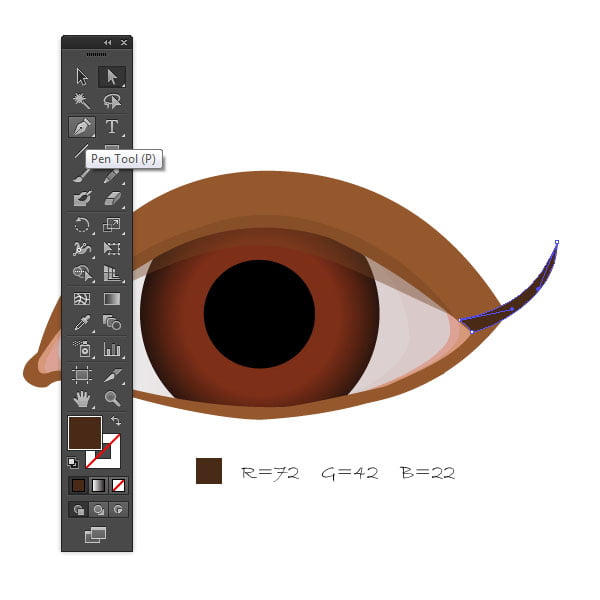
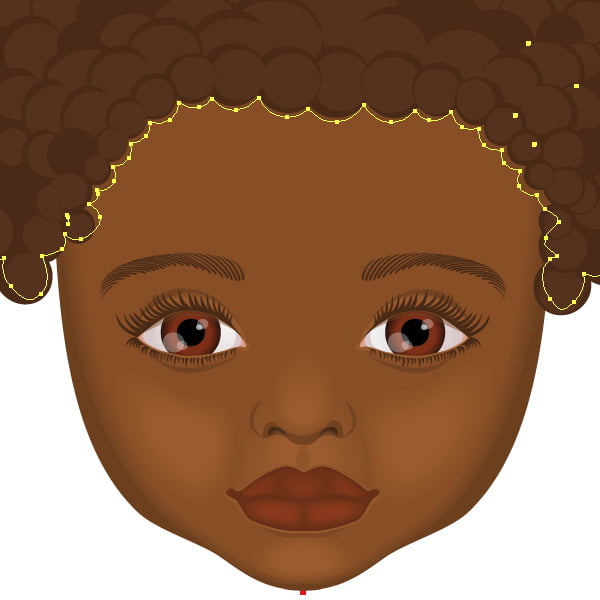
And now let's add some eyelashes. You can create any eyelashes with Pen Tool, then duplicate and modify it couple of times. Put in the color (R=72, G=42, B=22) for the eyelashes.
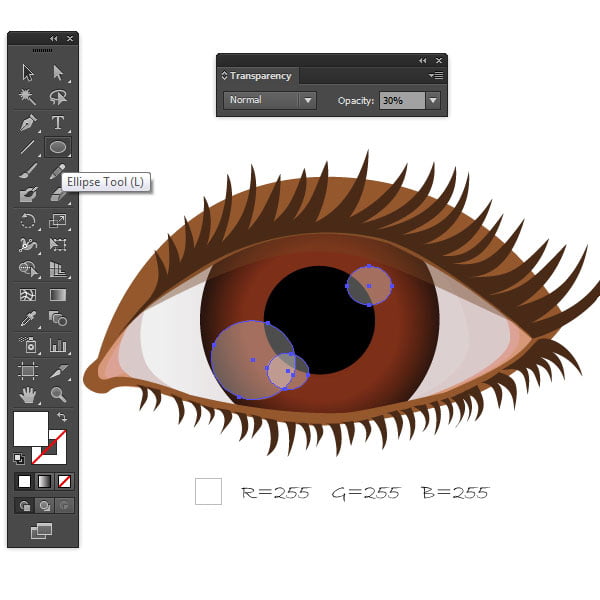
At last, use the color (R=255, G=255, B=255) for the highlight and light reflections. For the reflections you can use the Normal Blending mode and the Opacity 30% and 60%.
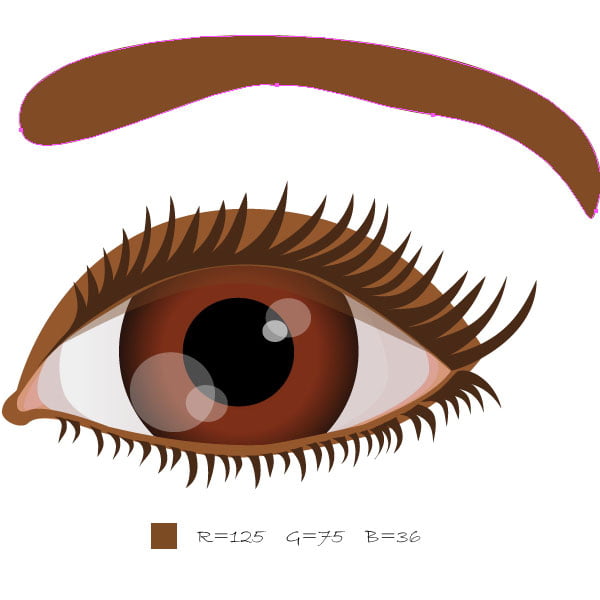
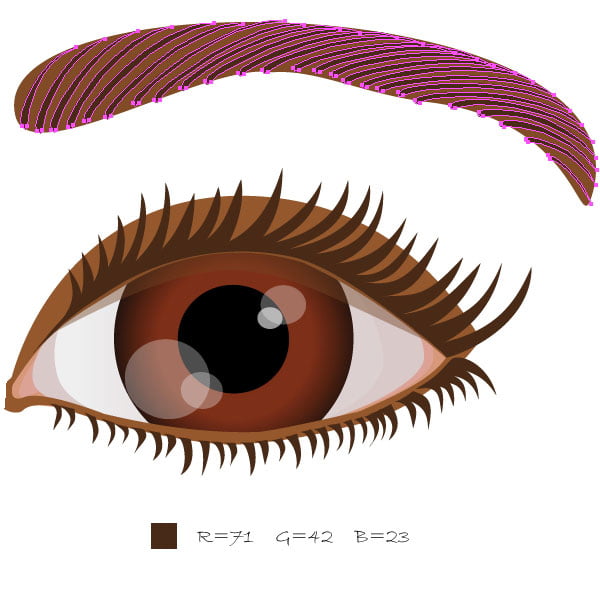
Group your eye shapes (Cmd / Ctrl + G). With the Pen tool create the basic brow shape and fill it with the color (R=125, G=75, B=36). For the darkest brow areas I used the color (R=71, G=42, B=23).
Group your brow shapes (Cmd / Ctrl + G).
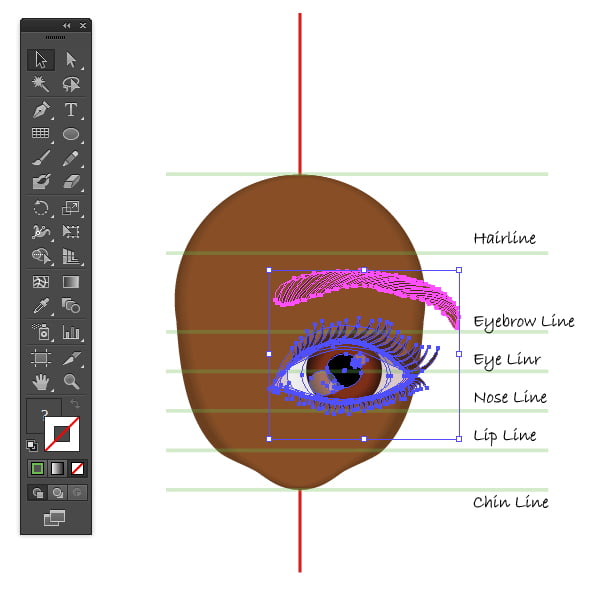
With the Selection Tool select the eye and the brow, a bounding box displays around them. Move the objects by dragging. Then use the bounding box to scale the eye and the brow objects by dragging a diagonal handle (one of the hollow squares along the bounding box) while holding Shift to maintain the proportions.
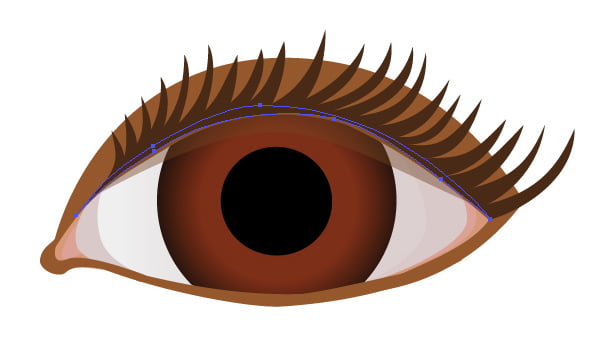
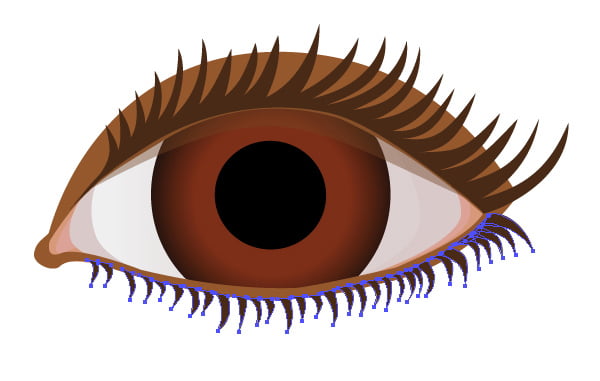
Draw the upper eyelid and lower eyelid with the Pen Tool (or from modified shapes). I used the color (R=112, G=66, B=32). Place the eyelid shape under the eyelashes in the layer stack.
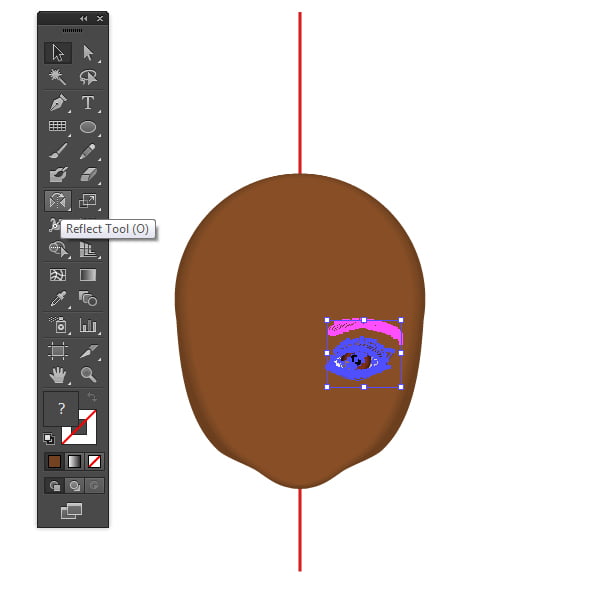
If you are satisfied with the result, reflect the copy relatively to the vertical guideline. Select the eye, the upper and lower eyelids and the brow. Now select the Reflect Tool (O) and just click on the vertical guideline to start the invisible axis line (which you want the objects to reflect). And now click the point to finish the axis line (anywhere on the vertical guideline) by holding Opt / Alt to reflect the copy of our objects. When you click for the second time, the copy of selected objects flilps over the axis line.
And now you've done it! Lock the eyes and the brows and go to the next step.
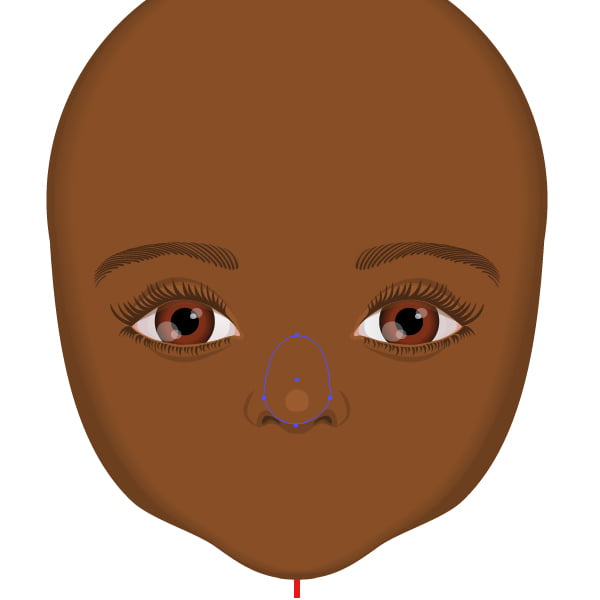
Step 8
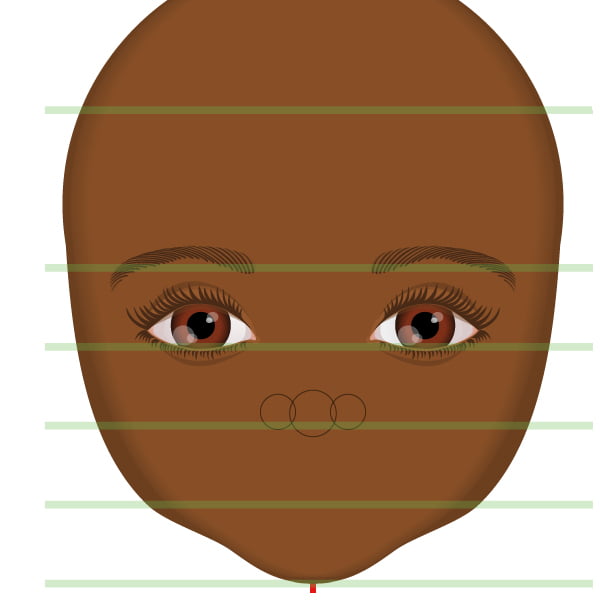
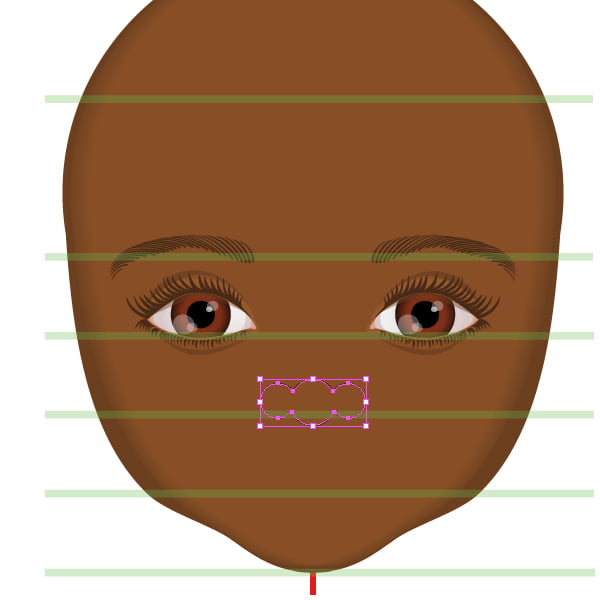
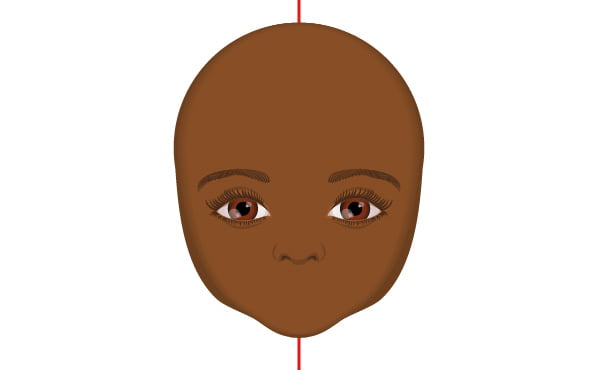
Let's create a little nose. Just click on the Create New Layer icon and name a new layer "Nose". Start with constructing of three ellipses with any color stroke and no fill. Align the ellipses relativele to main guiges (and slightly move down), and go to the Transparency panel to reduce the Opacity. Then lock them to use just a guide.
Create the bottom shape for the nose. Duplicate the three ellipses, unlock and unite them. Fill the shape with the color (R=112, G=66, B=32). Modify this shape as shown below.
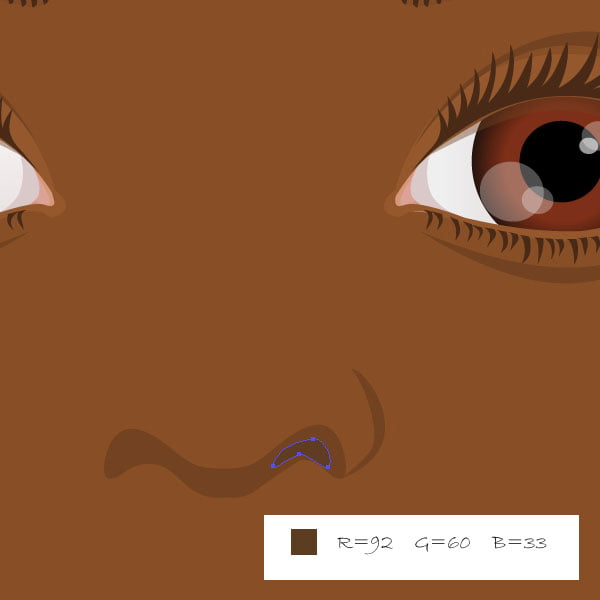
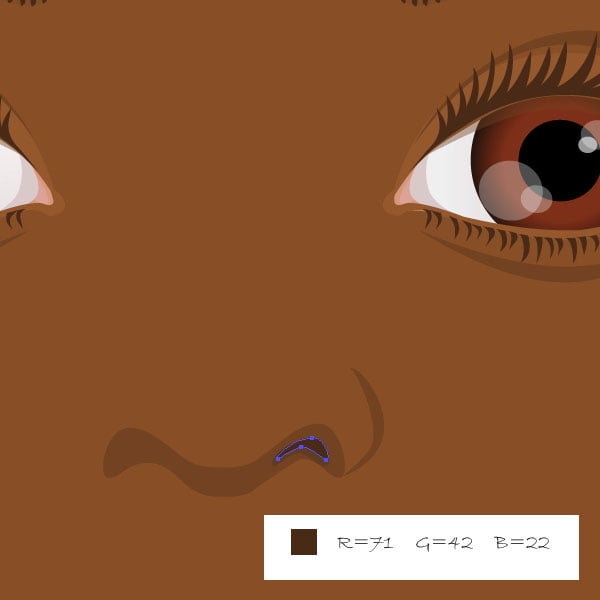
With the Pen Tool draw one of the little roundly nostrils. Fill it with the color (R=112, G=66, B=32). Then draw the little roundly shape and fill it with the color (R=92, G=60, B=33). Duplicate this shape, reduce the copy and fill it with a bit darker color (R=71, G=42, B=22). Group this shapes and reflect the copy relative to the vertical guide line.
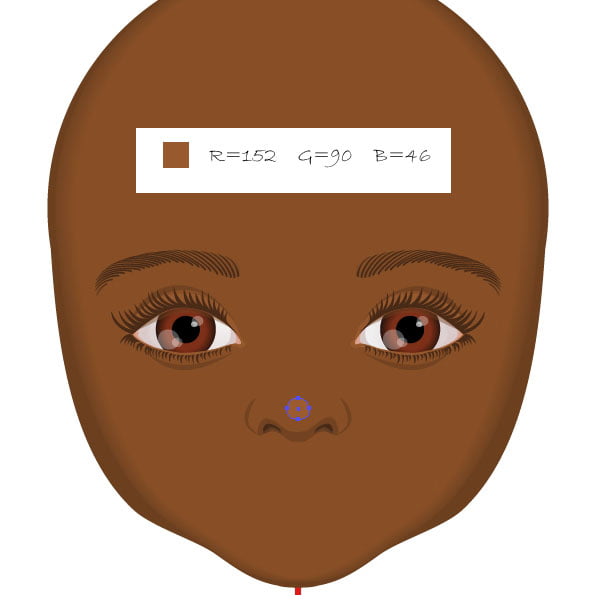
At last, make the nose slightly turned up. Draw a circle a little above the bottom of the nose shape and align it relative to the vertical guideline. Fill it with the color (R=152, G=90, B=46). And then modify it a little. This is the lighter area of the nose (bulge).
Duplicate this shape. Use the Eyedropper Tool to fill it with the base color of the skin. Send this shape backward (Object > Arrange > Send Backward) and modify it as shown below (you can use the Outline view to see all the nose paths).
At last, select both shapes and use the Blend tool with the Smooth Color in Blend Options.
Group the nose shapes when they're done (Cmd / Ctrl + G) and delete the guides (three ellipses). Go to the next step to create the lips.
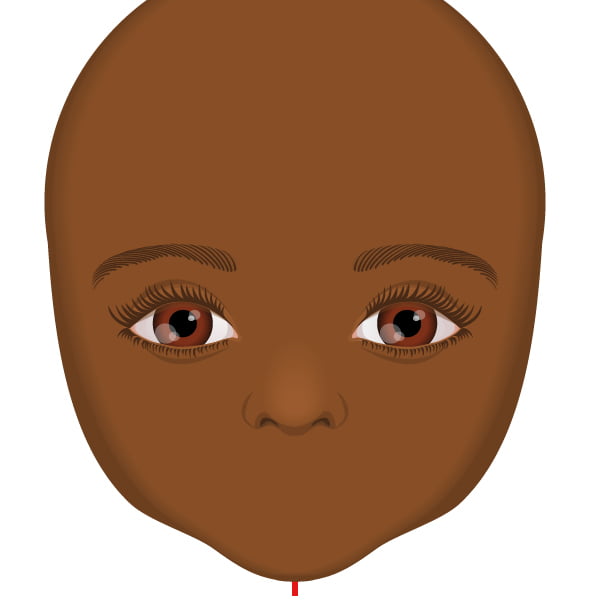
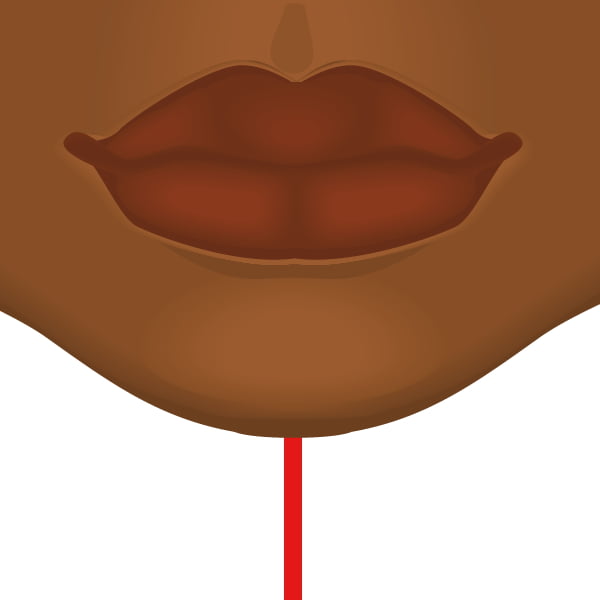
Step 9
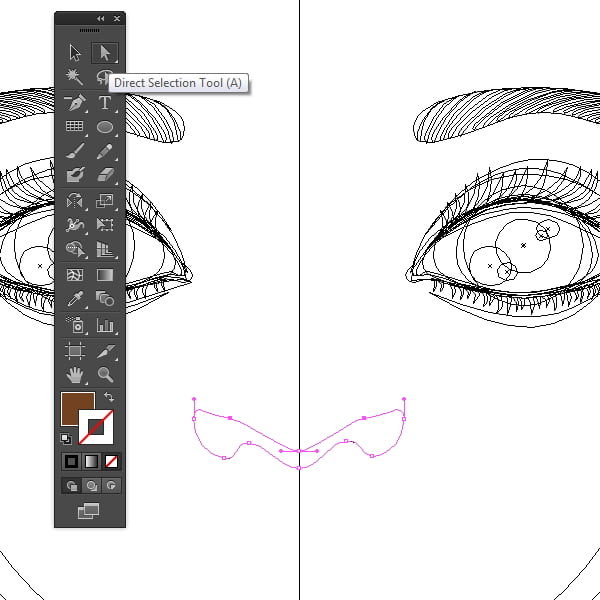
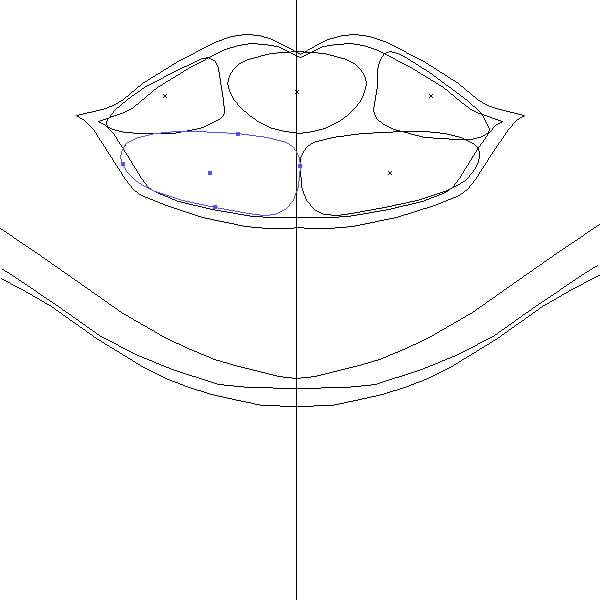
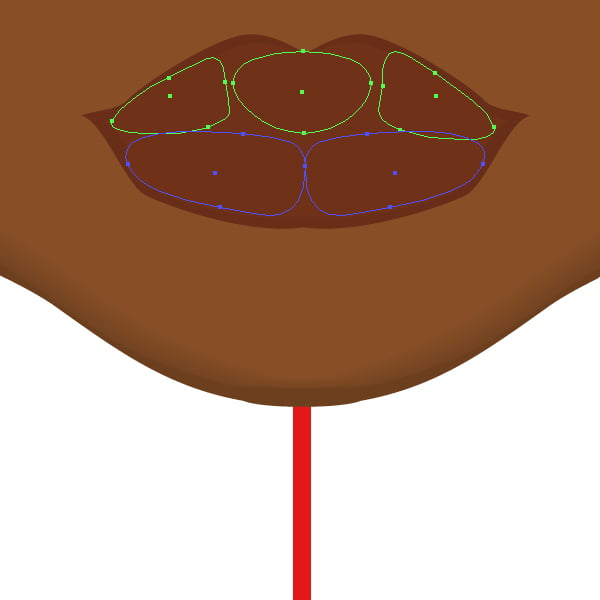
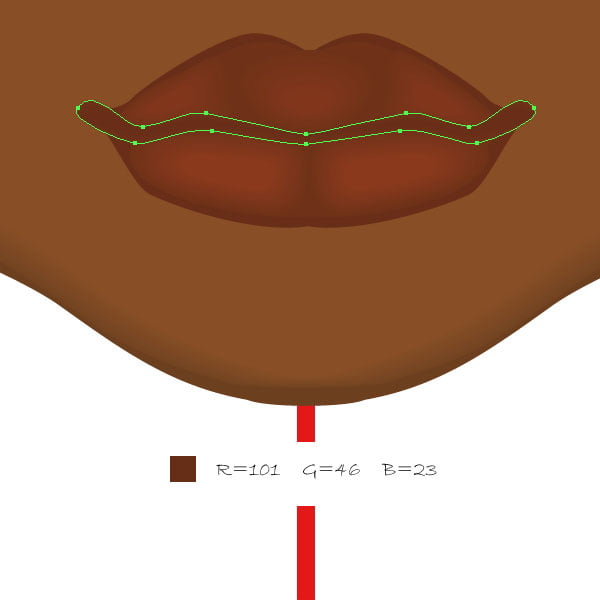
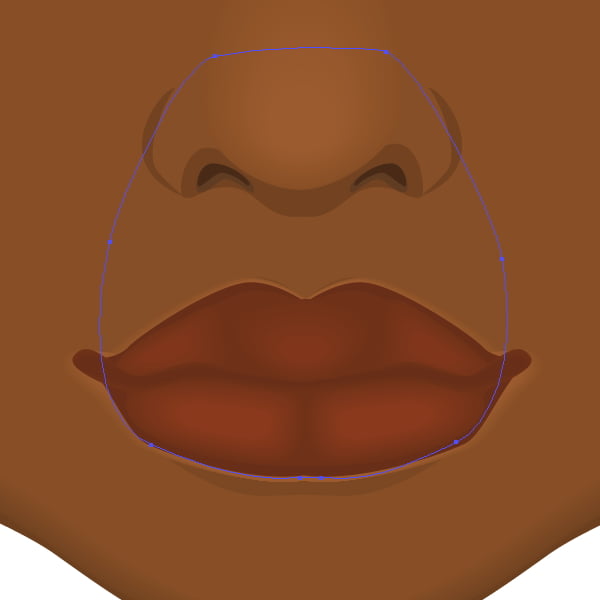
Let's draw the mouth. Create a new layer and name it "Mouth". Start by construction of five ellipses: three for the upper lip and two for the lower one. Reduce the opacity and lock them to use just a guide.
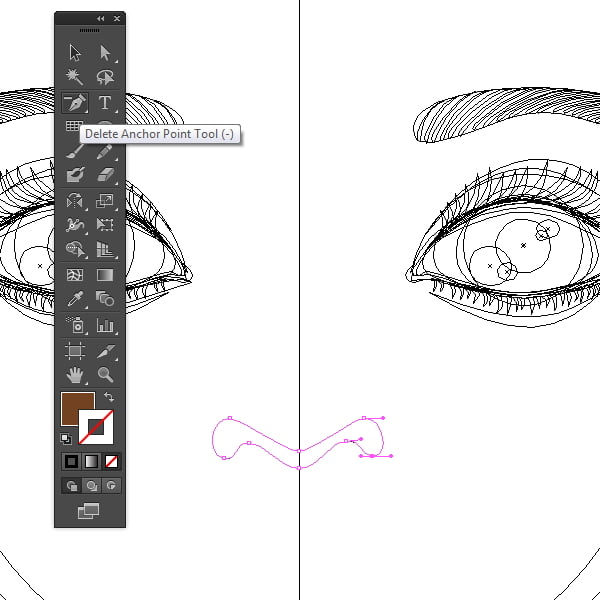
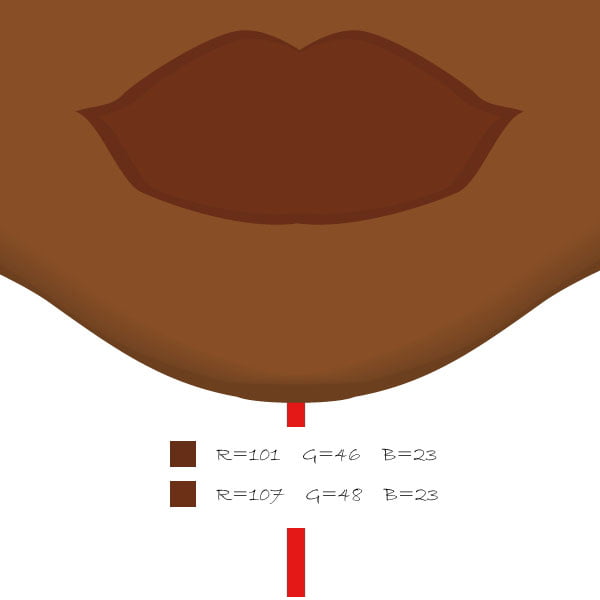
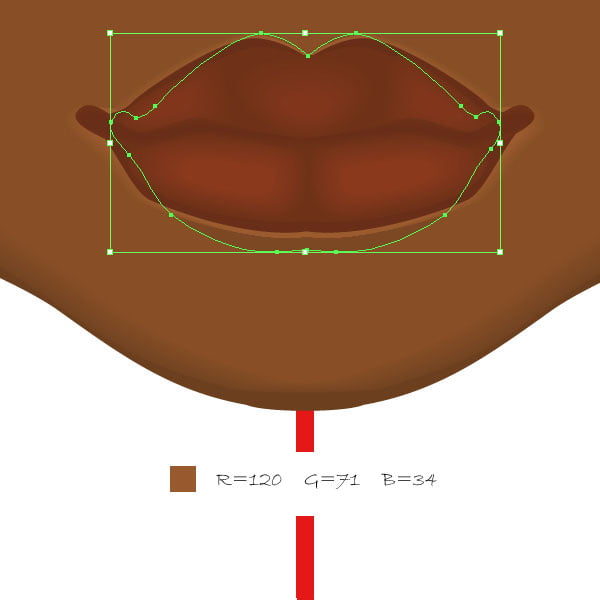
Now create the basic shape of the mouth. Draw the shape with the Pen Tool, then duplicate and reflect the copy, as shown below. Unite the shapes.
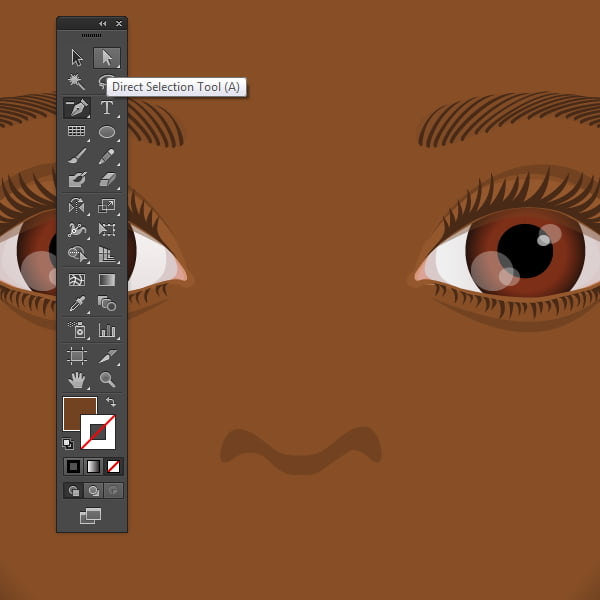
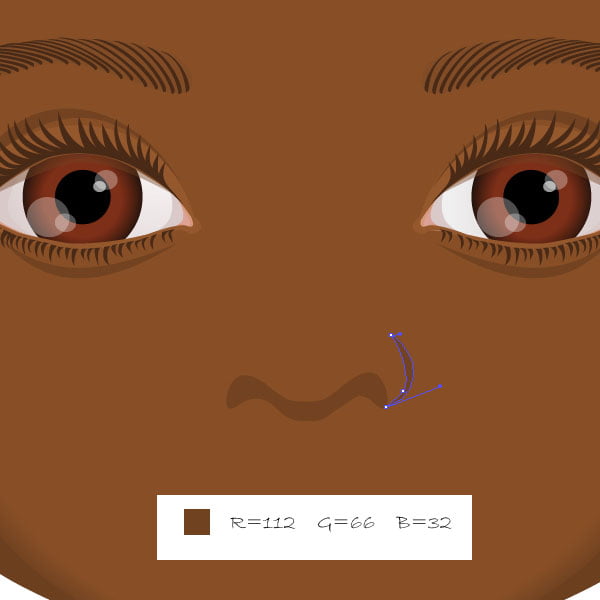
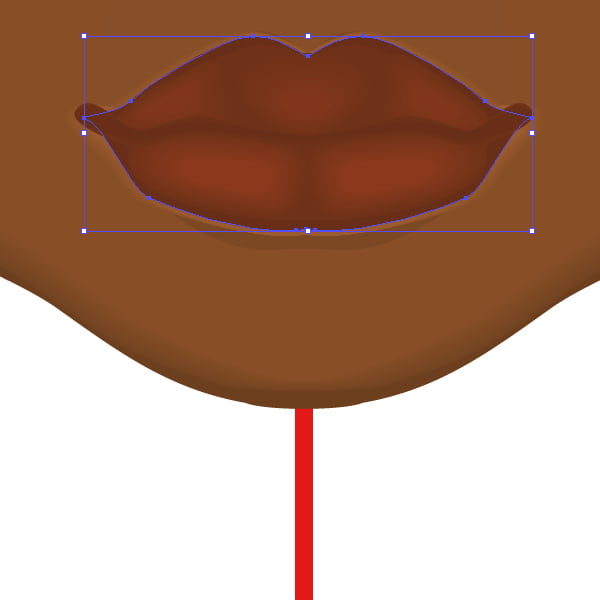
Now put in the colors for the mouth. Fill this shape with the color (R=101, G=46, B=23). Then duplicate it, slightly reduce the copy and fill the copy with the base color (R=107, G=48, B=23).
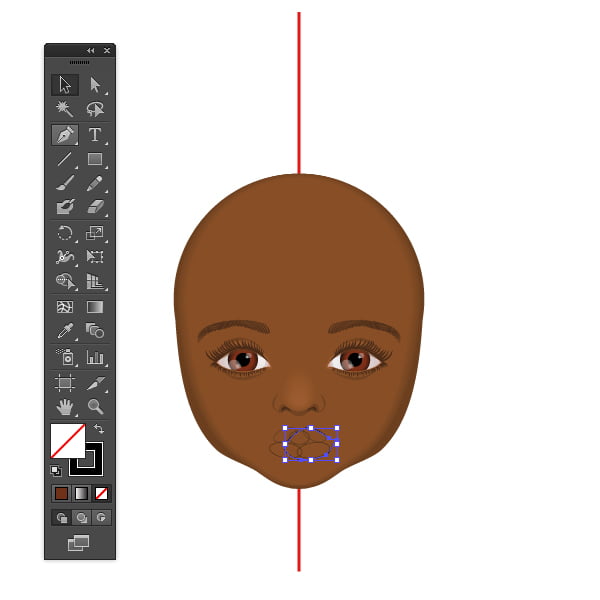
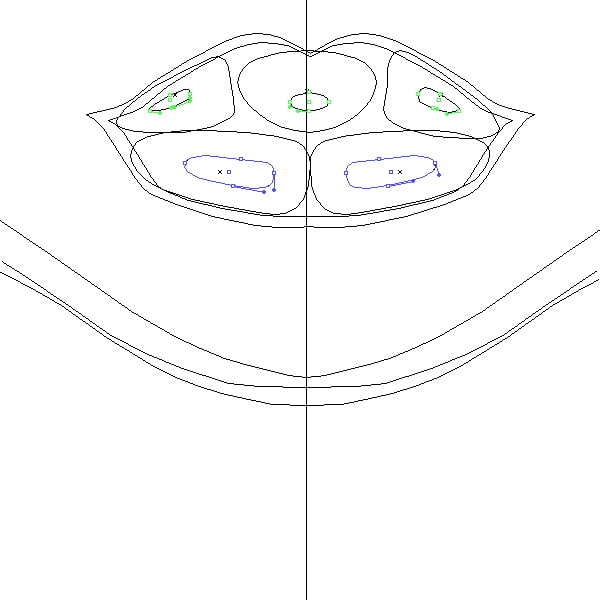
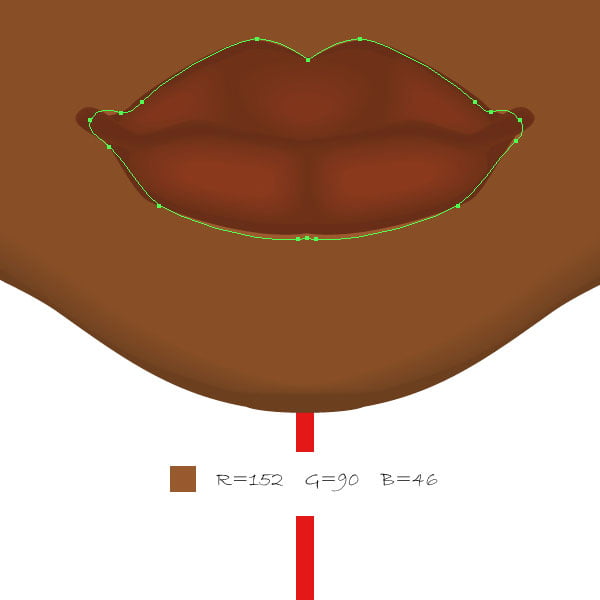
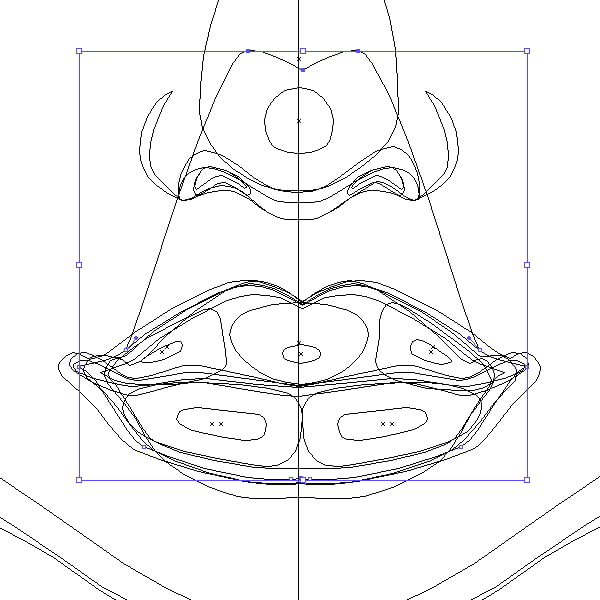
The lips are not all the same color. The upper lip is a bit darker than the lower. And there are some lighter and darker areas and the lightest outline. Duplicate our five ellipses, bring them forward and modify them to create the lighter areas. Then duplicate each of them and reduce every copy as shown below.
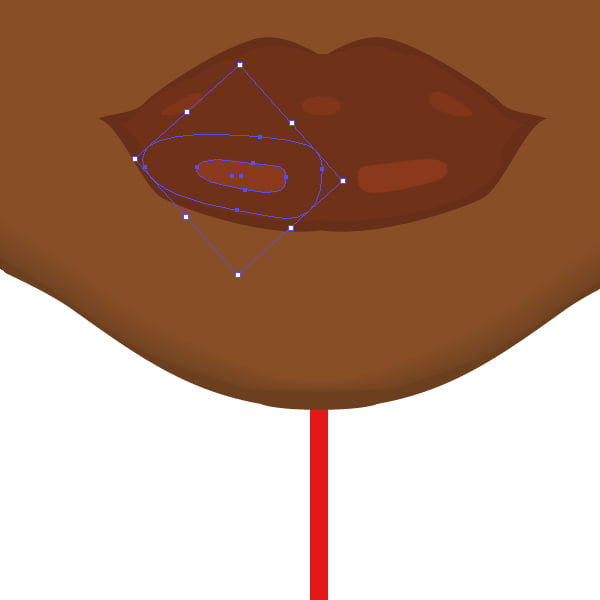
And now put in the colors for the shapes to create the lighter lips areas. I've used three colors for the lips. The basic color (R=107, G=48, B=23) is for the larger shapes. The color (R=125, G=53, B=25) is for the upper lip highlights (bulges). And the color (R=133, G=56, B=25) is a bit lighter for the lower lip highlights (bulges).
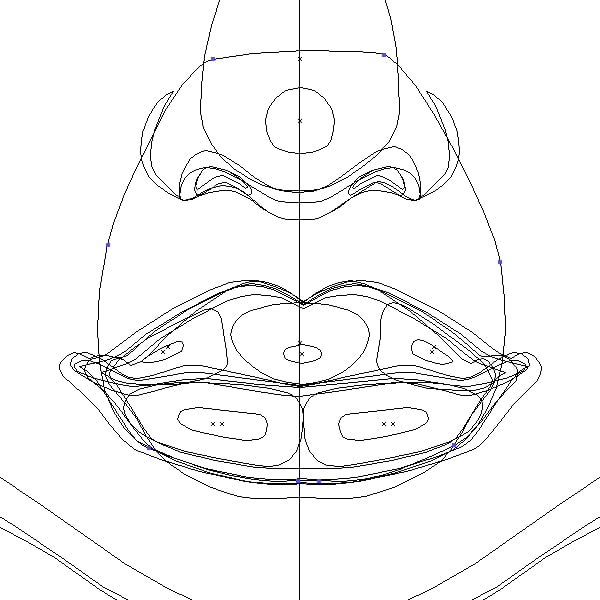
At last, select the every shapes and use the Blend tool with the Smooth Color in Blend Options.
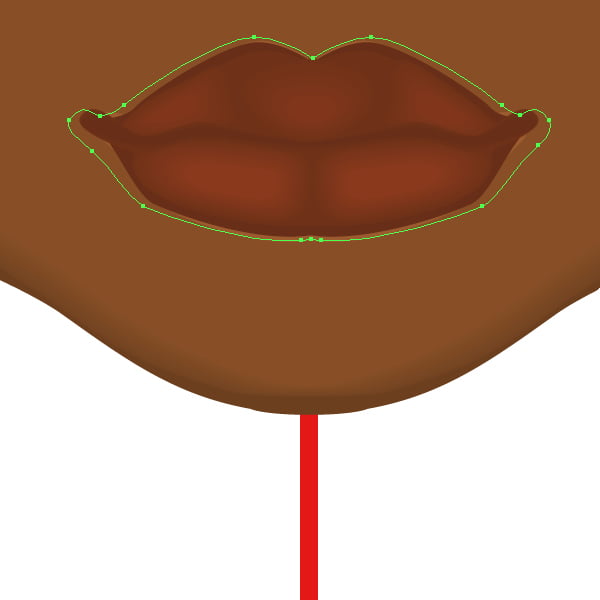
Now use the Pen Tool to create the shape of the corners of the mouth. You can draw only the half of the shape; reflect its copy and unite both shapes. Fill this shape with the color (R=101, G=46, B=23).
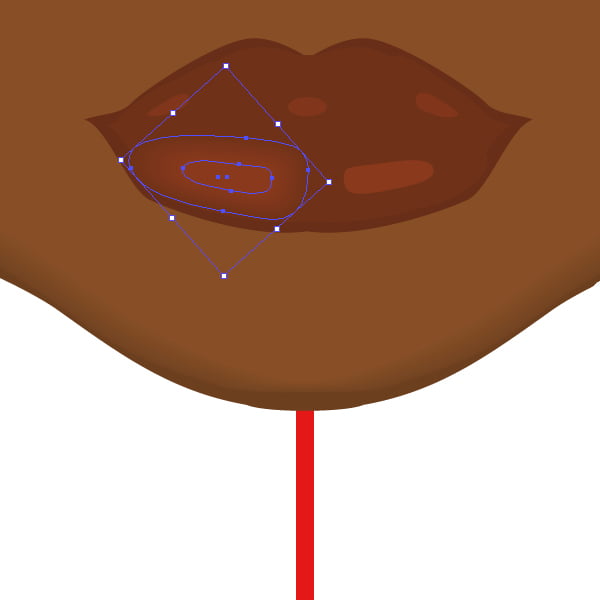
Now create the lightest outline of the mouth.
Select the basic shape of the mouth and the shape of the corners of the mouth. Duplicate each of them and unite them. Decrease the vertical size of this shape as shown below. Fill this shape with the color (R=152, G=90, B=46). This is the color of the lighter areas of the skin.
Duplicate this shape two times. Fill first copy with thebasic color of the skin and send it backward. Increase the size of this shape while holding Opt / Alt to resize from the center of the shape as shown below.
At last, select both shapes and use the Blend Tool with the Smooth Color in Blend Option.
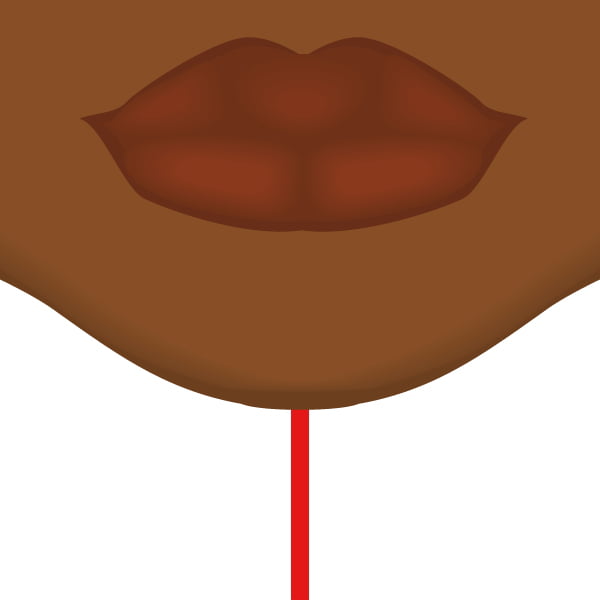
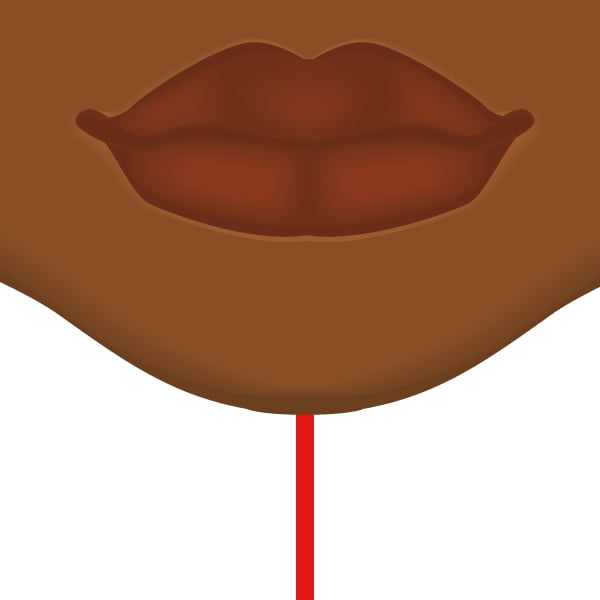
Create some shadow under the lips. Select the second copy of the shape. Fill it with the color (R=120, G=71, B=34) and send backward. Modify this shape as shown below.
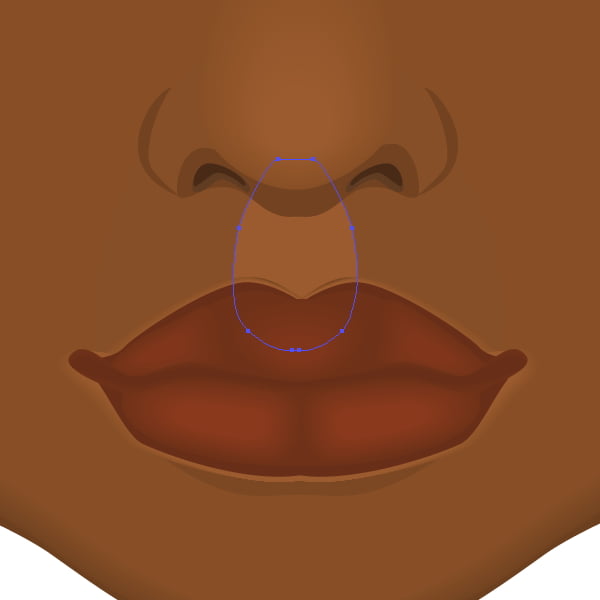
Usually the child's upper lip rises sharply and protrudes a little when the child is not smiling.
Now select the basic shape of the mouth, and duplicate it. Place the copy under the lightest outline of the mouth in the layer stack. Modify this shape as shown below. And then fill it with the base color of the skin.
Now duplicate this shape and fill it with the color of the lightest areas of the skin. And now decrease its size while holding Opt / Alt as shown below.
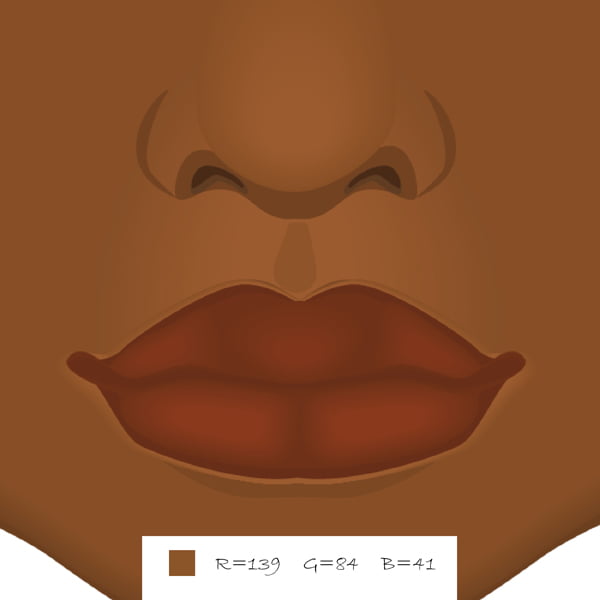
Now select both shapes and use the Blend tool to make the smoothness.
Then draw the shape with the Pen Tool and fill it with the color (R=139, G=84, B=41).
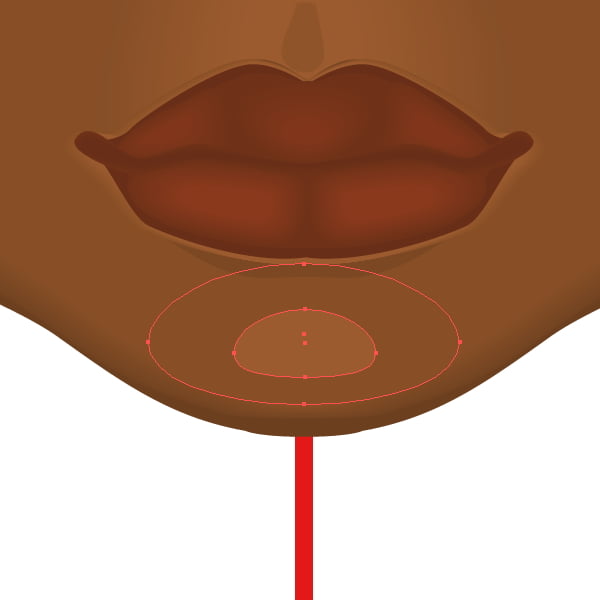
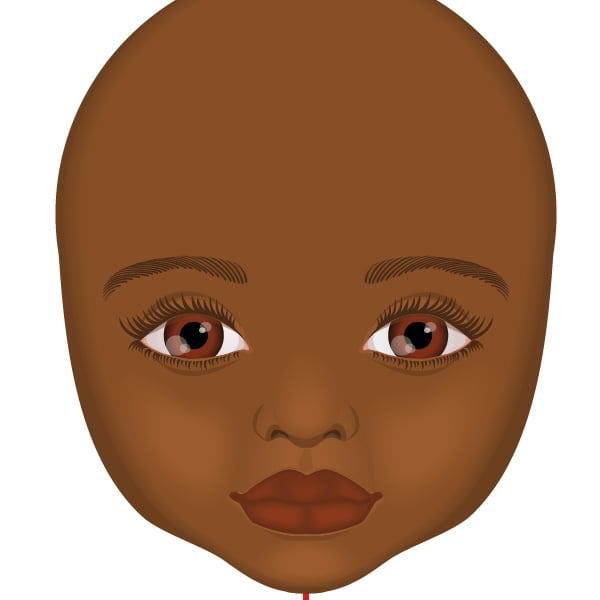
Step 10
Now create the chin with Blend Tool from two reducing ellipses. The color of the lower ellipse is the base color of the skin. And the color of the upper ellipse is the color of the lightest areas. Place the chin under the mouth in the layer stack.
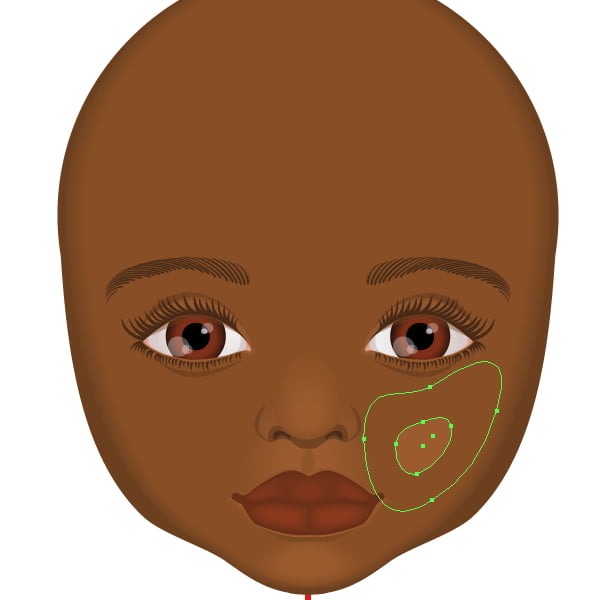
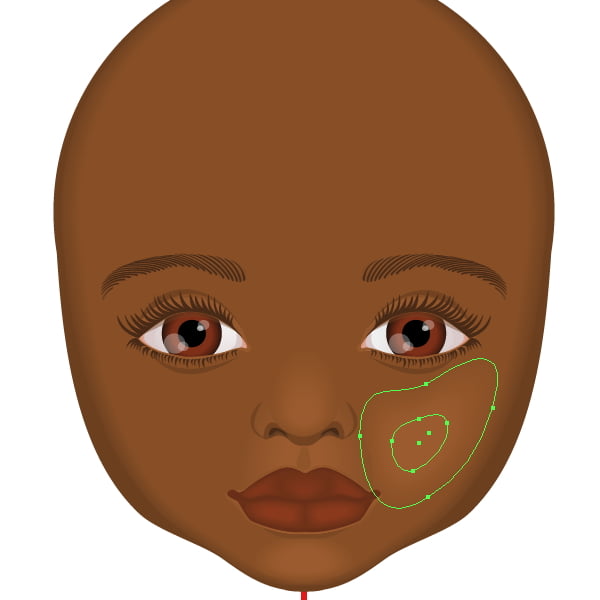
Step 11
And now create the full cheeks. With the Pen Tool draw some round shape and fill it with the basic color of the skin. Then duplicate the shape, modify and fill it with the color of the lightest areas. Use the Blend Tool.
If you are satisfied with the result, reflect the copy of the cheek relative to the vertical guideline as shown below.
Step 12
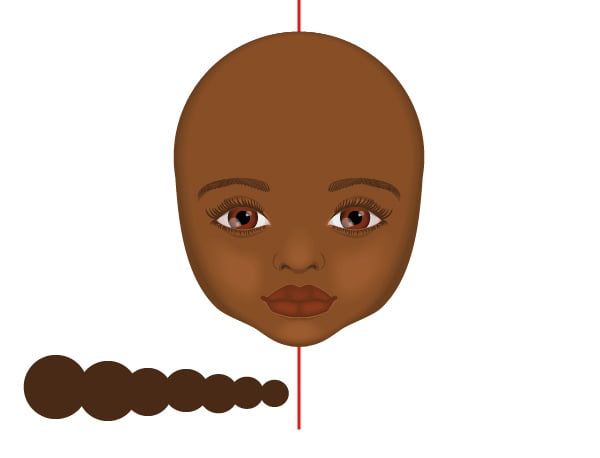
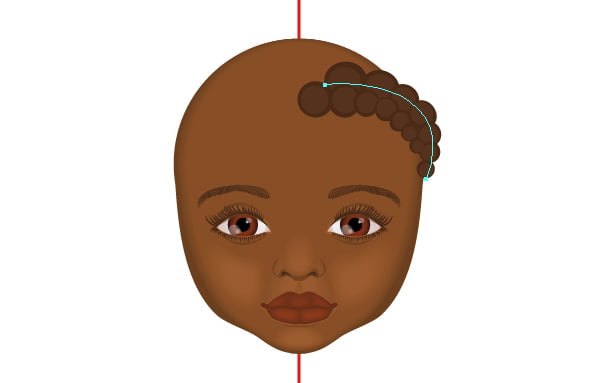
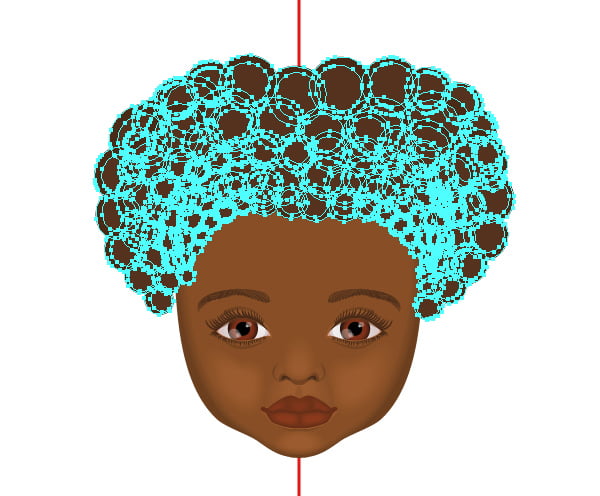
Let's draw the stylized afro.
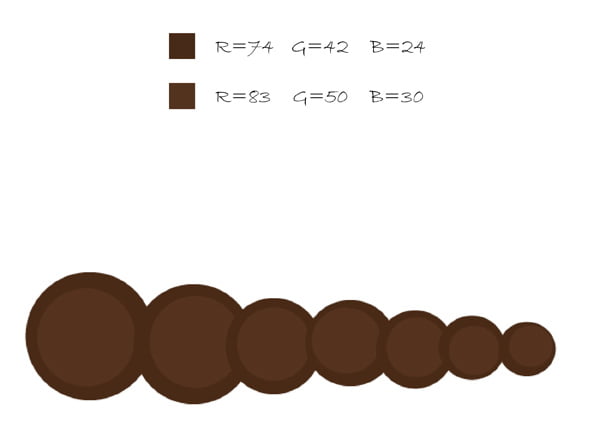
I'm going to create a new art brush using some circles. So select the Ellipse Tool (L) and draw a line of some slightly decreasing circles or ellipses as shown below. Fill them with the color (R=74, G=42, B=24).
While selected, go to Object > Transform > Transform Each.... When you click on Transform Each, the Transform Each panel appears. Choose the value of Scale and Move your request and click on the button Copy. While shapes is selected, fill them with the color (R=83, G=50, B=30).
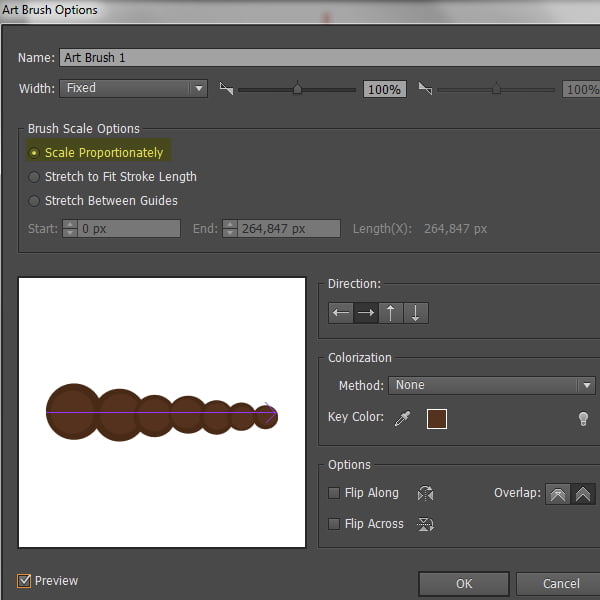
Select all shapes. Drag and drop them into the Brush panel and select Art Brush 1 (you can rename it). When Art Brush panel have appeared, click on Scale Proportionately and choose Method None in Colorization. So we've got the art brush for afro.
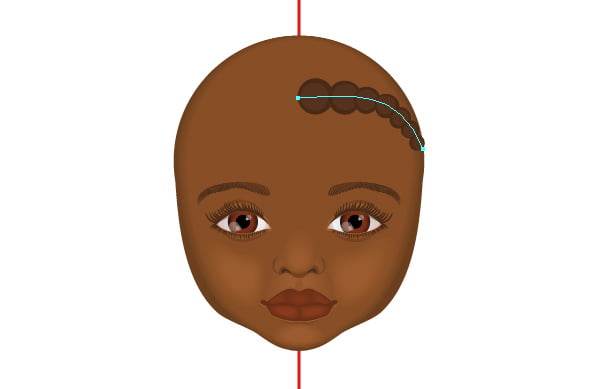
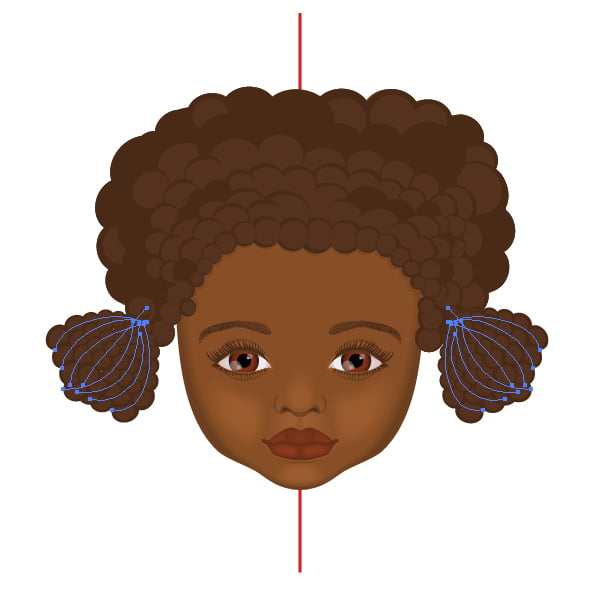
Create a New Layer and name it "Hair”. I’m going to build up the afro by using the new art brush.
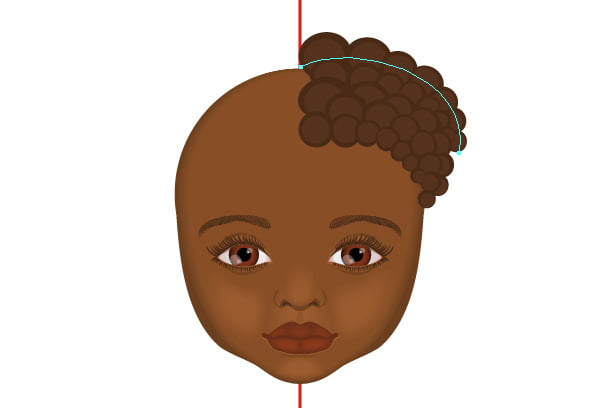
Select the brush in the Brushes panel. Using the Paintbrush Tool build up right or left side of the hair gradually falling from the face.
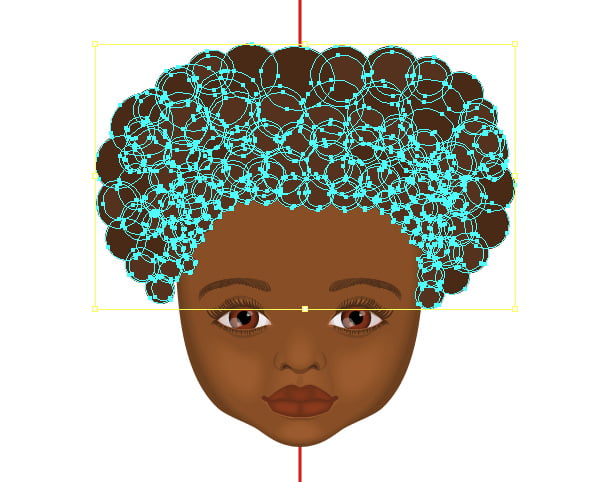
If you are satisfied with the result, reflect the copy of the hair relative to the vertical guideline. Then slightly modify the copy as shown below.
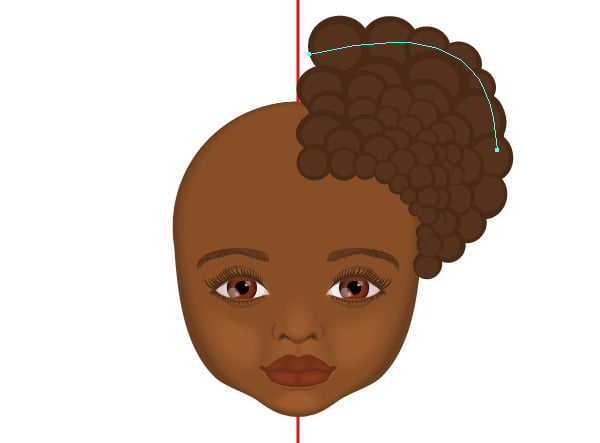
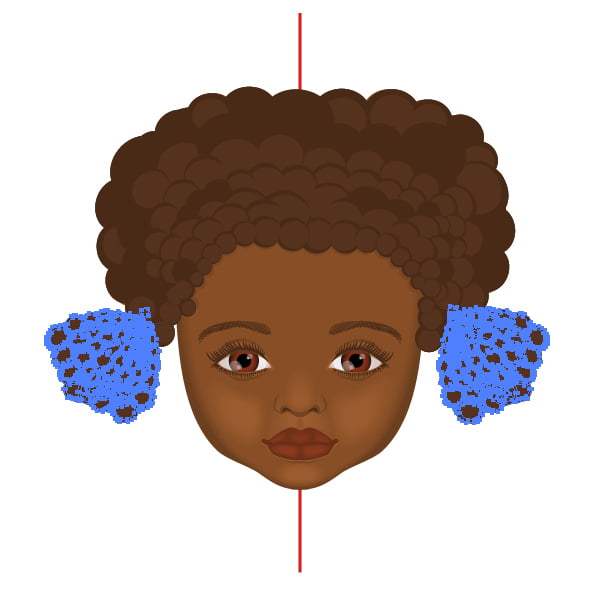
Select both sides of hair and expand them (Object > Expand Appearance).
Then modify afro as you want. I've changed the color on certain small circles and moved some of them slightly.
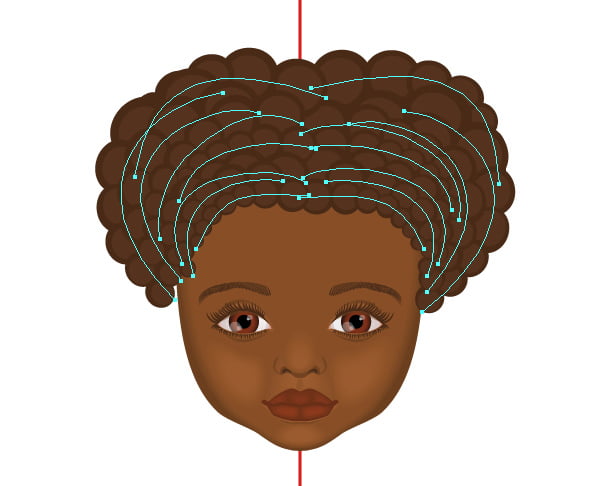
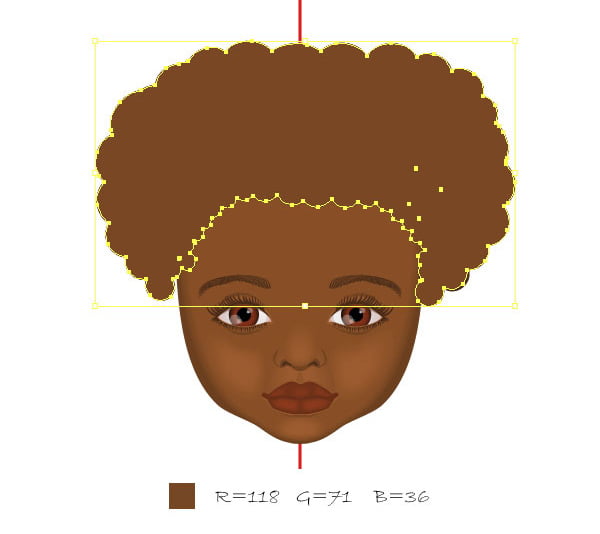
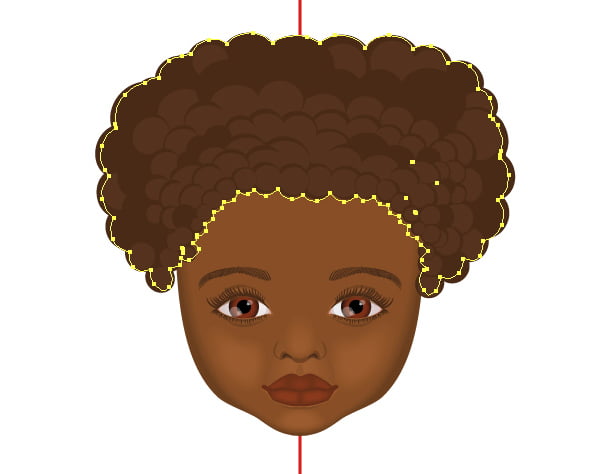
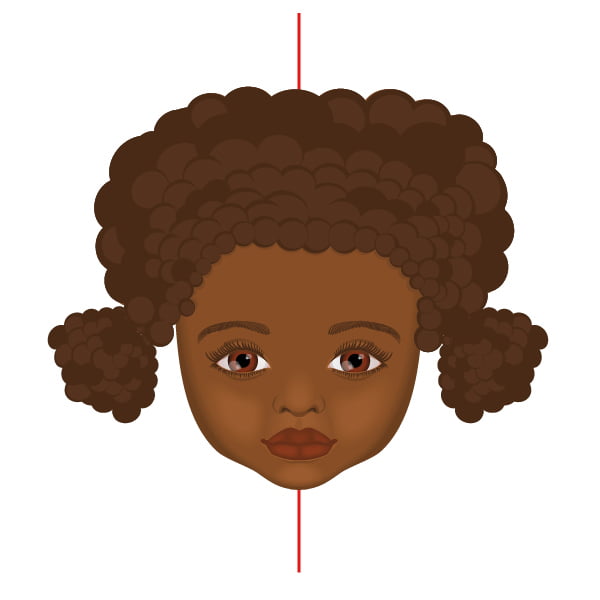
Now create some shade around the hairline. Select all the hair, duplicate it and unite all shapes. Fill this shape with the color (R=118, G=71, B=36) and send backward. While selected, increase the size of this shape down as shown below.
And now repeat this action for the ponytails.
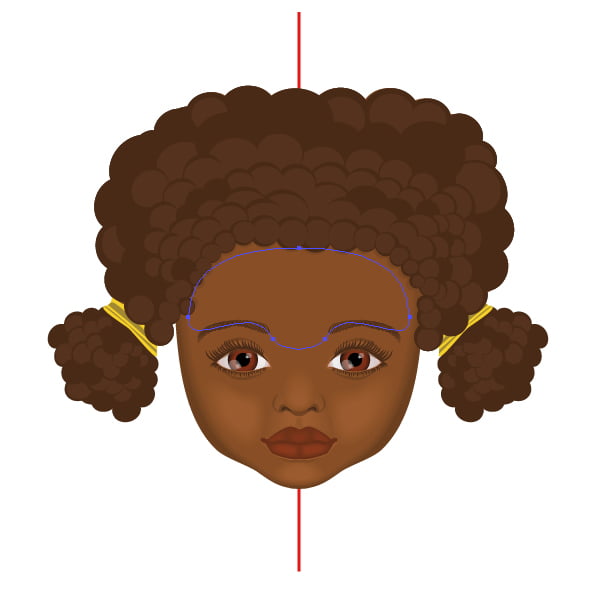
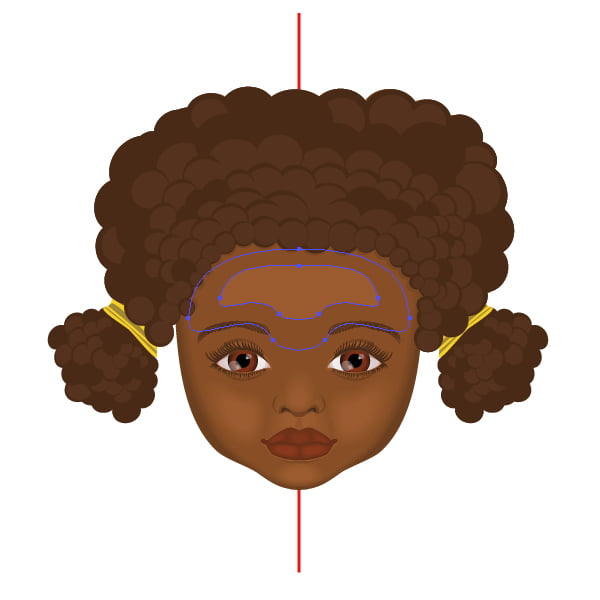
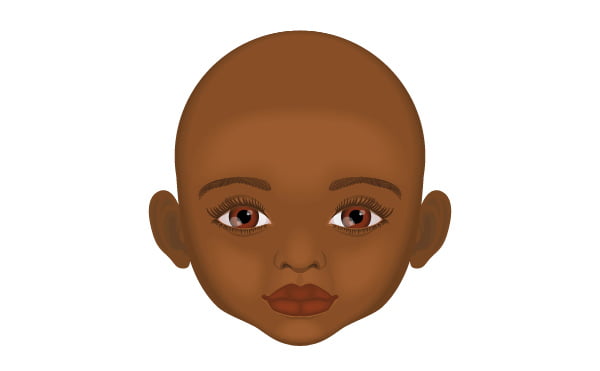
Step 13
I'm going to draw the forehead. Let's create a large shape as shown below. You can draw it with the Pen Tool or unite some modified ellipses. Fill the shape with the basic skin color.
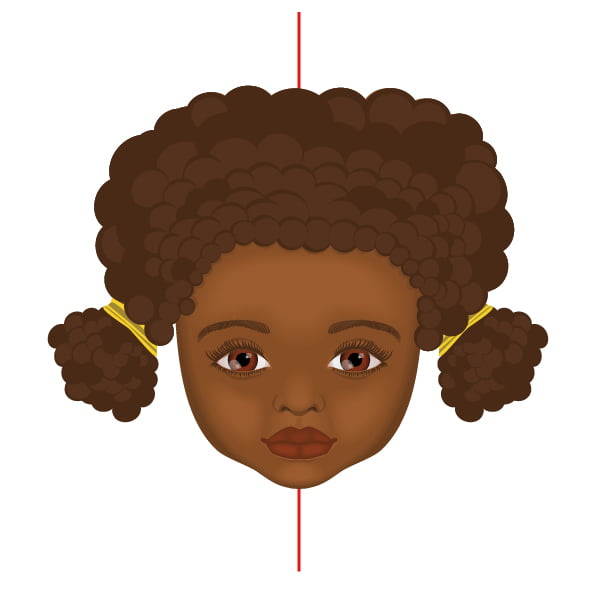
Duplicate this shape and decrease its size while holding Opy / Alt. Fill it with the lightest areas skin color. Select both shapes and make blend.
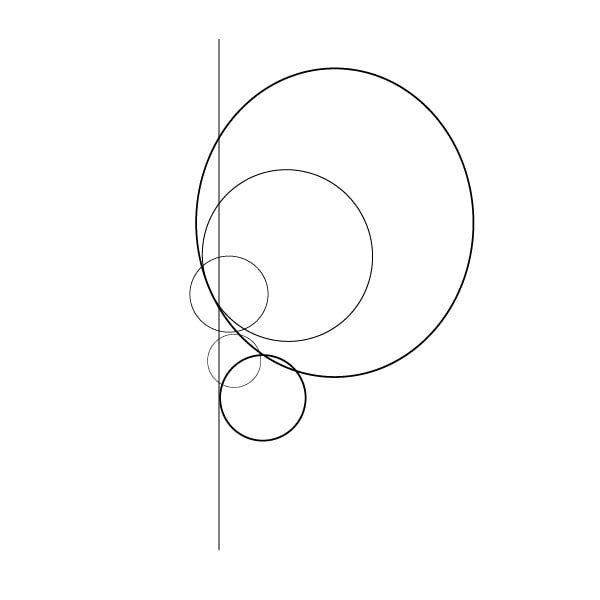
Step 14
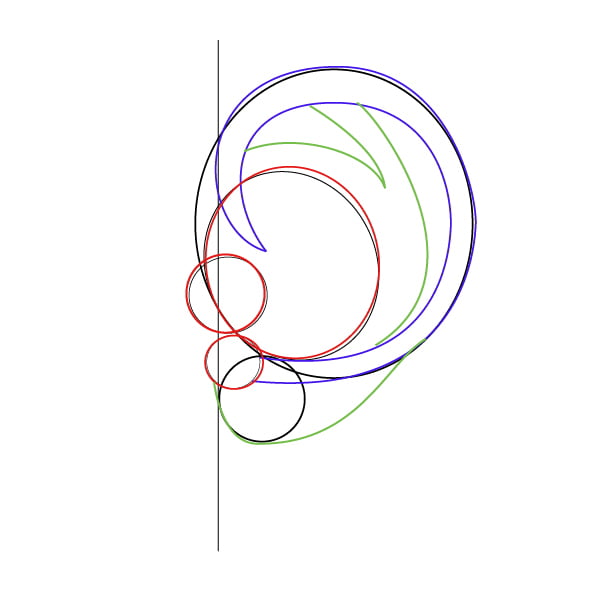
And now let's create the ears. Draw some ellipses as shown below. Then add some paths. This is our guide for front side of the ear.
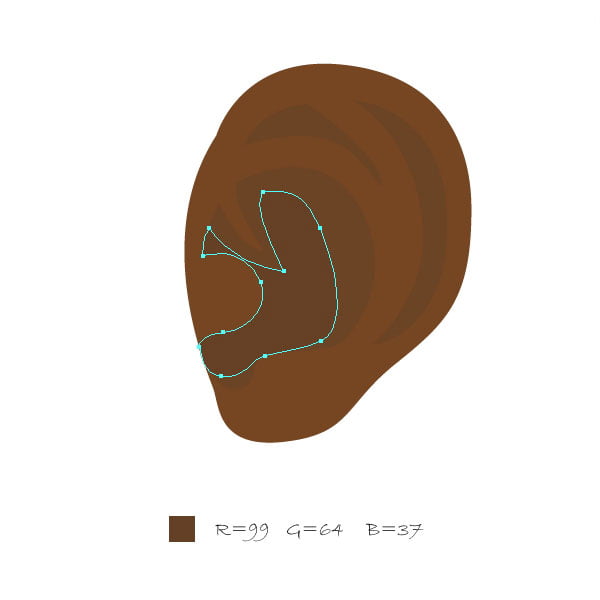
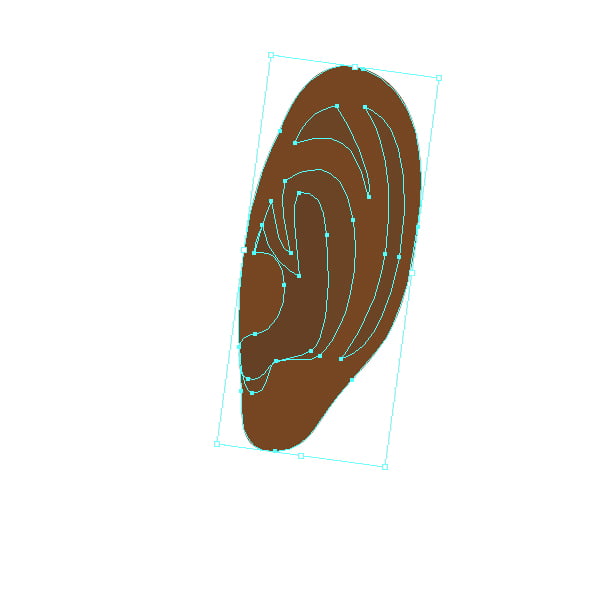
Now with the Pen Tool draw the ear. Then you can modify the ear shapes as you want. We don't need any detailed ears. So use only three colors: the basic ear color (R=115, G=70, B=34) and two colors for the darker areas: (R=104, G=68, B=37) and (R=99, G=64, B=37).
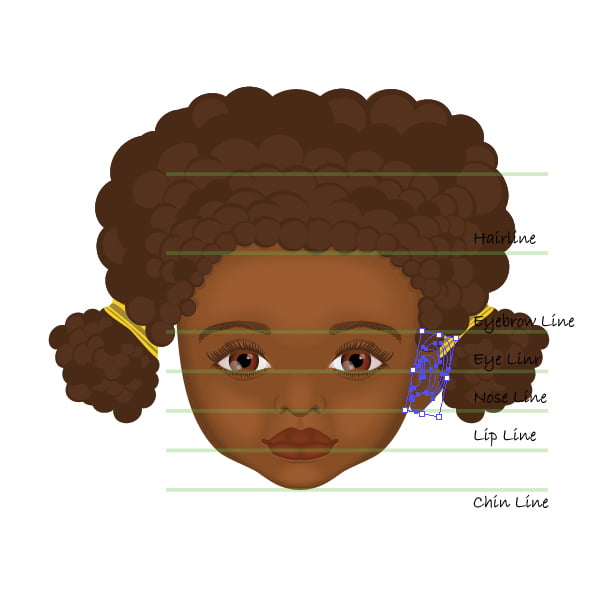
Place the layer "Ears" under the "Head" in the layer stack. Decrease its size, and reflect the copy of the ear relative to the vertical guideline.
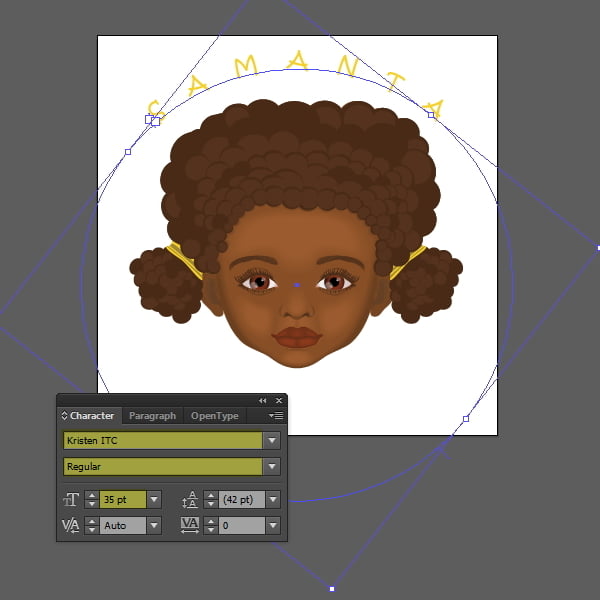
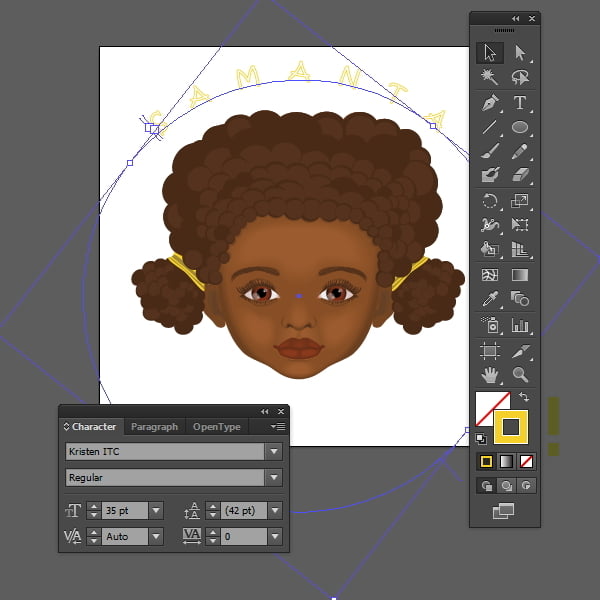
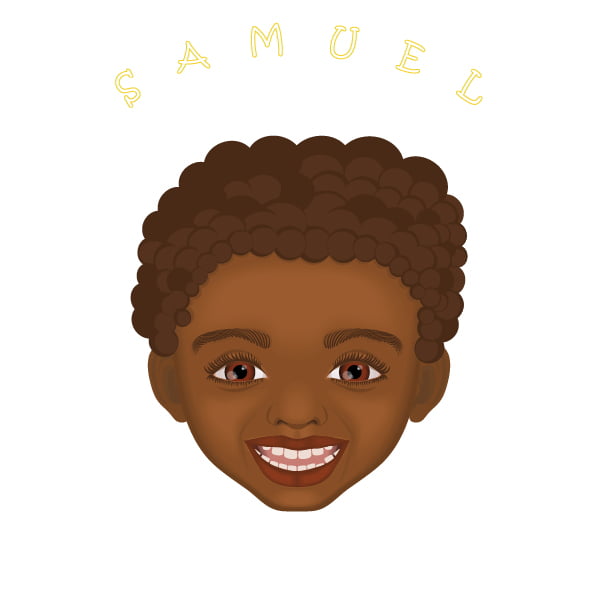
Step 15
Let's sign the portrait! Create a large circle. Select the Type on a Path Tool and click on a path-circle. Enter the name. I've used Kristen ITC font, size 35 pt.
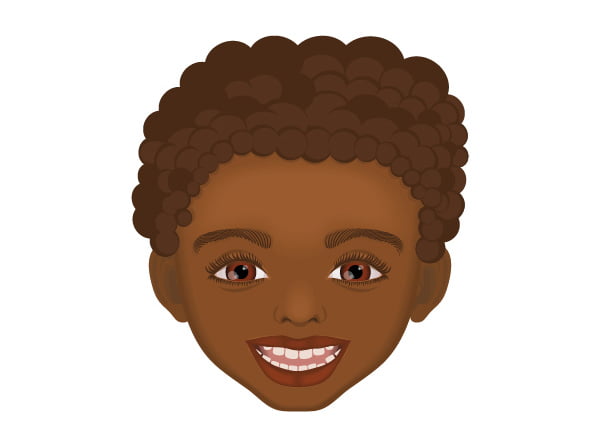
Congratulations, your portrait of Samantha is ready!
Step 16
And now you can create a portrait of her twin-brother Samuel.
The up-and-down proportions of the head are about the same in little boys as those in little girls. But all lines of features are usually square in boy's face. Square (and rugged) forms give a little boy a more masculine look.
Final Image
Here're our final portraits. Do follow this step-by-step tutorial and you can create a lot of cartoon child portraits. Create and Enjoy!
You can download the Cartoon Little Girl vector file absolutely for free by clicking on Download button at the beginning or in the end of this post. You need to register to download the EPS10 file.
Author: Mia Ria
Hello! I'm Mia Ria from St. Petersburg, Russia and I adore drawing. I'm freelancer and I spend most of my time working in Adobe Illustrator or Photoshop. My inspiration is from cartoons and video games and I try live for dreams. You can visit me on deviantART and Behance.
|