|
In this article we'll check out a couple of ways how to reduce extra points on the Bezier curves or paths using Adobe Illustrator standard tools and plug-ins. You can easily compare the proposed methods, as I evaluated them qualitatively and quantitatively.
Sooner or later, every graphic designer faces with the problem of path simplification. The fact is, extra points on the path increase the size of the vector file and make path edition very difficult (and even impossible). The Delete Anchor Points Tool and the Remove Selected Anchor Points button on the Control panel are designed to delete points; however, after removing points in these ways the trajectory of the path changes significantly, which means that it will not retain its original form. But what we need is to delete extra points and retain the form of the path with minor changes only. I think our task is clear. Now let's find the solution.
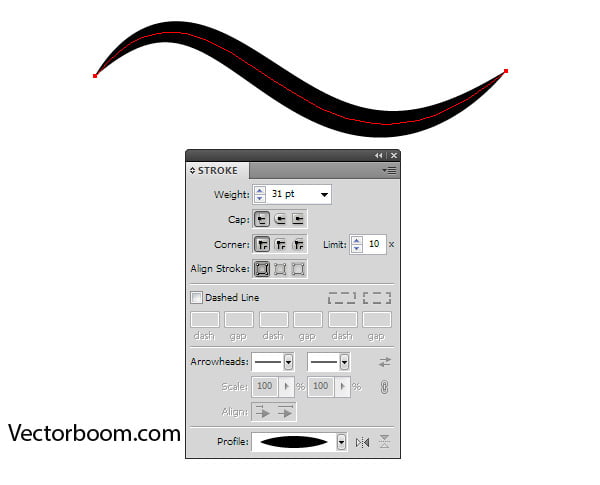
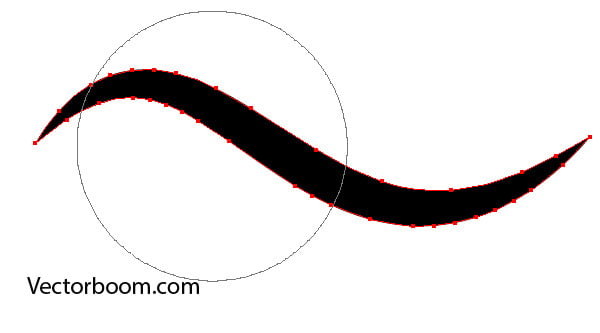
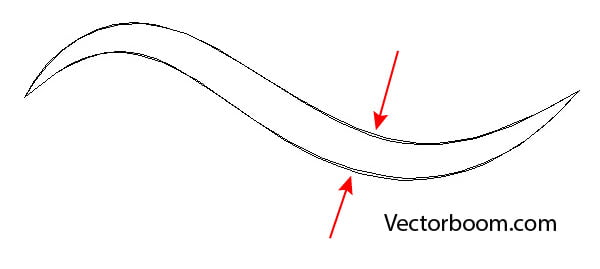
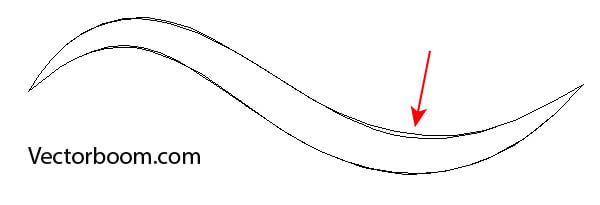
To demonstrate it, I created a curved segment; I applied a variable width profile from the Stroke panel to it.
Go to the Object > Path > Outline Stroke or Object > Path > Expand Appearance.
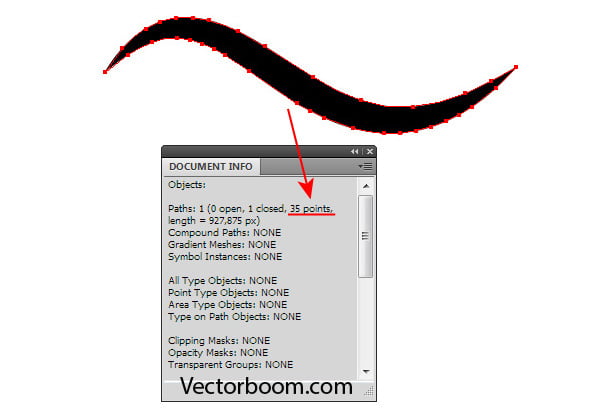
We see now a typical example of extra points creation as a result of one of the most common operations. If you open the Document Info panel (Window > Document Info), you'll see that a relatively simple form contains 35 points.
Simplify function
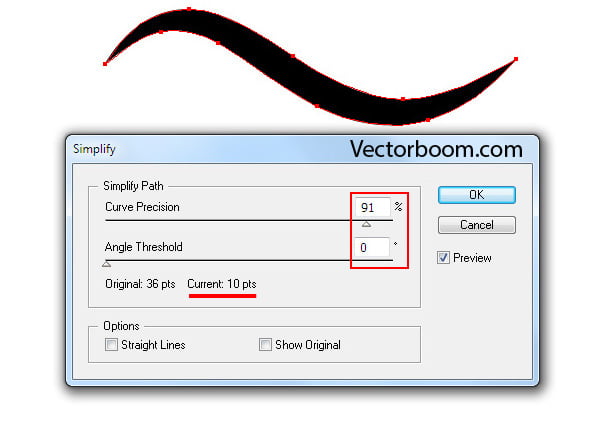
The command Object > Path > Simplify… is designed to delete extra points. For Curve Precision values that approximately equal 90% and Angle Threshold= 0 we receive pretty good result. The number of points was reduced for more than 50% and in my case it is now 10.
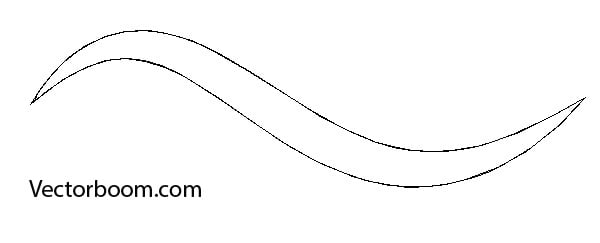
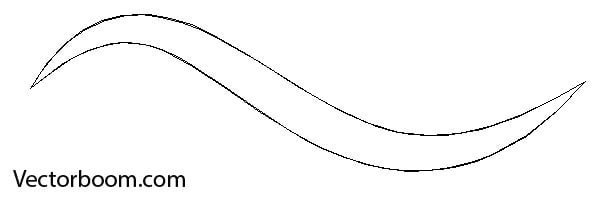
To analyze the changes in the path ways, in this and in the next steps, I'll examine the initial and the final form of object, which lie one above the other in the Outline mode (View > Outline). As you can see, the trajectory hasn't changed much.
We also can remove points locally, i.e. in places selected by user. To do so, select a couple of points with the Lasso Tool, for example, then go to the Object > Path > Simplify…. However, this method has some disadvantages. Sometimes we might get some loops formed on corner points, as it is indicated on the figure below.
Despite this, we can remove a lot of extra points from many selected paths, for example, in textures, which are result of automatic tracing. When working with complex forms containing many corner points, it is hard to reduce the number of points significantly and at the same time preserve the object's form.
Path simplification with the Warp Tool
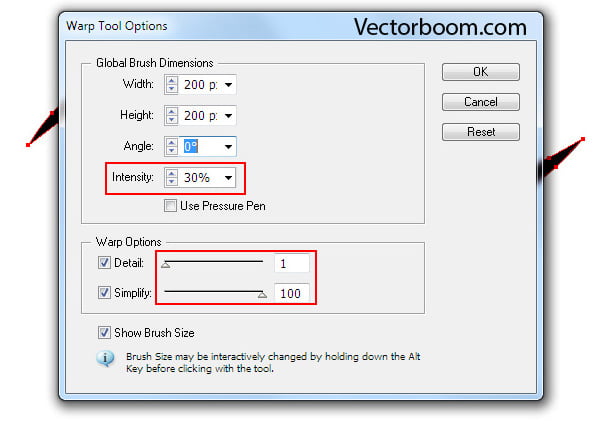
This method is not very popular. Honestly , I found out about it just today. Well, let's try it. Click twice on the Warp Tool icon on the Tools panel, which opens the dialog box with the settings of the tool. By experimenting, I picked the settings which suit for our task perfectly. You can see them on the figure below.
To my point of view, the size of the brush should be set a couple of times bigger than edited object.
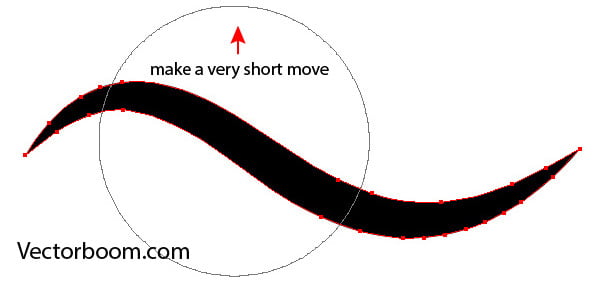
Select the object, then by clicking of the mouse button make a very short move in the place, where we'd like to remove some points.
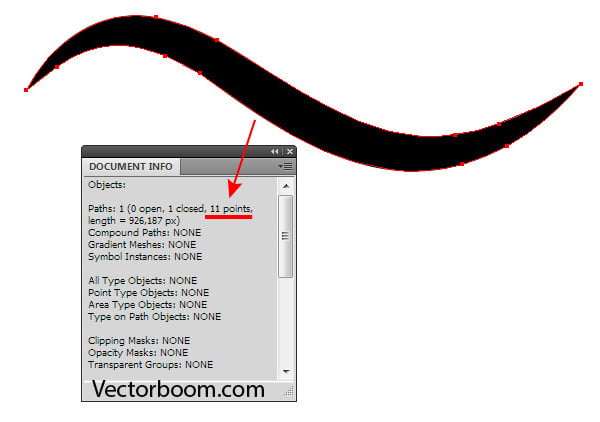
I was able to reduce points to 11 by using this method.
At the same time, the paths' trajectory was not significantly changed, although the difference is more pronounced than after usage of simplify function.
The advantage of this method is the ability to work locally. The disadvantage is that the result depends on your patience and accuracy, in other words, on your skills. Besides, not every action on the path will reduce the points; this should also be taken into consideration.
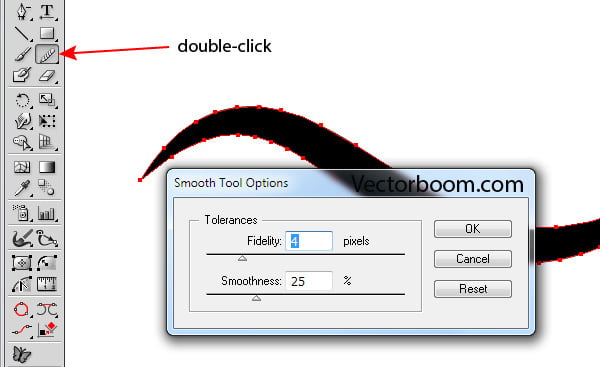
Path simplification with the Smooth Tool
Click on the Smooth Tool icon twice to open the setting window. I worded with parameters that you can see on the figure below, but you're free to experiment with different values for optimal results.
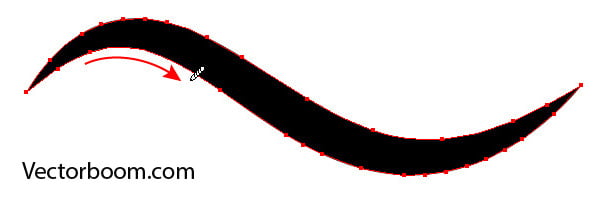
Now move the tool along the part of the path which contains extra points.
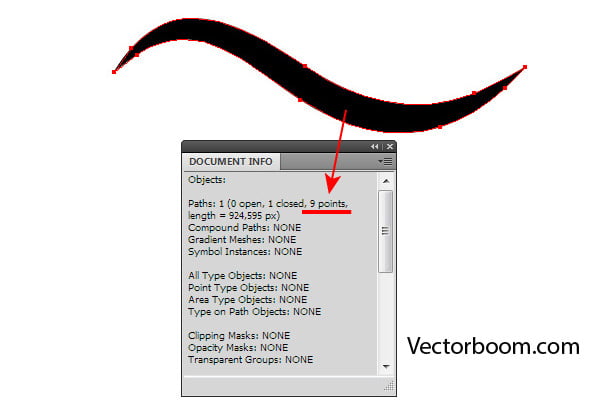
Using this method, I reduced the number of points to 9.
As in the case with the Warp Tool, your result depends on your skills, though, I must mention, the Smooth Tool was easier to use.
I think the Warp Tool should be used for rough and quick path processing, whereas the Smooth Tool is suitable for fine work.
Path Simplification with the VectorScribe and InkScribe plug-ins
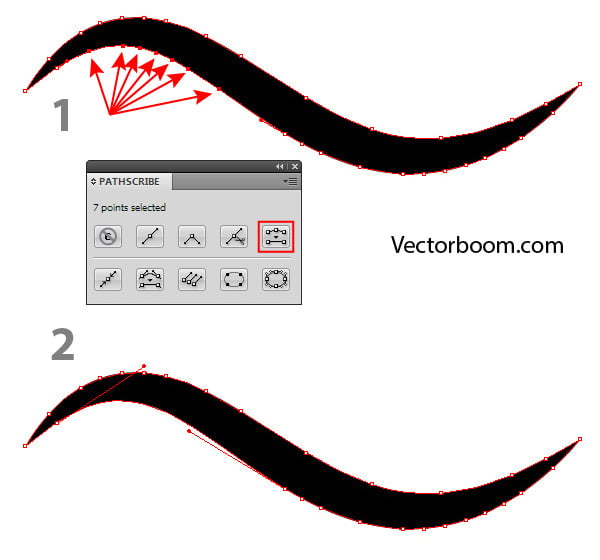
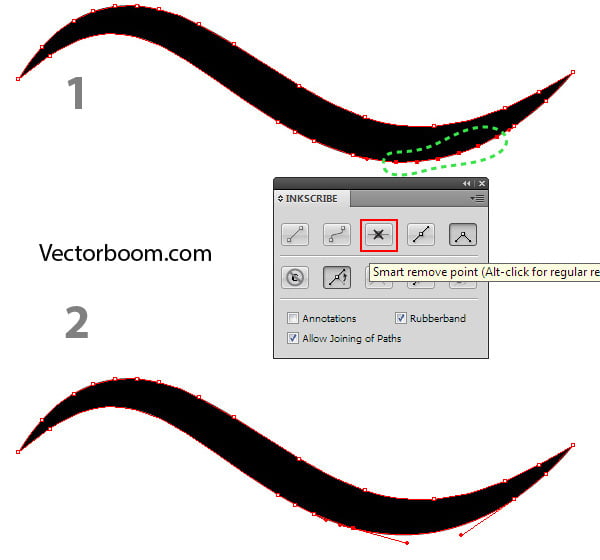
The plug-in VectorScribe has the Smart Remove Point function, which is presented as a button on the PathScribe panel (Window > VectorScribe > PathScribe panel). This function deletes selected points without changing paths' trajectory.
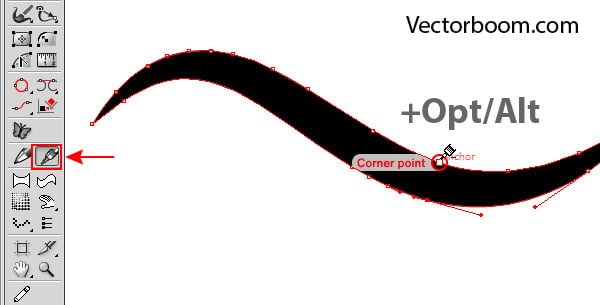
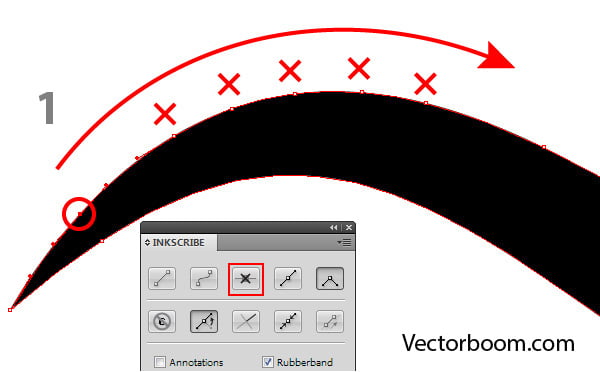
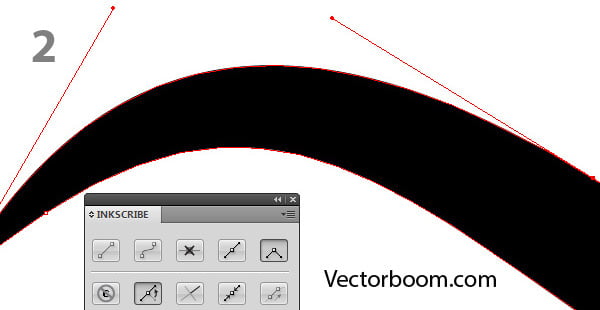
The InkScribe plug-in has a similar function.
You can delete points, using the InkScribe Tool while pressing Opt/Alt keys, simply by clicking on them.
Besides, if you select and delete a point with the button on the InkScribe panel, the next point will be selected, which gives us opportunity to remove points sequentially by clicking the Smart Remove Point button.
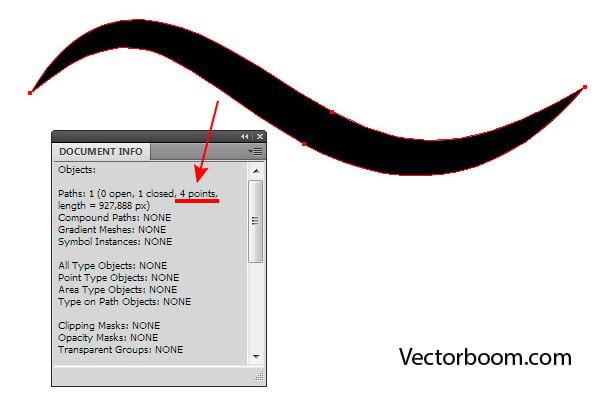
So, working with Smart Remove Point feature, I reduced the amount of points to 4.
Taking a look at the figure below, we can say that the precision of this method is perfect. This is a clear record today!
The advantages of this method include easy usage and high accuracy. We cannot apply Smart Remove Point to big amounts of selected paths (to vector texture, for example), as it will delete all selected points. This can count as a disadvantage; keep in mind, the function is more like surgeon's scalpel than excavator's bucket. In addition, these tools are not free, but till September 24th a 40% discount is offered to eight Astute Graphics plug-ins, which you can purchase only for £145 (approximately $225 / €170).
|