|
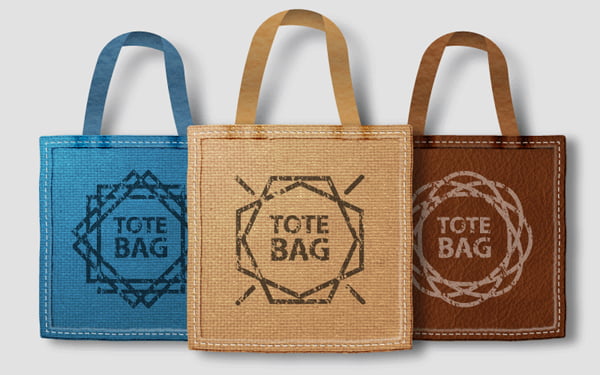
Final Image Preview
In today’s tutorial you will learn how to create a Tote Bag Mock-up on which you can easily replace color elements, textures and even object shapes. This is possible thanks to a few plug-ins: Texturino, VectorScribe, Stylism, Phantasm, DynamicSketch and some native Illustrator effects. Let’s get started!
Step 1
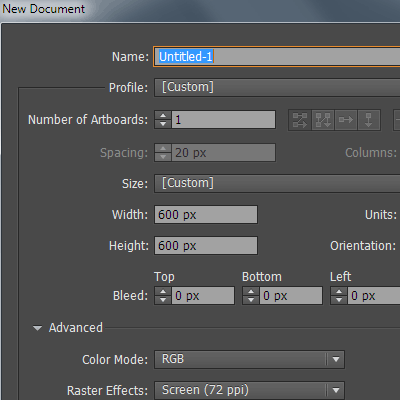
Start Adobe Illustrator and create a new document (Cmd / Ctrl + N). For this I have worked in RGB color mode. Create a rectangle filled with light-gray color, this will play the role of the background. Sizes of the rectangle correspond to the sizes of the artboard (in my case it’s 600 x 600 px).
Step 2
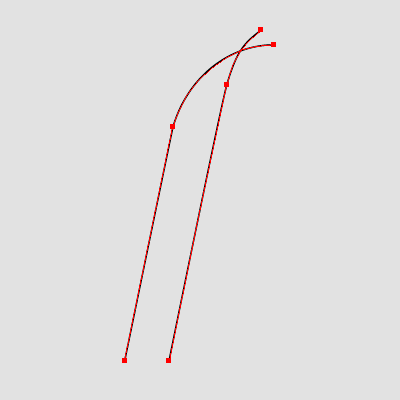
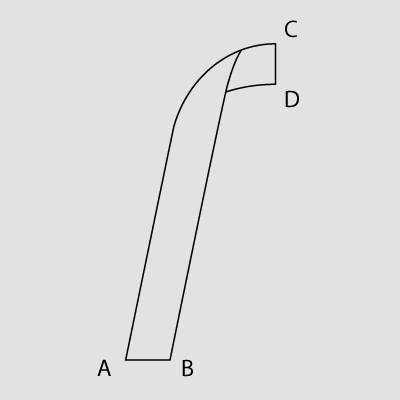
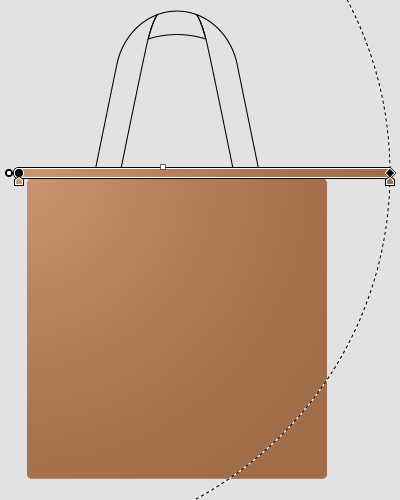
Create a handle for the tote bag with the help of the Pen Tool (P), creating two intersecting paths similar to those shown in the picture below.
There are three methods to trim the upper part of the right-hand path back to the intersection:
- If you have DynamicSketch installed, select that tool, hold down Shift and strike through the upper part of the right path segment to be trimmed.
- If you have VectorScribe v2 (or above) installed, use the Path Extend Tool (stacked beneath the PathScribe Tool in the Illustrator toolbox) and simply click-drag the protruding endpoint to snap with the intersection.
- Natively in the latest Illustrator CC, select both paths, click on the Shape Builder Tool (Shift + M), holding Opt / Alt, scrub out the section of path to be removed.
Create a short parallel curve which touches the right-hand path. If you have VectorScribe installed, you can easily ensure the path touches perfectly by using the Extend Path Tool.
Join points A, B and C, D using the Pen Tool (P).
Note that points C and D are on the same vertical.
Step 3
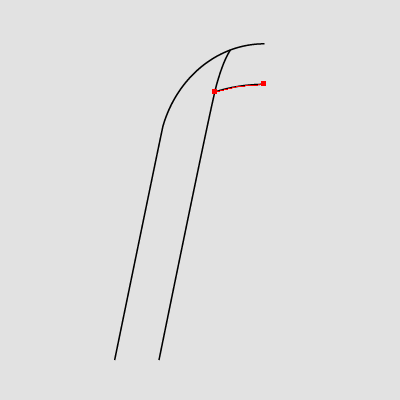
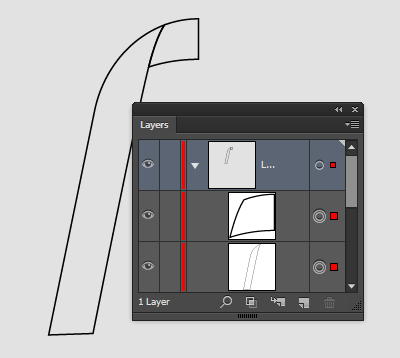
Select the resultant path, take the Shape Builder Tool (Shift + M) and click inside the shapes. As a result, we should have two closed paths, any other objects that may appear as a result of the building shapes process, must be deleted.
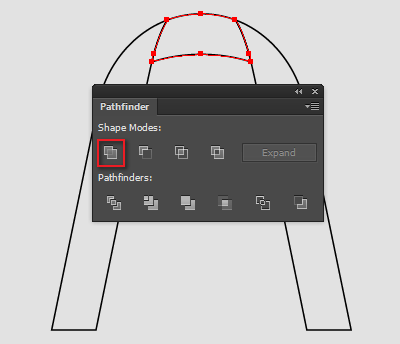
Take the Reflect Tool (O) and click at point C, holding Opt/ Alt. In the opened dialog box, select the Vertical option and press the Copy button.
Select two upper shapes, then press Unite in the Pathfinder panel.
Step 4
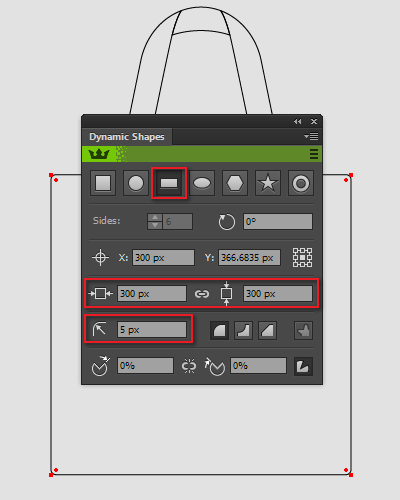
To create the cloth part of the bag, we will be using the Dynamic Shapes part of the VectorScribe plug-in, which will allow us to easily change the shape of the bag after the mock-up is ready. Take the Dynamic Shapes Tool and create a rectangle 300x300px in size with 5px for radius of the shape’s corners. While doing this tutorial it’s advisable to stick to these sizes, so that the parameters used in your future effects will coincide with those in the pictures.
Fill the dynamic shape with radial gradient, which consists of two shades of brown.
You can read full version of this article on AstuteGraphics.com....
|