|
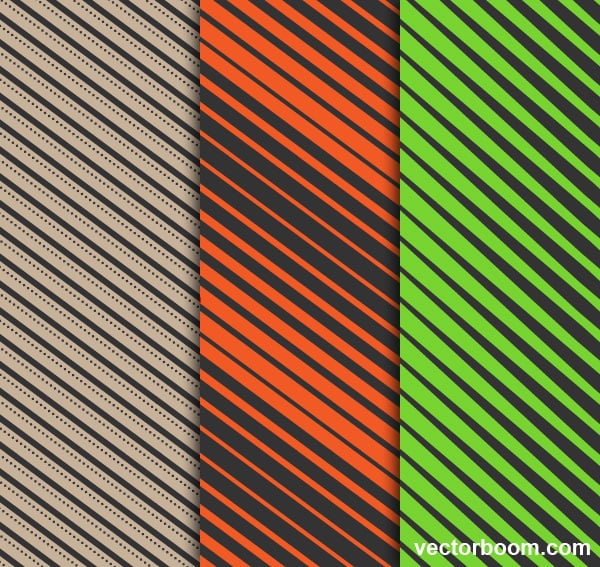
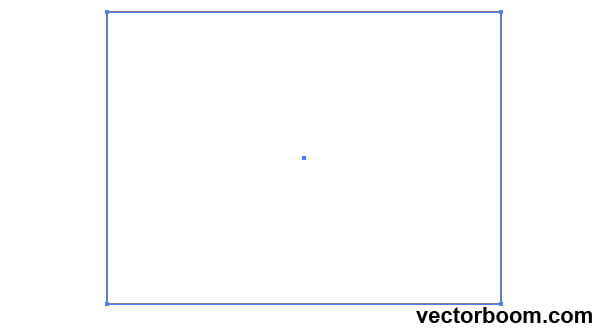
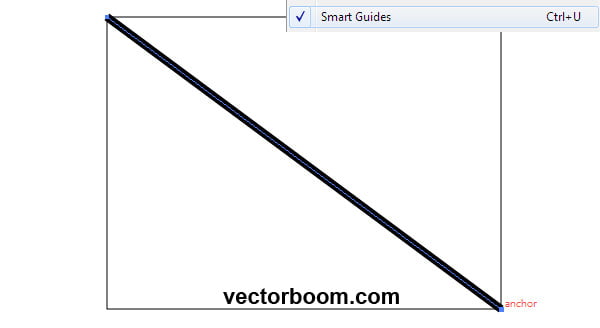
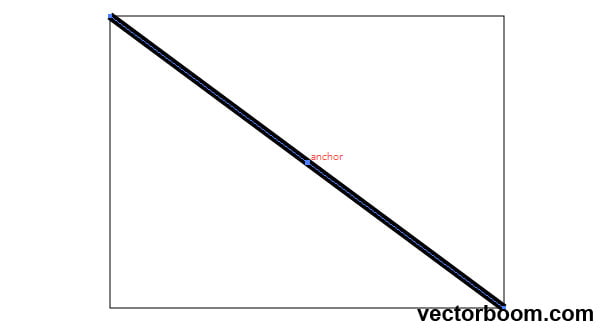
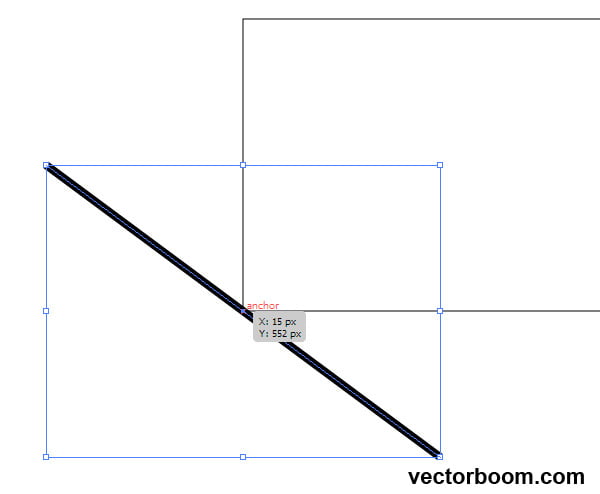
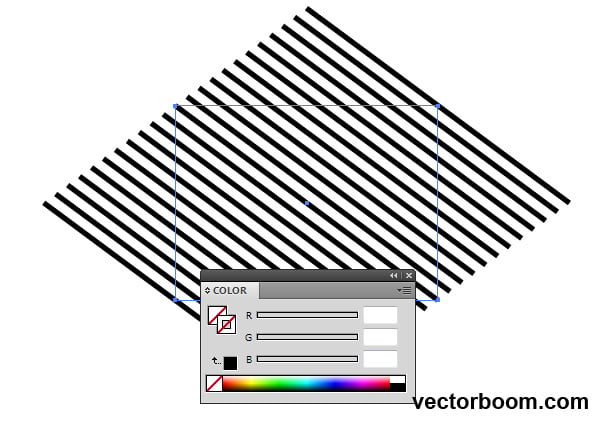
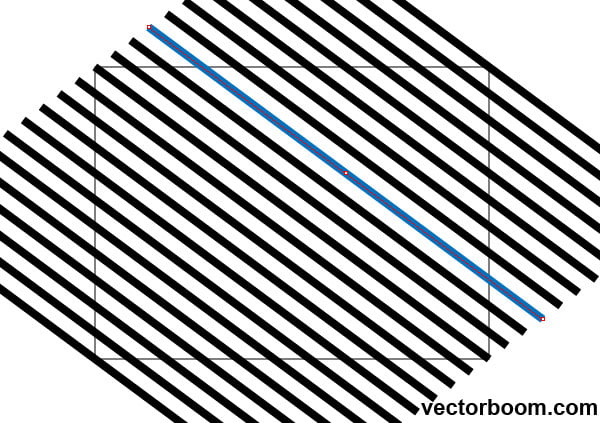
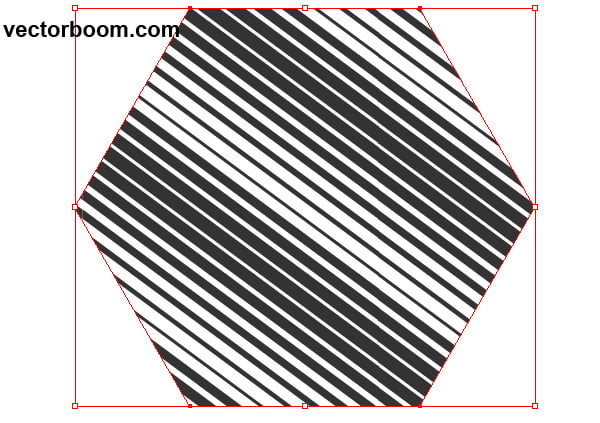
Final Image Preview In today's tutorial we will look at a very simple technique of creating and editing of a diagonal seamless pattern. It is a common technique, and it can be used in any Adobe Illustrator release. Have fun learning one of the new Adobe Illustrator tutorials! Step 1Create a rectangle using the Rectangle Tool (M). This rectangle will become a tile for our seamless pattern. Take the Pen Tool (P) or the Line Tool (/) and create a diagonal of the rectangle. Turning on the Smart Guide mode will help you to accurately combine the points of the line with the vertices of the rectangle (Cmd / Ctrl + U). Step 2Keeping the straight-line segment selected, go to Object > Path > Add Anchor Point. I only did it in order to find the center of the line.
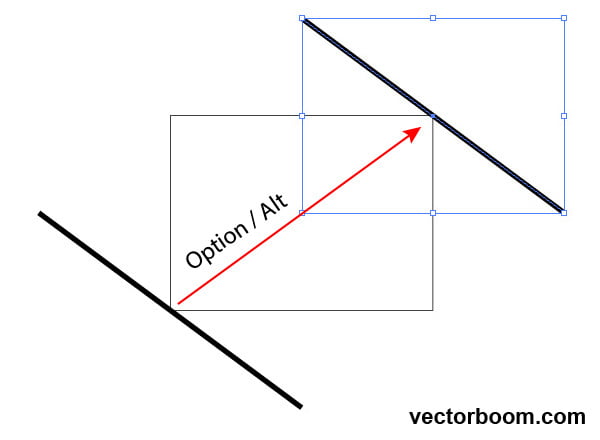
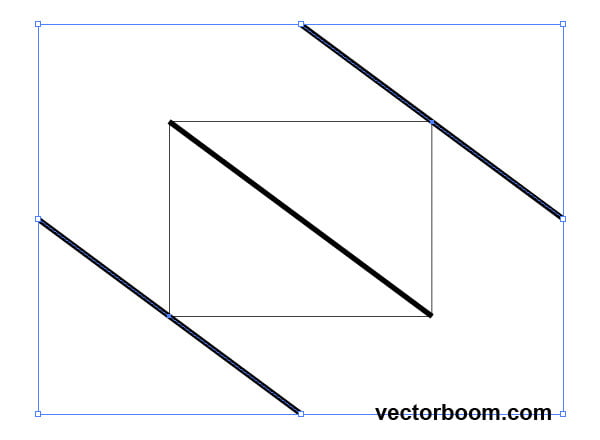
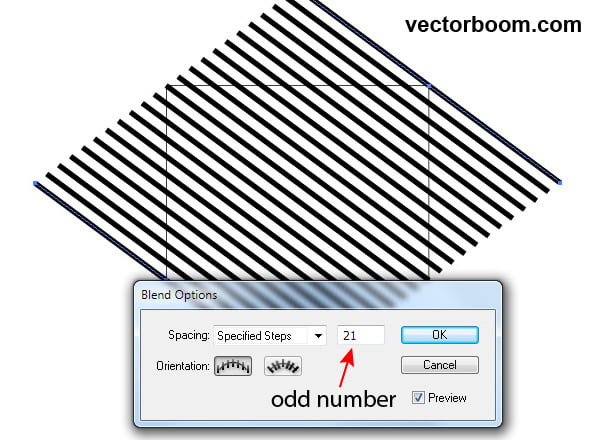
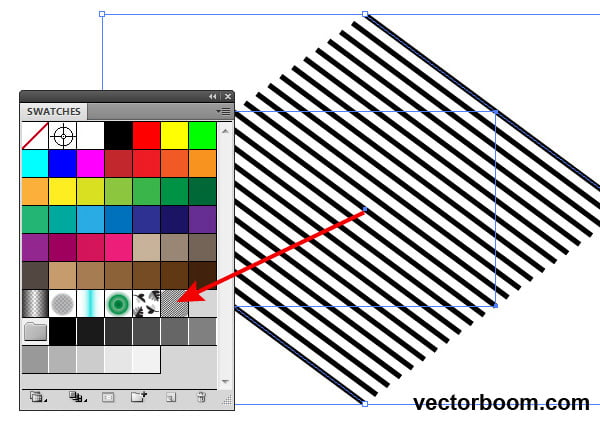
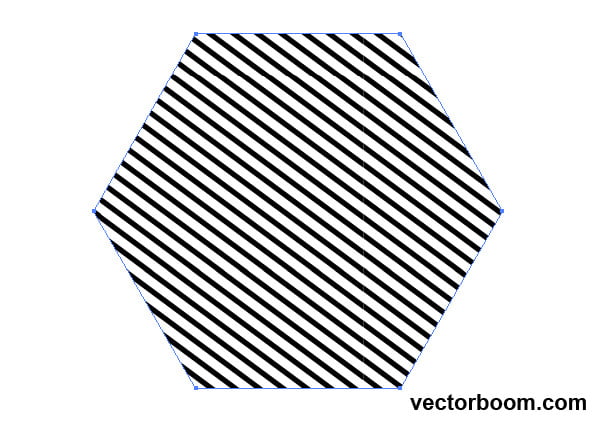
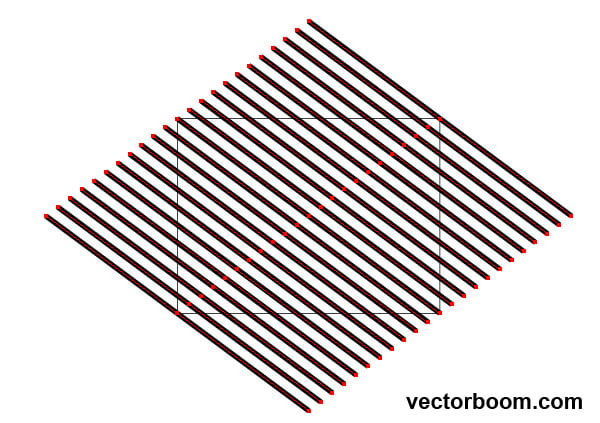
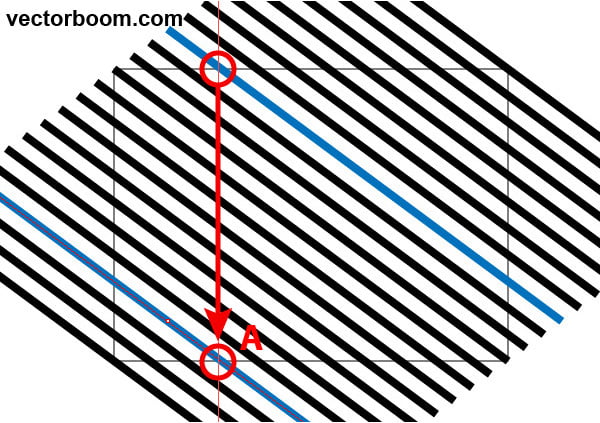
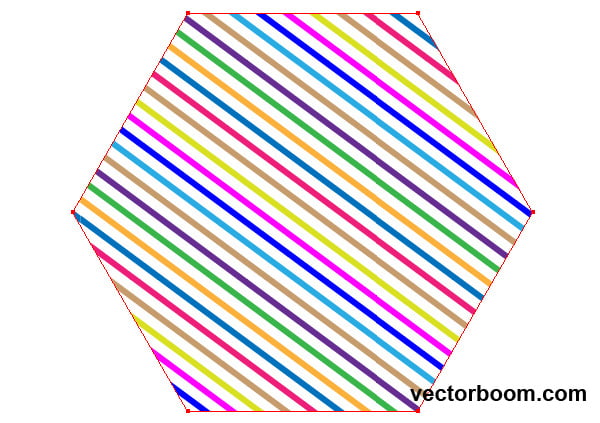
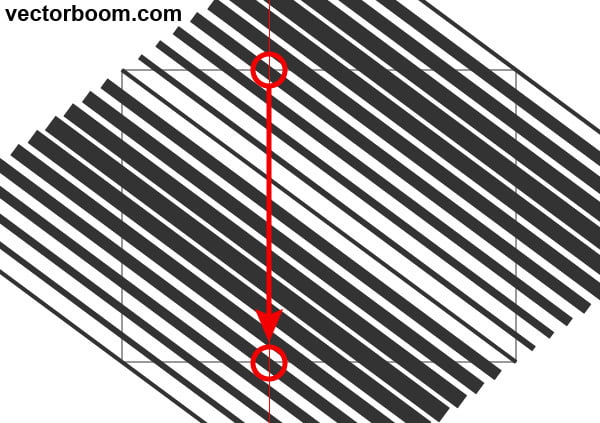
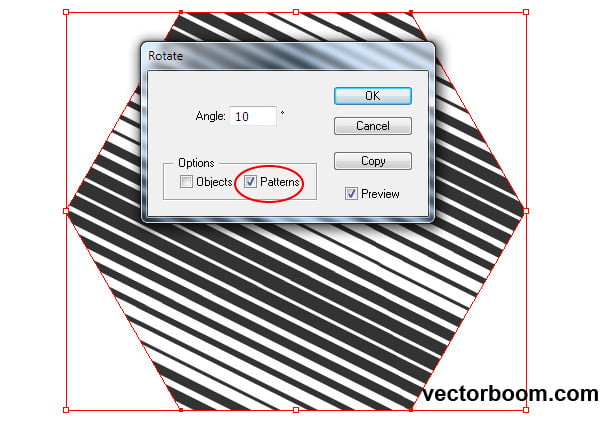
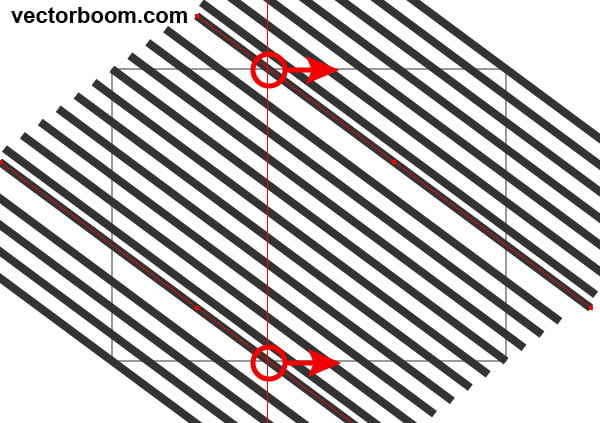
Take the Selection Tool (V), grab the center point of the line and drag it towards the intersection with one of the vertices of the rectangle. Now drag the line at the center point to the opposite vertex of the rectangle, holding down the Option / Alt key, which will lead to its duplication. Step 3Select both lines, then go to Object > Blend > Make or use Command / Ctrl + Option / Alt + B keyboard shortcut. In order to set the desired amount of lines, double click on the Blend Tool icon in the Tools panel, and set the number of the specified steps in the open dialog box. Their number must necessarily be odd. Step 4Check whether our diagonal pattern became seamless. Turn off the fill and stroke in the rectangle. Now select and drag all the created objects to the Swatches panel. Create an arbitrary shape and apply diagonal pattern to it. As you can see, everything works fine. Step 5We got a very simple pattern, but it can serve as a basis for a variety of different ones. For example, we can repaint the lines of the pattern. To do this, select the blend object, then go to Object > Blend > Expand. As a result we get a group of parallel lines. Select one of the lines with the help of the Direct Selection Tool (A) and recolor its stroke with blue color as an example. To keep the pattern seamless, we also need to recolor a line which intersects the tile at the point A. This line can easily be found if using a vertical guide. Using this technique, repaint the rest of the lines of the seamless pattern. Checking … everything works well. Step 6Hopefully, repainting lines has helped you understand the principle of editing a diagonal seamless pattern. Now let's try to change the line thickness. Step 7There is no need to redo the pattern tile if we need to change the declination angle of its lines. Select the object to which the pattern is applied, then go to Object > Transform > Rotate…, set the desired angle, disable Object option and enable Pattern option in the dialog box. Step 8
If you want to mix the lines of the pattern, then you need to move two lines at a time. The same rule employs as in coloring the lines in step 5. At that the technical part of the tutorial is over, it's time to experiment....
|