So, how to control gradient and which gradient to use.
A lot of beginners, like me at the time, had difficulties with controlling the gradient. So, for those who experience problems with it, I will comment on this more specifically.
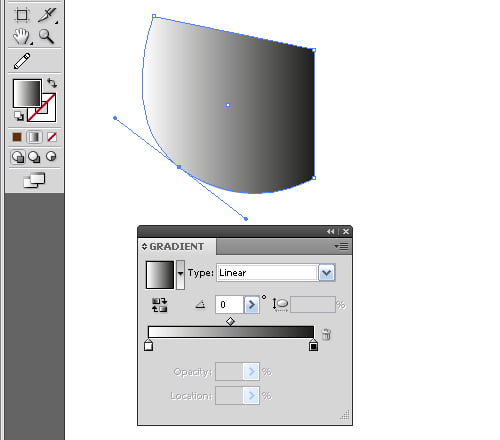
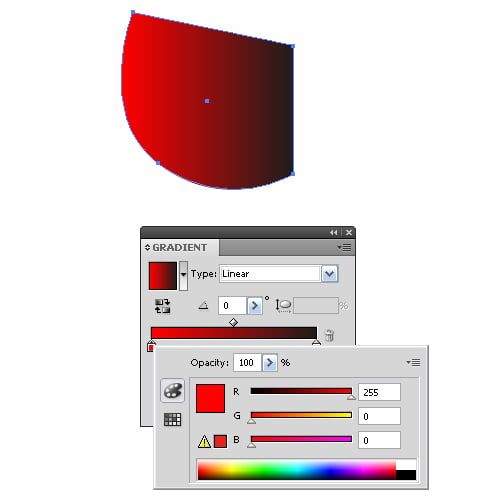
Step 1
If in my work I am using a gradient fill for the first time, I always fill the object with black and white linear gradient from the Swatches palette or by selecting this type of fill on the side toolbar.
Therefore, already on the object, I can see where is the beginning and the end of the gradient, and where it is located.
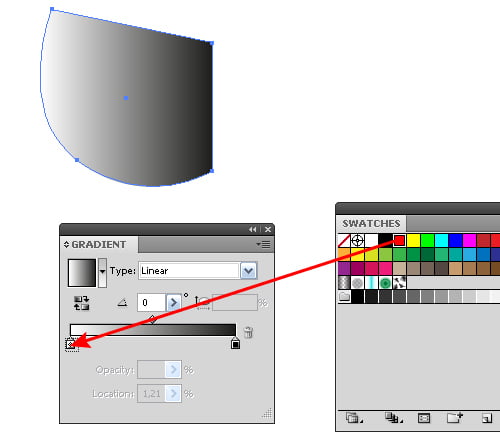
Step 2
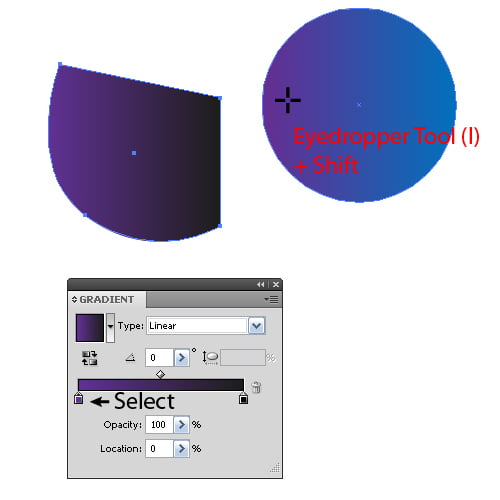
Now start controlling the colors. You can replace colors by dragging a color from the Swatches palette directly to the slide that you want to replace.
Before you start coloring your work I recommend you to identify basic colors and save them in the Swatches palette. The second way to replace the sliders color is double clicking on the slider what brings up the Color palette, where you can mix the color you need.
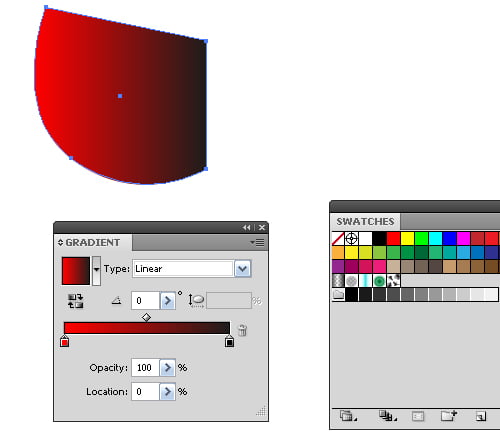
The third way: suppose you have another object, raster or vector, the color of which, you want to use in the gradient. Select the slider, take Eyedropper Tool (I) and holding down Shift get the color from another object.
This way you can get colors even from the gradient fill of another object.
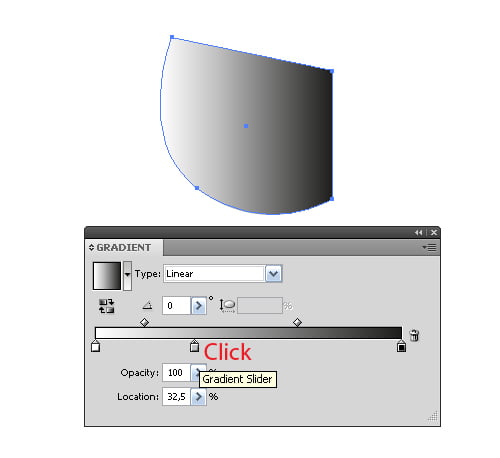
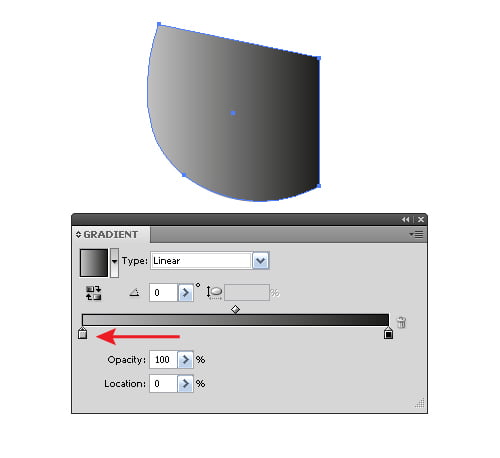
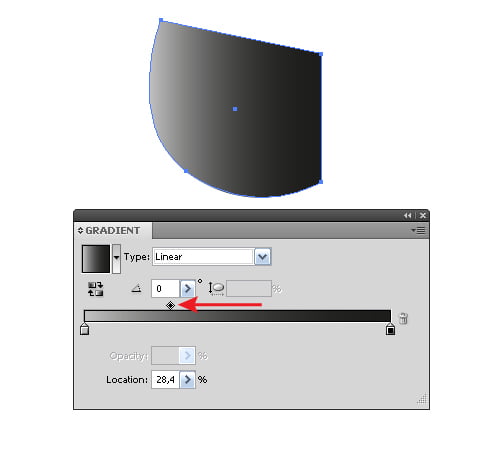
Step 3
To add a slider, just move the cursor to the gradient strip in the Gradient palette and click.
To remove a slider, drag it down.
Of course, you can move sliders and control the distribution of colors in between them.
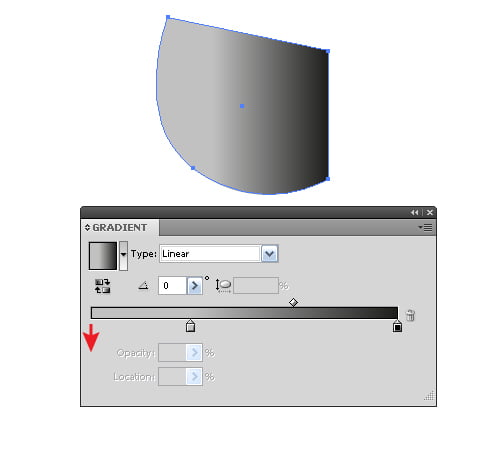
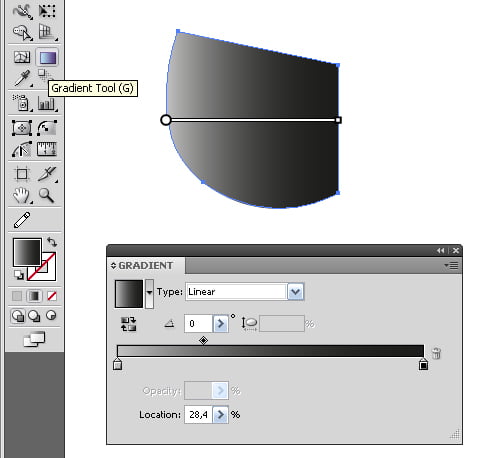
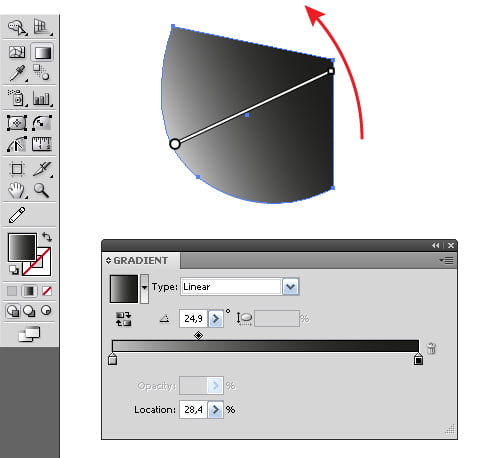
Step 4
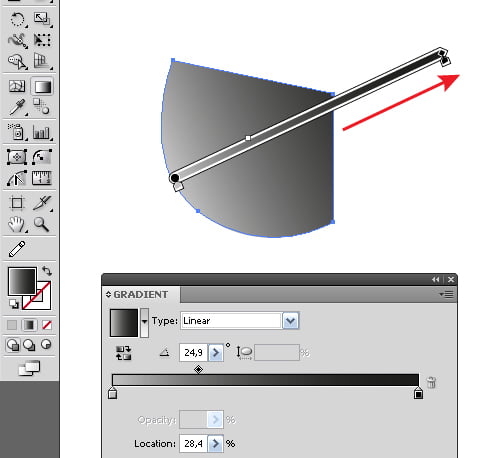
To change the angle and location of the gradient, I use the Gradient Tool (G).
Sometimes it is necessary to accurately set the angle of the gradient, and then I adjust the angle of the gradient in the Gradient palette.
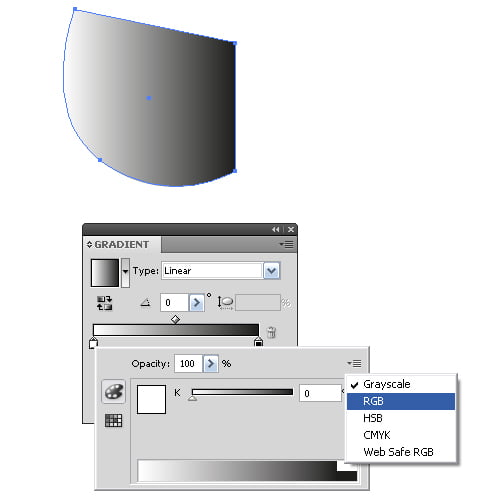
Step 5
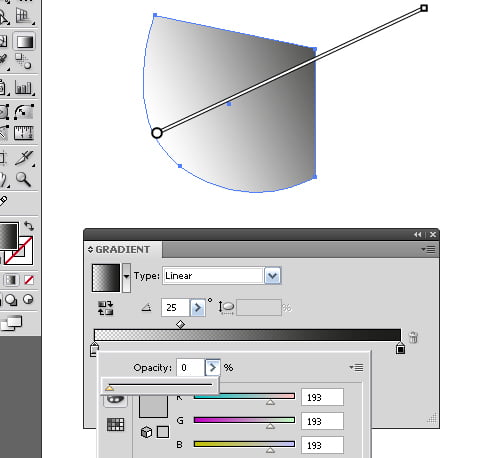
Starting with the version CS4, Adobe Illustrator allows you to set the slider opacity of the gradient.
This function largely replaces the Opacity Mask and allows getting interesting lighting solutions faster.
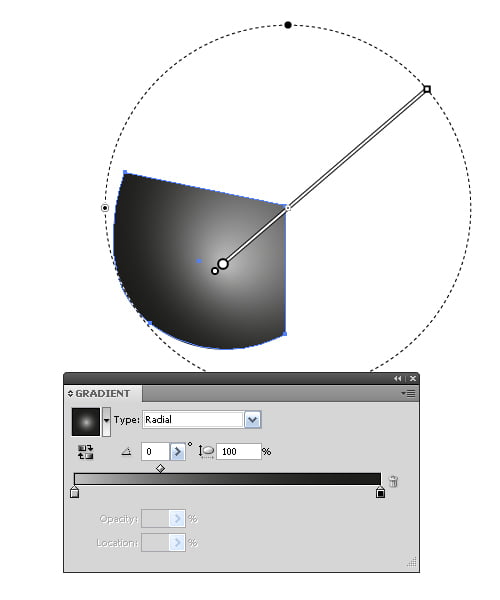
Step 6
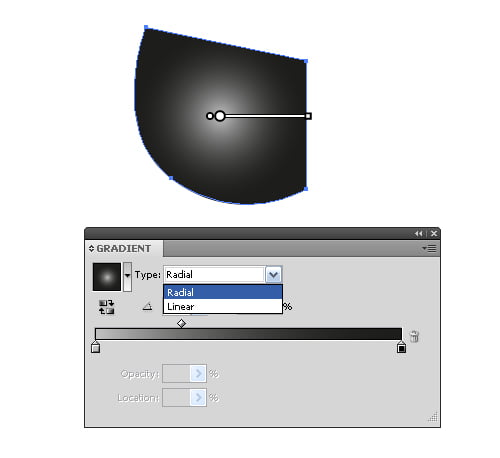
Adobe Illustrator contains two types of gradients: linear, which we discussed with you, and radial. Switching between the types is available in the Gradient palette.
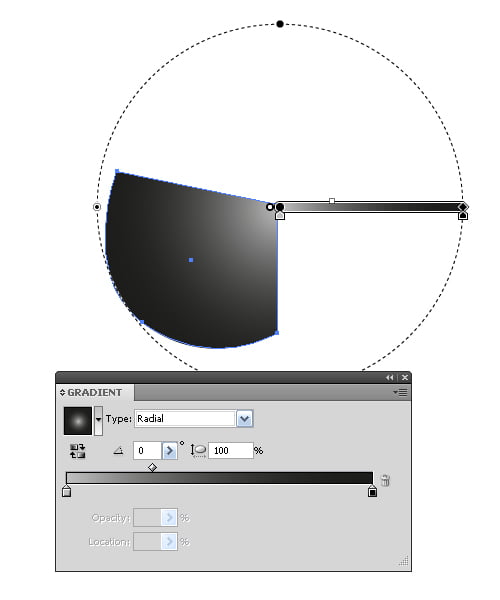
You can move the center of radial gradient and change its radius, and remember that your Gradient Tool (G) has to be chosen.
Changing the angle of the radial gradient does not make any sense. You can also move the center of the gradient in its field. To do this, click the cursor to set a new center of the gradient.
Step 7
Which gradient to use, a linear or radial? A little bit weird question. We use gradient fill to transmit the light distribution on the surface, in other words, set the location of light and shadow. How the light and shadow will be located, and what shape it will be, of course, depends on the properties of the surface itself or its elements. Ball — radial gradient, cylinder or plane — linear gradient. Your task is simply to determine the properties of this surface.
For complex surfaces is difficult to use a simple gradient, such as radial or linear, then use the Gradient Mesh.
I would advise you not to ask general questions. I doubt that someone will answer them. And if they answer, I doubt that someone will understand. Specific task - specific solution. Let theorists generalize. Just like that we can move on. Or do you want to write designer’s bible? We have not created this world, but we reflect it, therefore, have your eyes open wide, look at what surrounds us, and think about by what means of vector graphics (the practical side) we will be able to reproduce it.