|
Today our guest is a real master with Gradient Mesh - Dion Aoki. He creates high quality artowrk. "Generally, I follow these rules: Light to Dark. Large to Small. Details Last.” — says Dion. Today he is going to share some secrets of his craftsmanship with us. Learn after more about his background and techniques at the jump.
Could I ask you to tell a little bit about yourself? Do you have a basic design education?My name is Dion Aoki. I am 34 years old currently reside/work in Chicago Illinois. Originally from the West Coast (I lived most of my life in Las Vegas, NV) I've been in Chicago for 4 years. Although not currently employed as an Artist, I got my first job out of High School working for a print company specializing in Casino related art. I learned Illustrator 6 on the Job in 1997. I have very little formal training; other than a few classes in high school and a few community college classes in the late 90's, most of them were in tradition medias. I currently am a Game Designer for the Casino industry, so I haven't really given up being creative at work; just taking a different avenue.
Many designers do not feel comfortable working with Gradient Mesh. Could you give some pieces of advice on working with this Tool? Do you have any general advice?
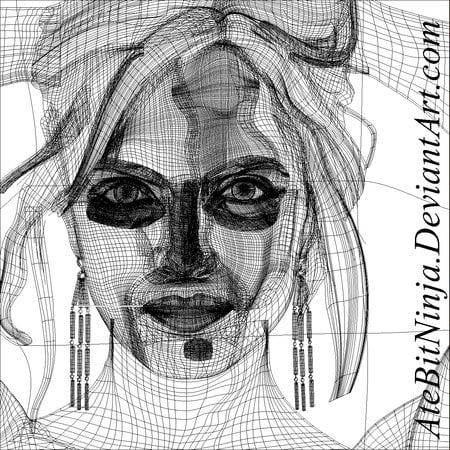
I know it sounds counter-intuitive, but I always like to keep my mesh shapes as simple as possible. I start with a basic shape (usually the rectangle shape tool), add a few mesh points in the center, then reshape the object using the added points as guides to the form and highlighting/shadowing of the part I'm rendering. The details and textures only come in after all the basic shapes have been defined.
Generally, I follow these rules: Light to Dark. Large to Small. Details Last.
This way, by the time I start adding Mesh points I rarely have to reshape the objects; they usually fall right where I want them to. I've been working on this one on and off for about 2 weeks now. Getting smooth surfaces with the Gradient Mesh tool is relatively easy, but highly textured surfaces become giant pain; keeping track of where all the wrinkles fold into each other took some serious thinking.
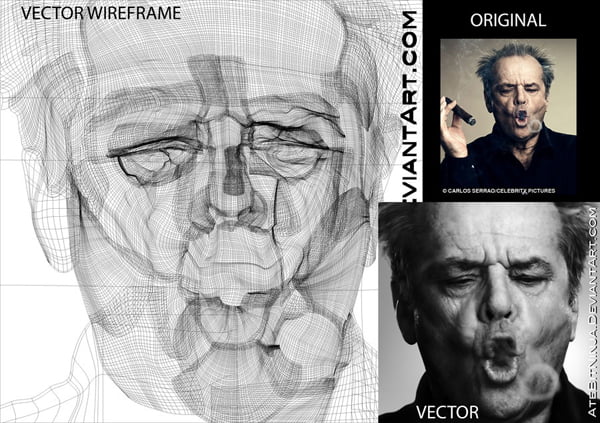
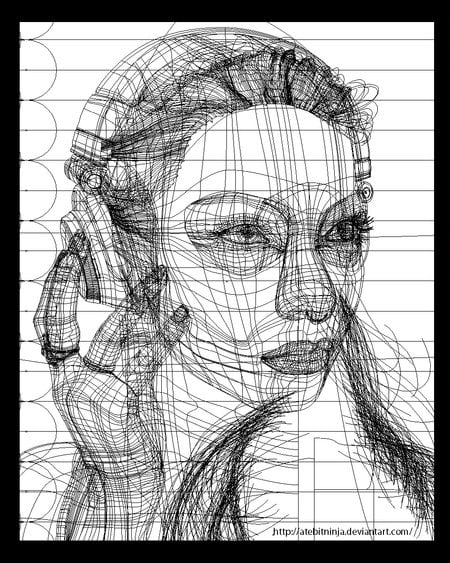
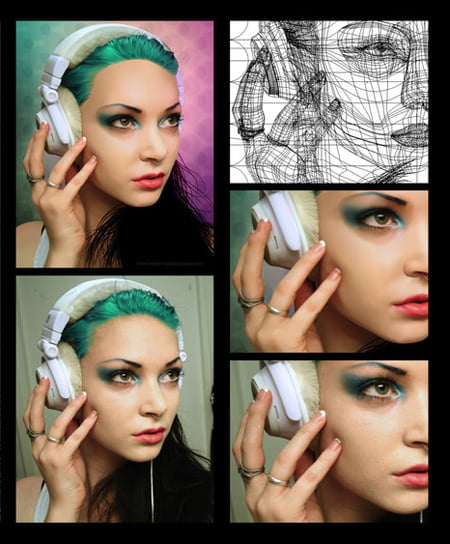
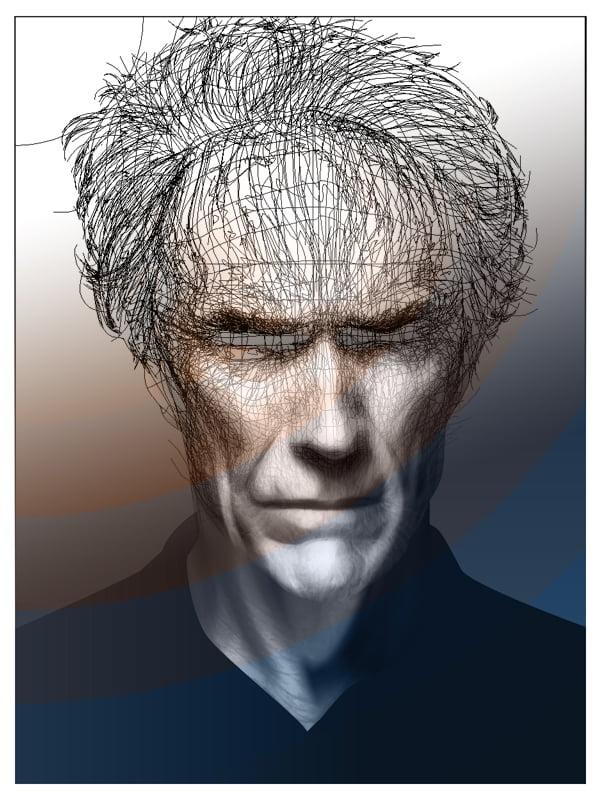
I think everyone will be interested to know how you create your model’s faces. Is it a whole Gradient Mesh or it consists of several objects? (I see that this is more than one object.) How do you connect a part of the mesh?It's usually several pieces overlapping each other. I tend to break the Face down into basic construction lines first, and those lines will usually determine the basic Mesh Shapes. Even though I'm drawing the faces is Illustrator, I still keep a pencil and paper next the monitor to help me plan out the different shapes. Before I started using CS5, I'd use the Opacity Mask tool on the different layers to blend them together. This was extremely time consuming, as a lot of times I'd have to create a whole new mesh just to use as the Mask. Now with CS5, you can change the Opacity of individual points within a mesh. This addition is amazing, as many of my overlapping meshes have several points with varying opacities. This allows me to blend two relatively simple shapes together, rather than trying to build a complex shape with a single mesh. I watched the New Johnny Depp/Tim Burton recently, Dark Shadows recently; got inspired to Vector up the main star of the film. I wanted to go 'super detailed' but at some point my computer just couldn't handle any more. I'm not entirely happy with the way some of the shapes ended up blending together, but just going between wireframe and preview mode took about 30 seconds… The entire portrait was drawn in Adobe Illustrator CS5 using the Gradient Mesh tool. Clint's getting a little long in the tooth. I thought it was a great photo so I wanted to see if I can re-draw it in AI. Pretty fun stuff. The Wireframe overlay for the Clint Eastwood Vector. Done in illustrator 12 I overlayed the Wireframe on top of the image so you can see what is applied where. There's a lot of opacity masking, so it looks pretty muddled with the wireframe.
I hope this is helpful!
Dion Aoki on the Web: atebitninja.deviantart.com
Follow us if you want to be the first to know about the latest Adobe Illustrator tutorials and articles. Vectorboom team works for you!
|